User profile
Viewing general user information
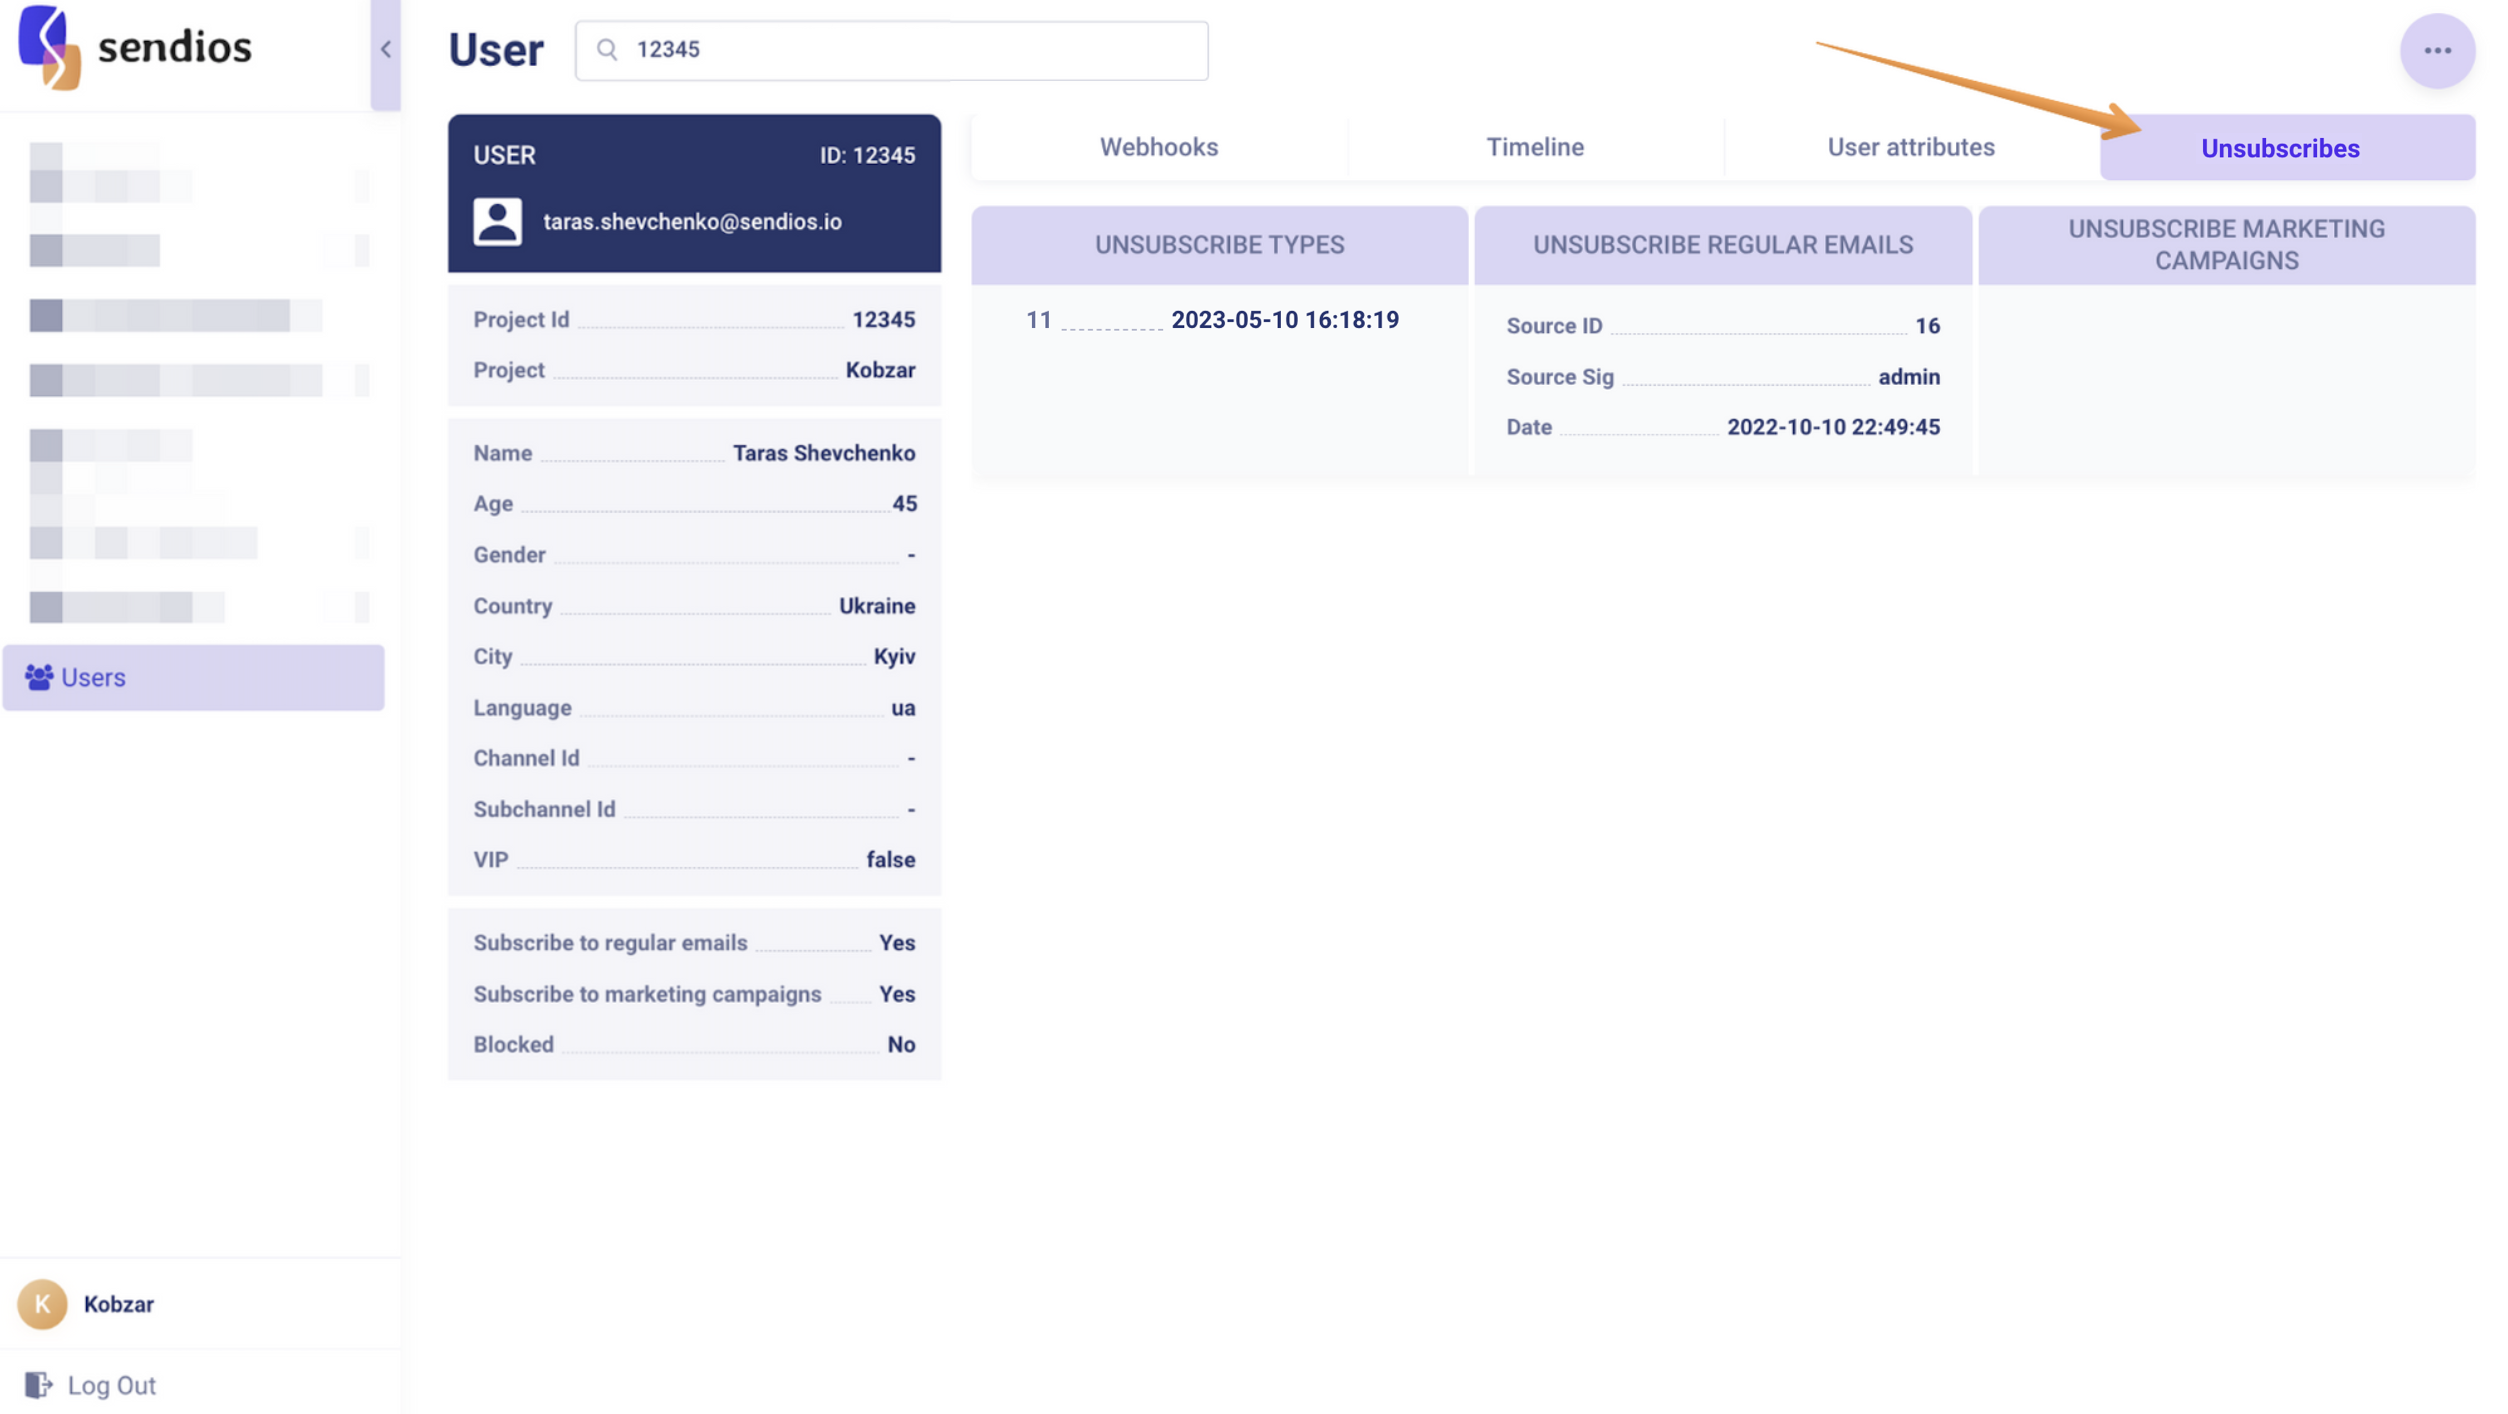
The user profile page provides an overview of general information about the user, their Project, and data related to their email subscriptions:
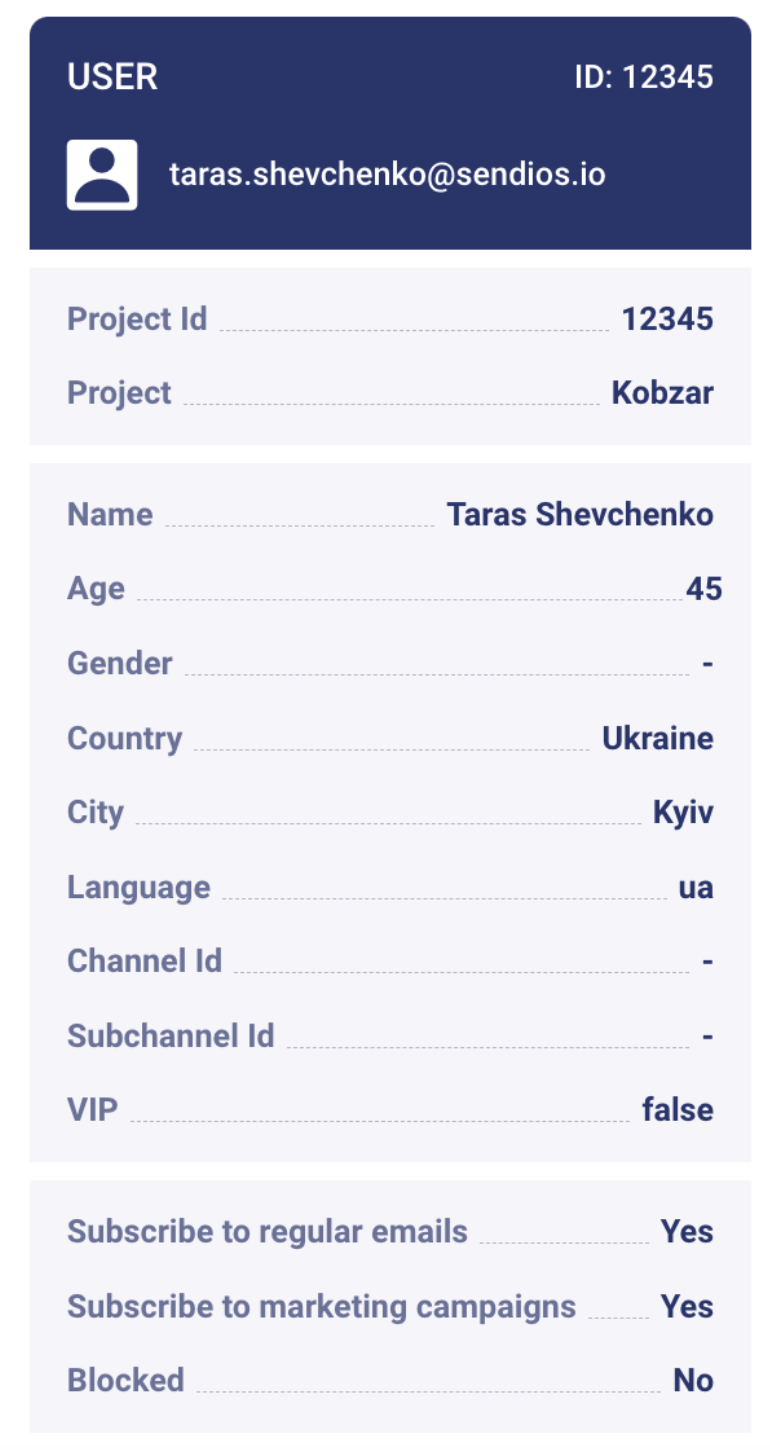
The standard parameters include:
| Parameter | Description |
|---|---|
| Namе | User name; |
| Age | User age; |
| Gender | User gender; |
| Country | Country name; |
| City | City name; |
| Language | Two-letter language code (e.g., "uk"); |
| Channel Id | Traffic channel from which the user reached the product (e.g., paid search); |
| Subchannel Id | Traffic subchannel from which the user reached the product (e.g., Facebook); |
| VIP | User status in the context: payer – "1" / non-payer – "0". |
By default, the VIP parameter has the "0" value (non-payer). Other parameters that have not been provided will remain blank.
Additional parameters, that do not belong to the listed above, can be found in the User attributes section.
The last block of general user data provides information about the status of subscriptions to different types of emails:
- Subscribe to regular emails – subscription to trigger emails;
- Subscribe to marketing campaigns – subscription to marketing campaign emails;
- Blocked – indicates whether the user is blocked.
More detailed information about the user subscription to emails can be found in the Unsubscribes section.
There are also four tabs on the page:
- Webhooks – displays delivery statuses of emails and user actions;
- Timeline – displays the dates of the main events related to the user;
- User attributes – displays user attributes;
- Unsubscribes – displays the date and reason for unsubscribe if the user has unsubscribed from emails.
Let's go over each one in detail.
Webhooks
This section provides information on the delivery status of emails and user actions in response to them.
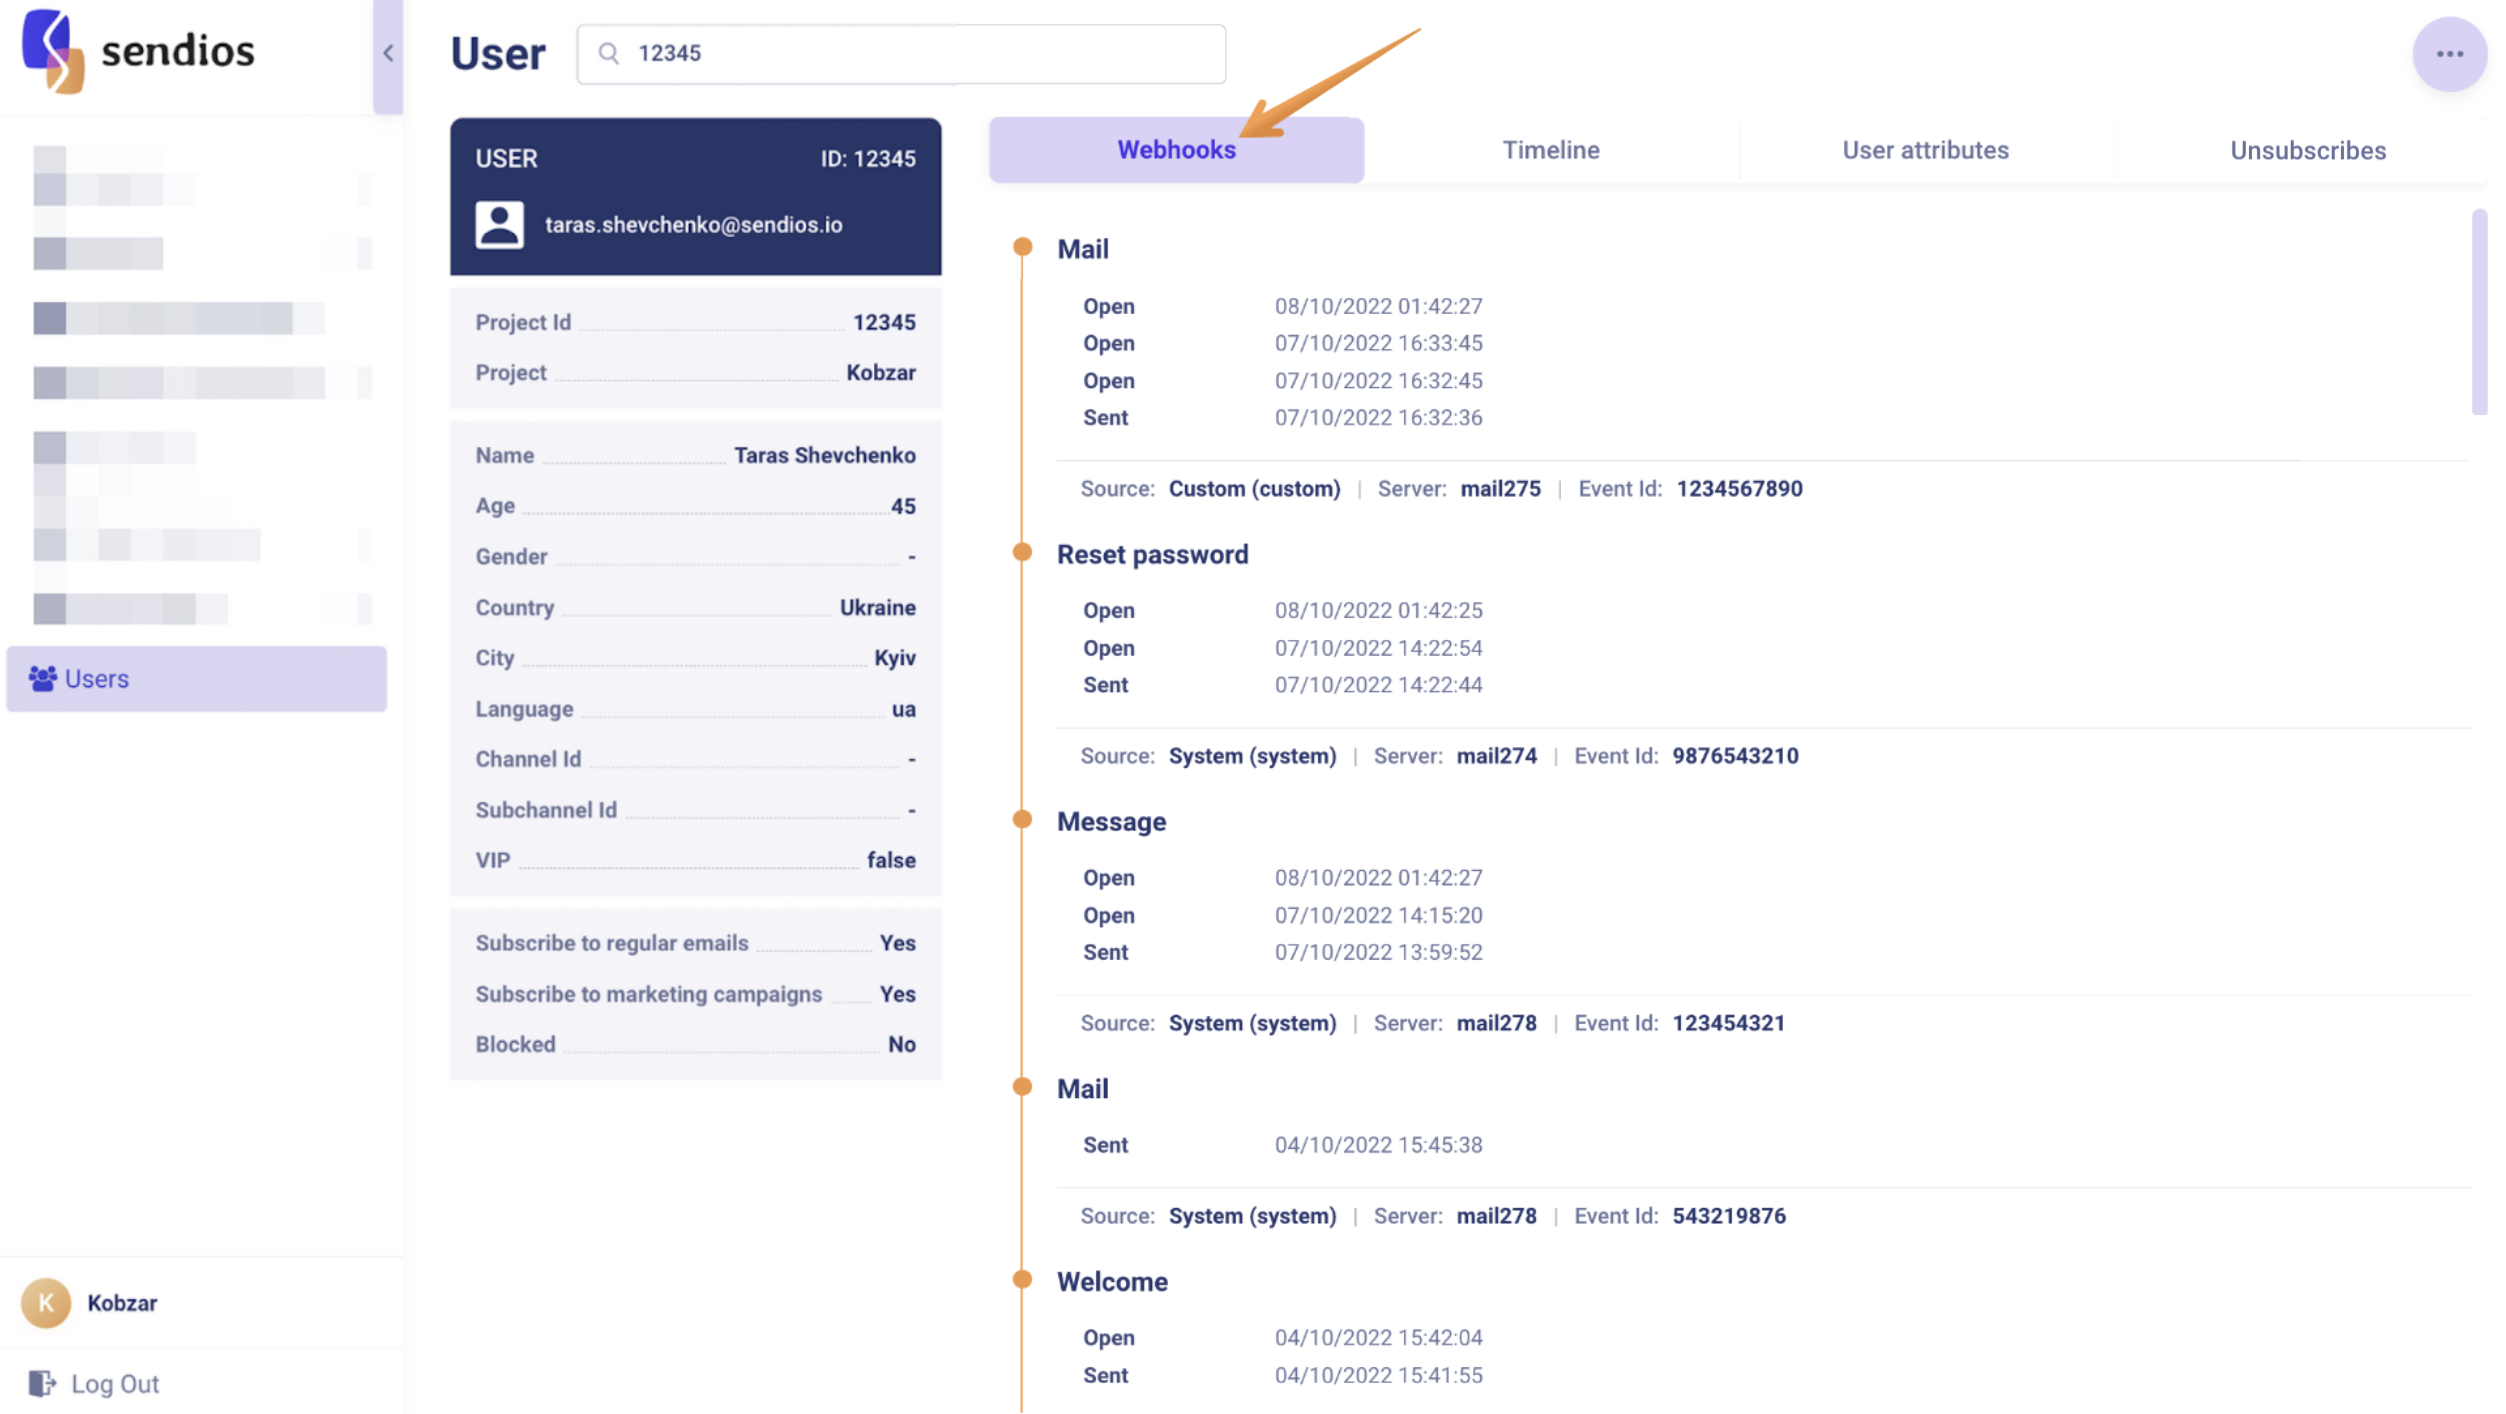
The name of the email is indicated at the top: "Welcome," "Reset password," etc.
Each email has its own Source indicating the sending type:
- "system" – system emails;
- "custom" – marketing campaign emails;
- "client" – sendings initiated by the client.
Other values in the Source field mean that the system's logic itself initiated the sendings. This logic is customized for each Project and differs depending on the product needs.
Please note that data is stored for 30 days.
You can also set up receiving webhooks when creating or editing a Project by entering the required URL address in the Webhooks field.
For more details on the setup process and examples, refer to our articles Webhooks and Email webhooks.
Timeline
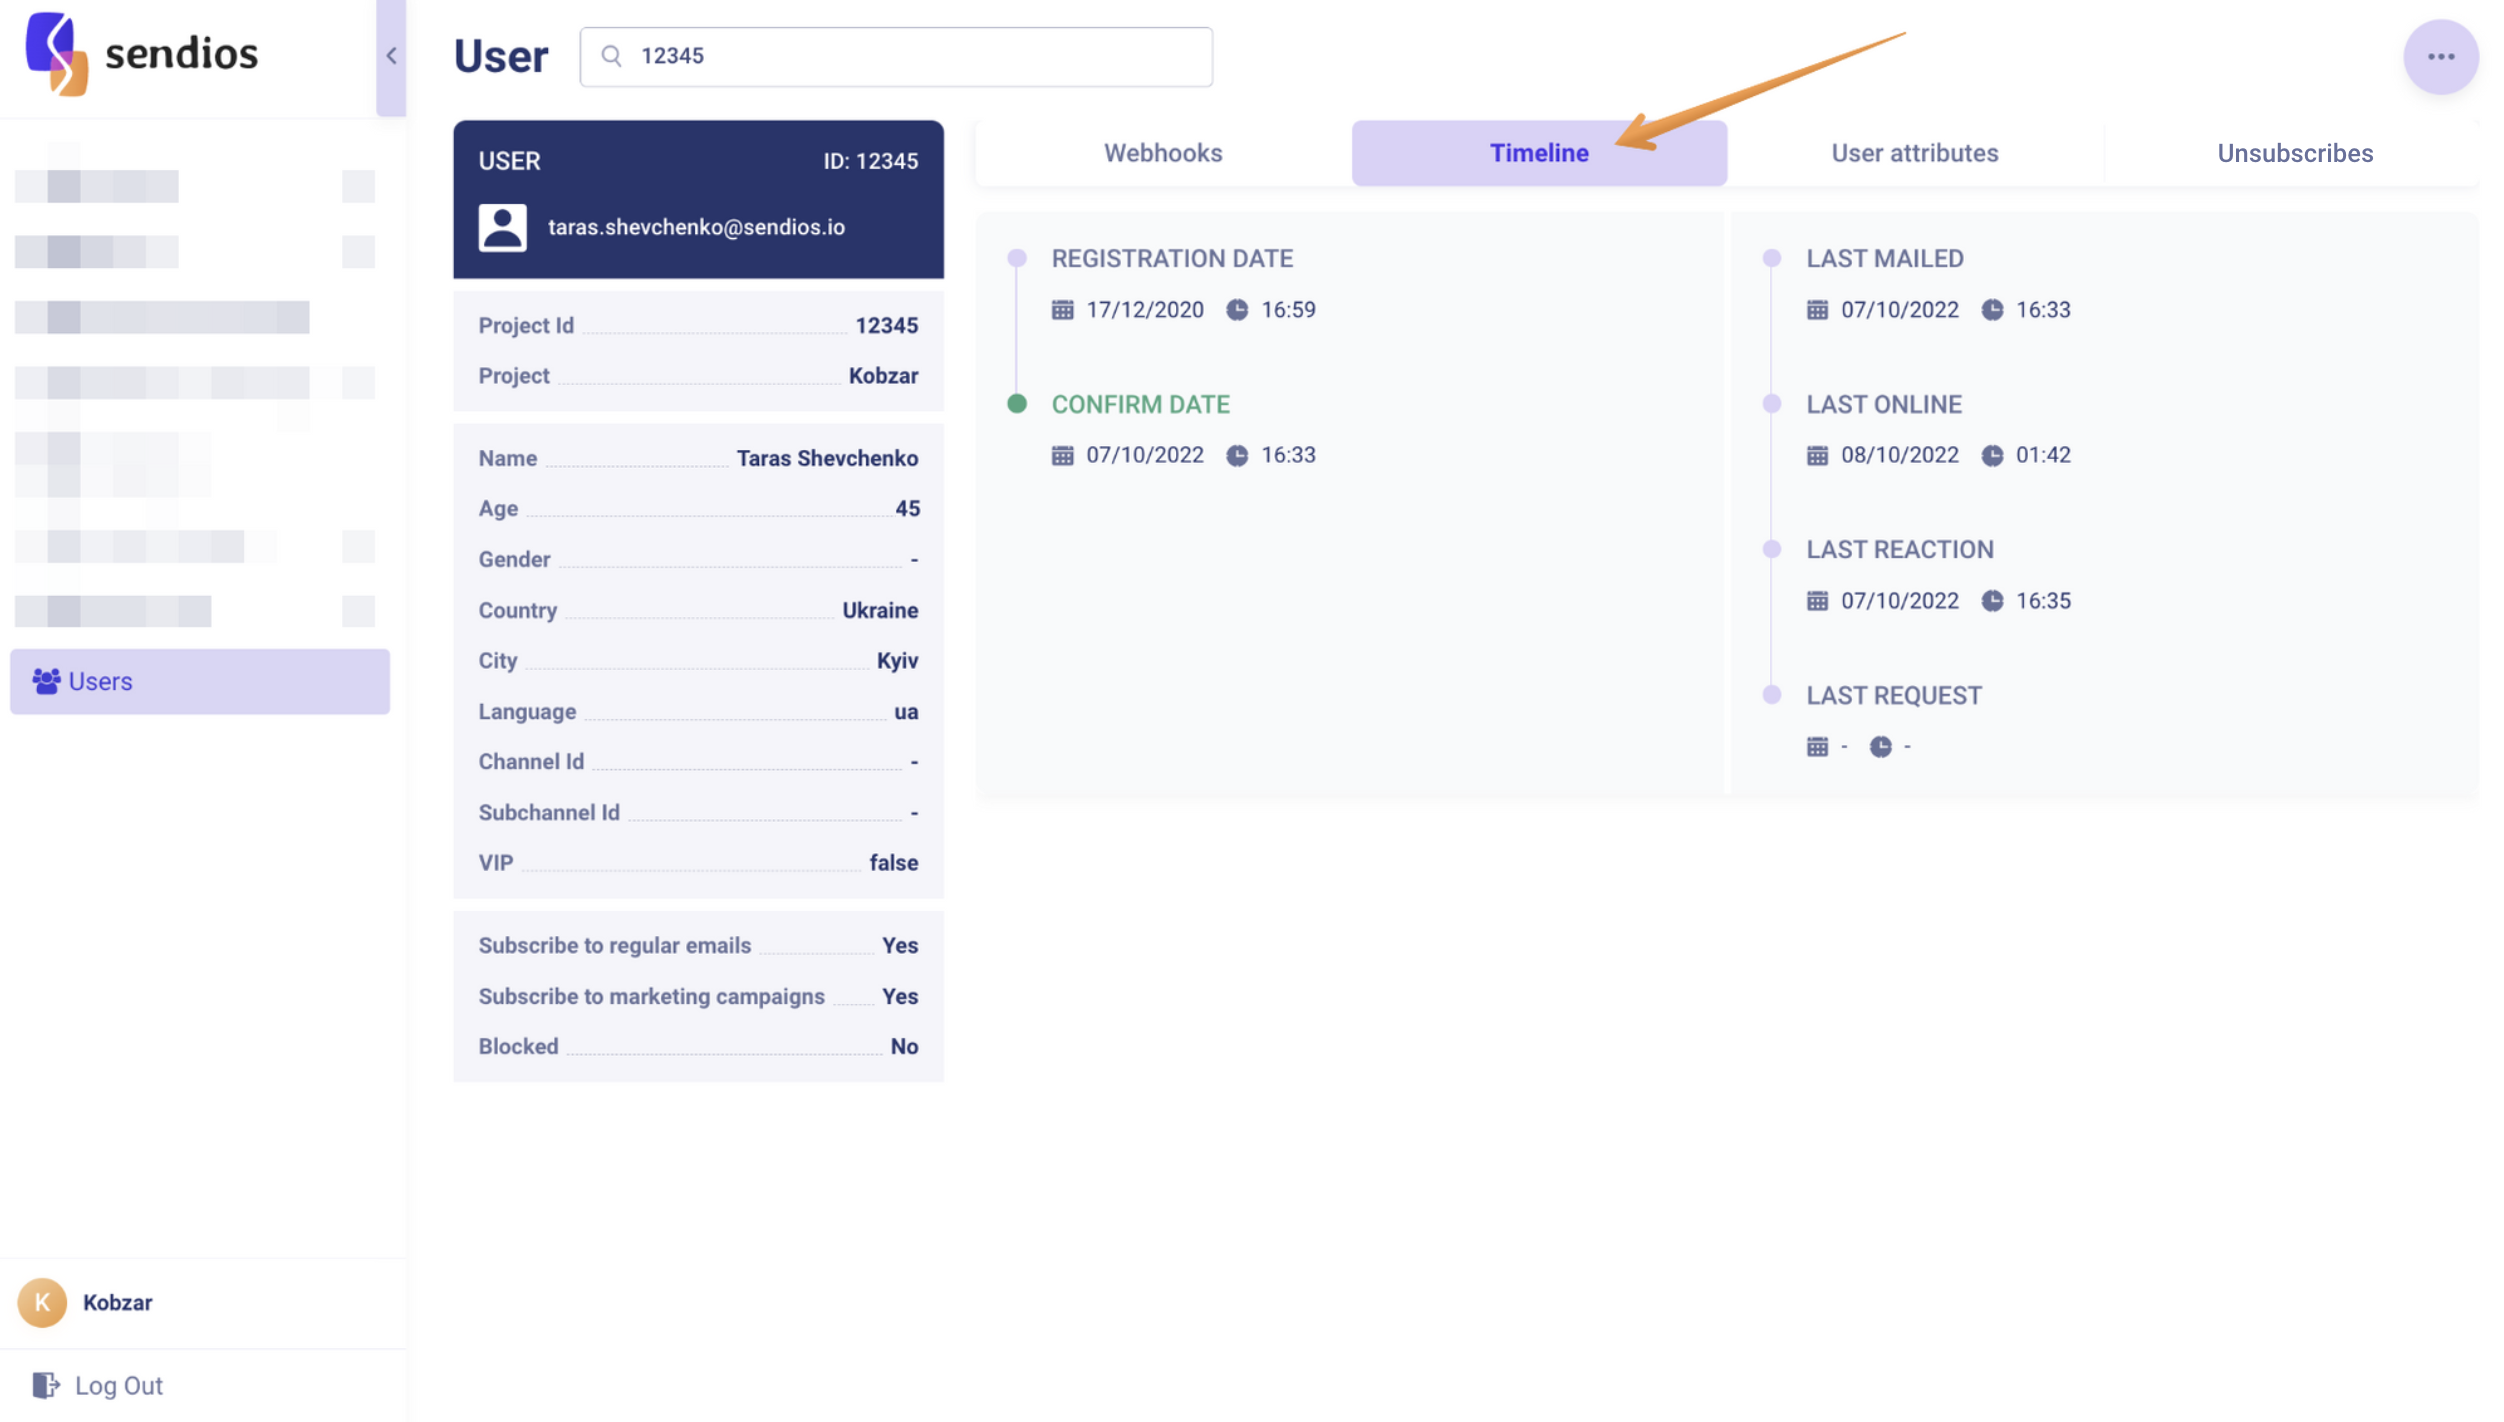
The Timeline tab displays the dates of important events:
- Registration date – the date of registration;
- Confirm date – the date of the first click;
- Last mailed – the date when the last email was sent;
- Last online – the date of the last email opening within the past 2 hours;
- Last reaction – the date of the user's last reaction to an email (last click);
- Last request – the date of the last request (via the Recommendation system).
User attributes
The User attributes tab contains user-specific attributes. These attributes are saved when sending trigger emails or system emails through the API endpoint (e.g., Send system / trigger email) or when provided separately using API endpoints Add and update user data by Project ID and email / Add and update user data by user_id.
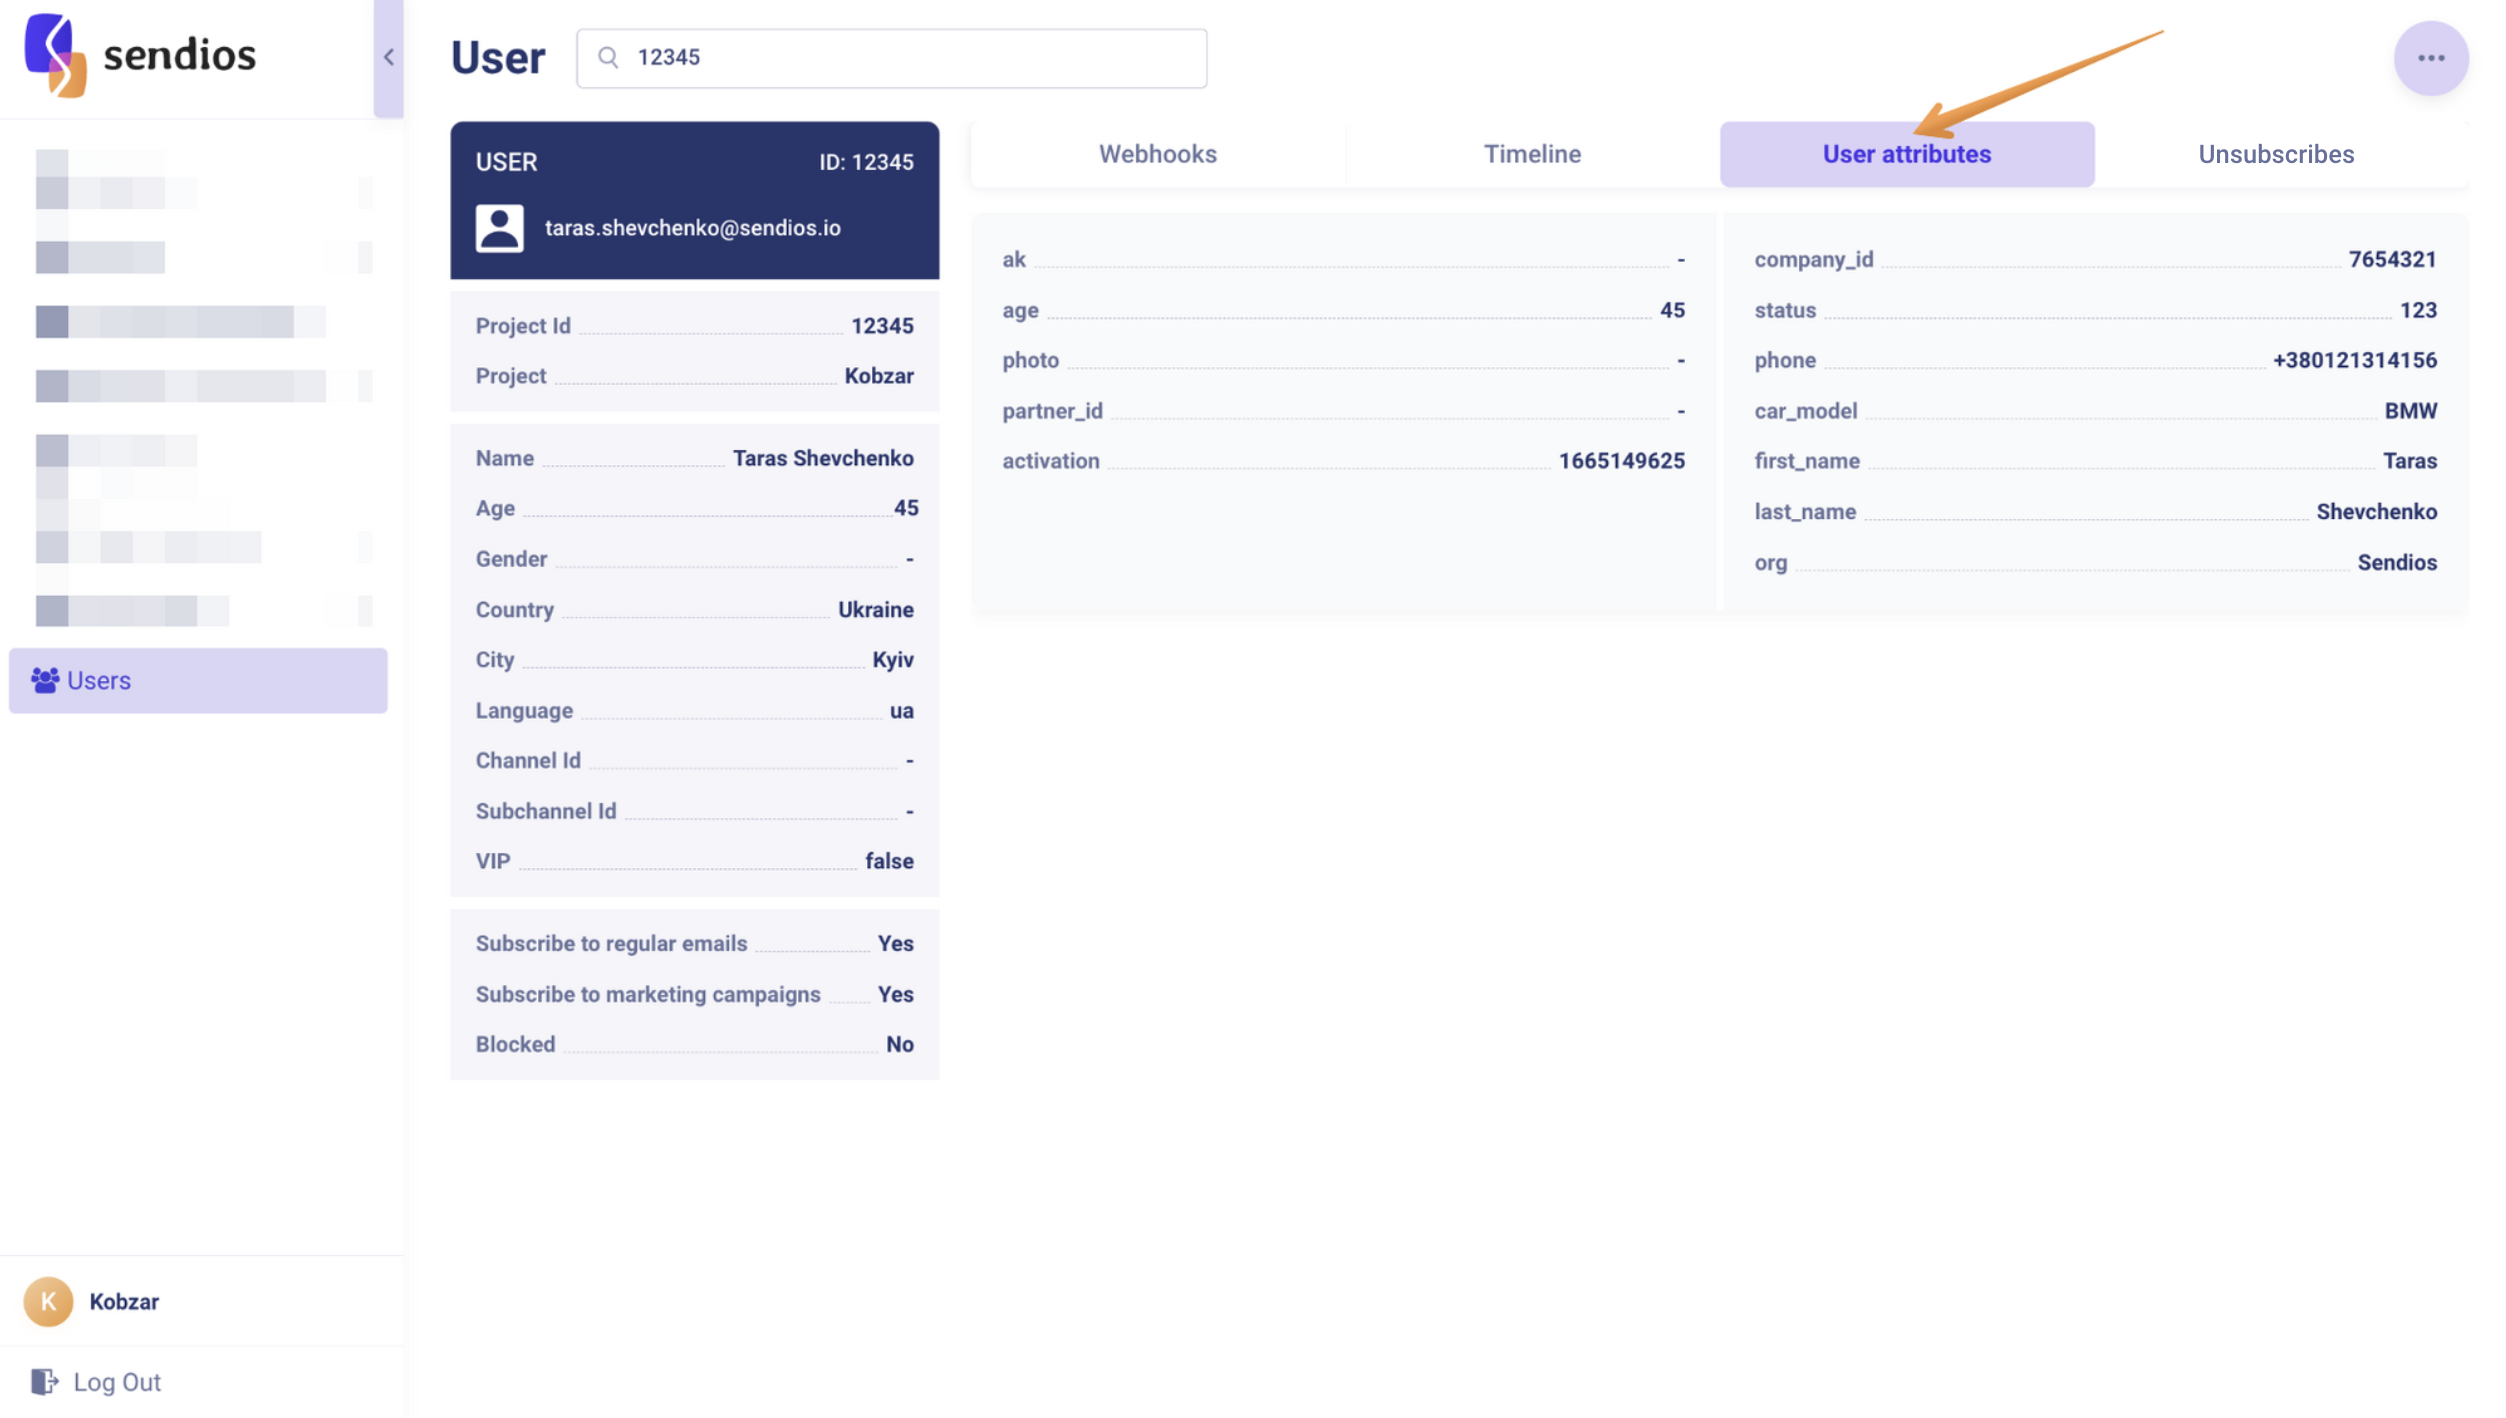
The table below shows only general parameters, but they may vary depending on the specifics of your product. Therefore, this list is not exhaustive:
| Parameter | Description |
|---|---|
| ak | Auth key – key for user authorization / autologin on the product; |
| аge | User age; |
| photo | Link to the user's photo; |
| list_id | User group identifier; |
| platform_id | 0 - 'Unknown,' 1 - 'Desktop,' 3 - 'Mobile,' 4 - 'Android App,' 5 - 'iOS App'. |
Unsubscribes
If the user unsubscribes from emails, the Unsubscribes tab displays the date and reason for unsubscribing.
- Unsubscribe types – unsubscribe from certain types of trigger emails;
- Unsubscribe regular emails – full unsubscribe from trigger emails;
- Unsubscribe marketing campaigns – unsubscribe from marketing campaign emails.
You can find more information in the article "Unsubscribing from emails".
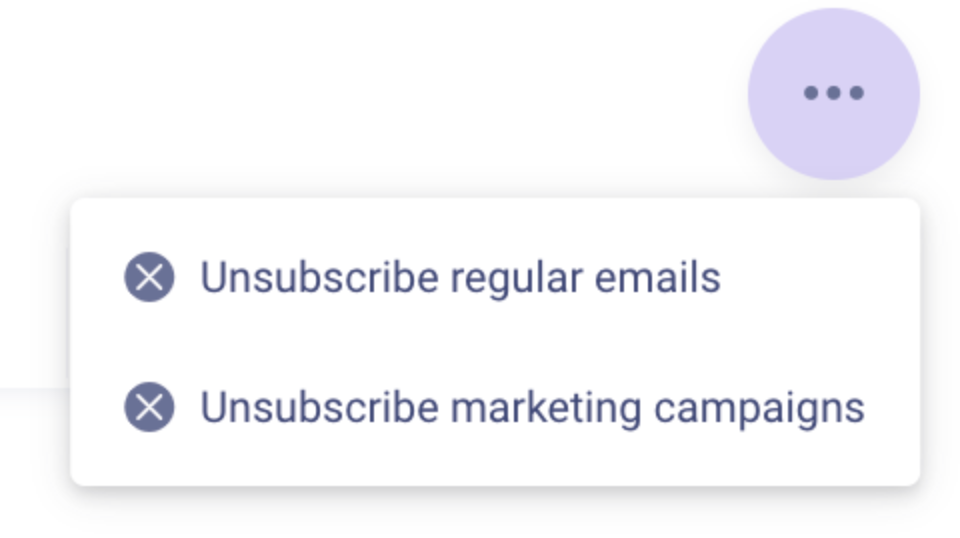
There is also the three dots button in the upper right corner of the page. By clicking on it, you can:
If the user is subscribed →
- Unsubscribe regular emails – unsubscribe them from trigger emails;
- Unsubscribe marketing campaigns – unsubscribe them from marketing campaign emails.
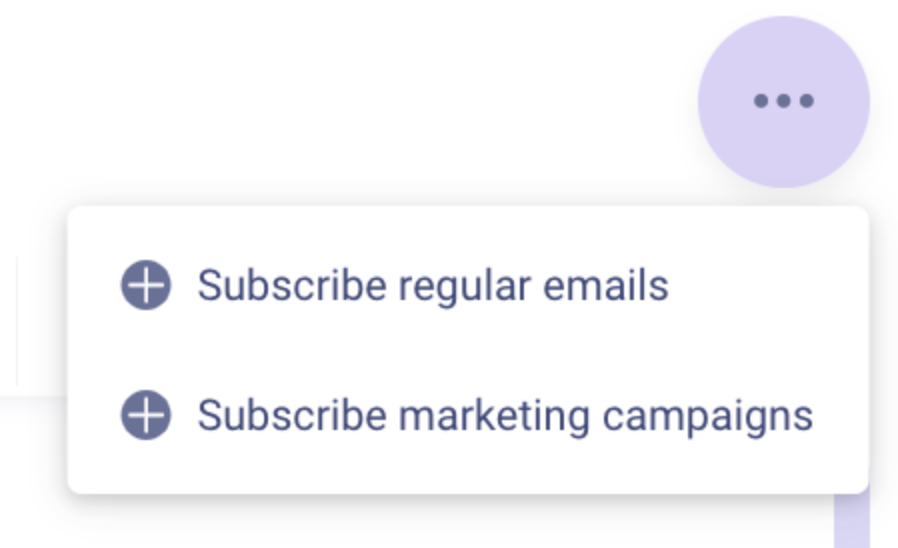
If the user is unsubscribed, then →
- Subscribe regular emails– subscribe them to trigger emails;
- Subscribe marketing campaigns – subscribe them to marketing campaign emails.
Updated about 2 years ago