Using variables in templates
In this article, we explore the usage of various variables in templates and provide detailed guidance on their syntax and functionality.
To incorporate a variable into templates, it's essential to use the correct syntax depending on the variable type.
User default / user fields
Both user default and user field variables share the same syntax: {{ ObjectName.VariableName }}. For example, you can use {{ user.name }} to reference a user's name. When sending a message, this variable will be replaced with the respective value for each recipient.
Dynamic variables
For dynamic variables, use the syntax {{ VariableName }}. For instance, you can use {{ unsubscribe_ak }}.
Values for dynamic variables can be provided in arrays, such as the "list" array. In this case, reference the variable as{{ ArrayName.VariableName }}, for example, {{ list.VariableName }}.
Using loops to substitute variables in an array of users
To display all the variables and their values contained in a JSON array within your templates, you can use the "for loop" from the Twig templater. This operator allows you to execute code multiple times.
Learn more about the "for loop" on the corresponding Twig page.
For example, to output the data of all users from the array "list", the loop and variable insertion code would look like this:
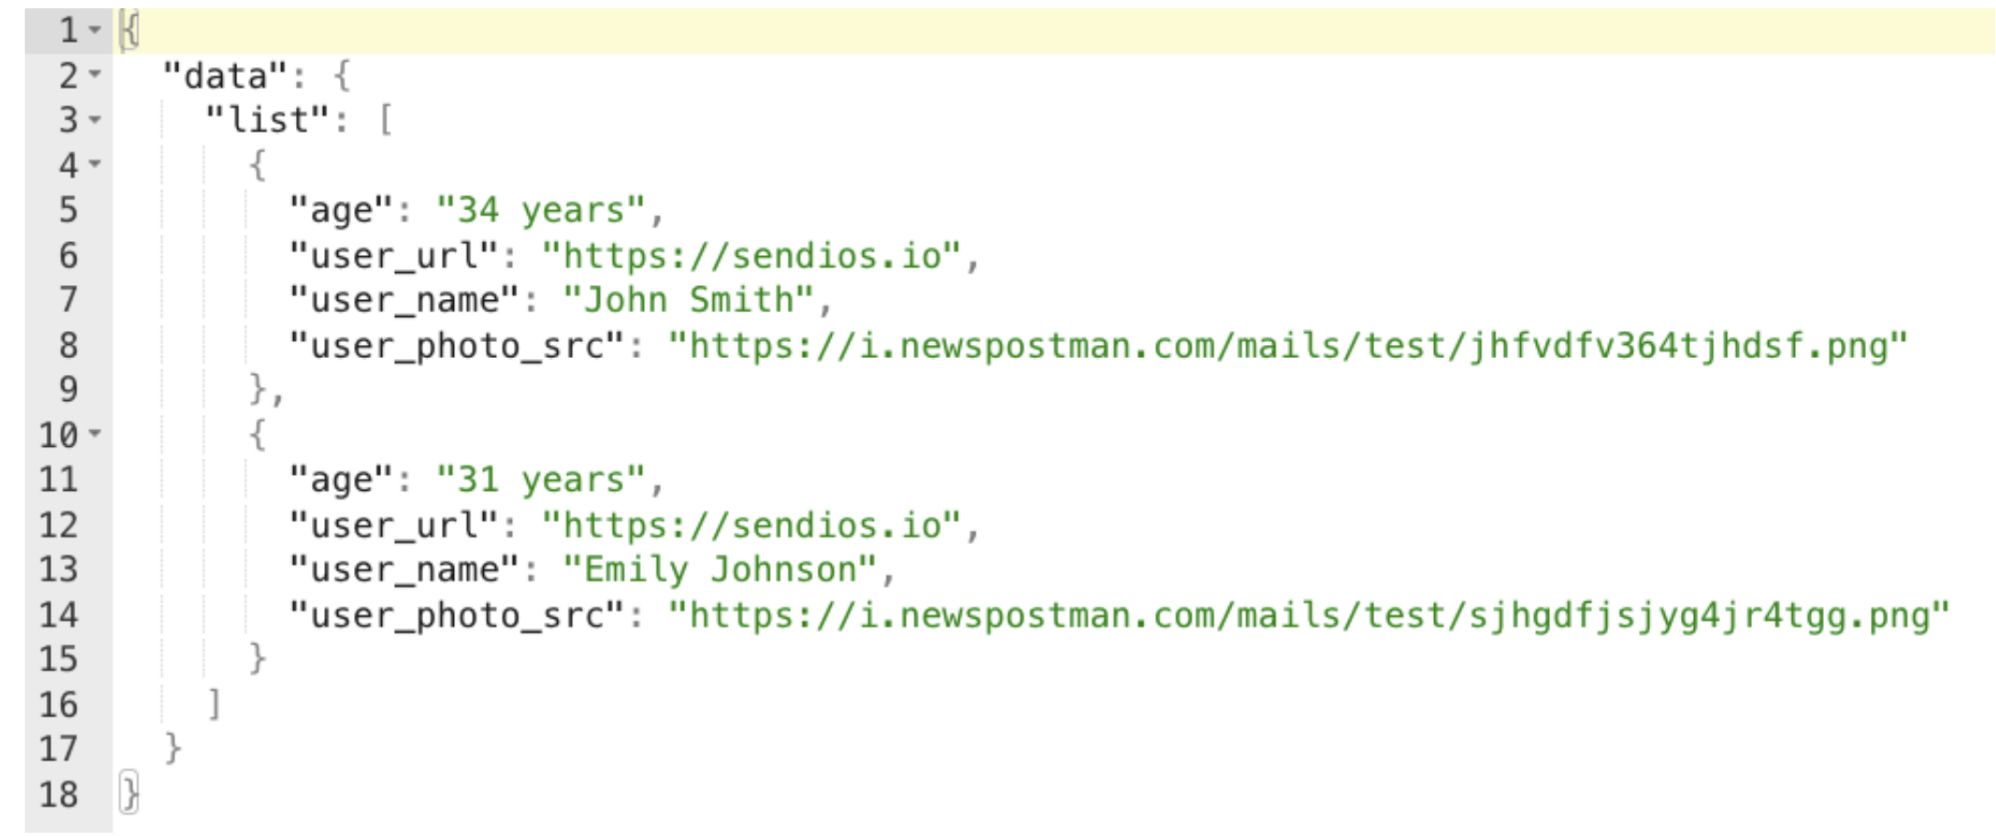
JSON code where the data about users is passed
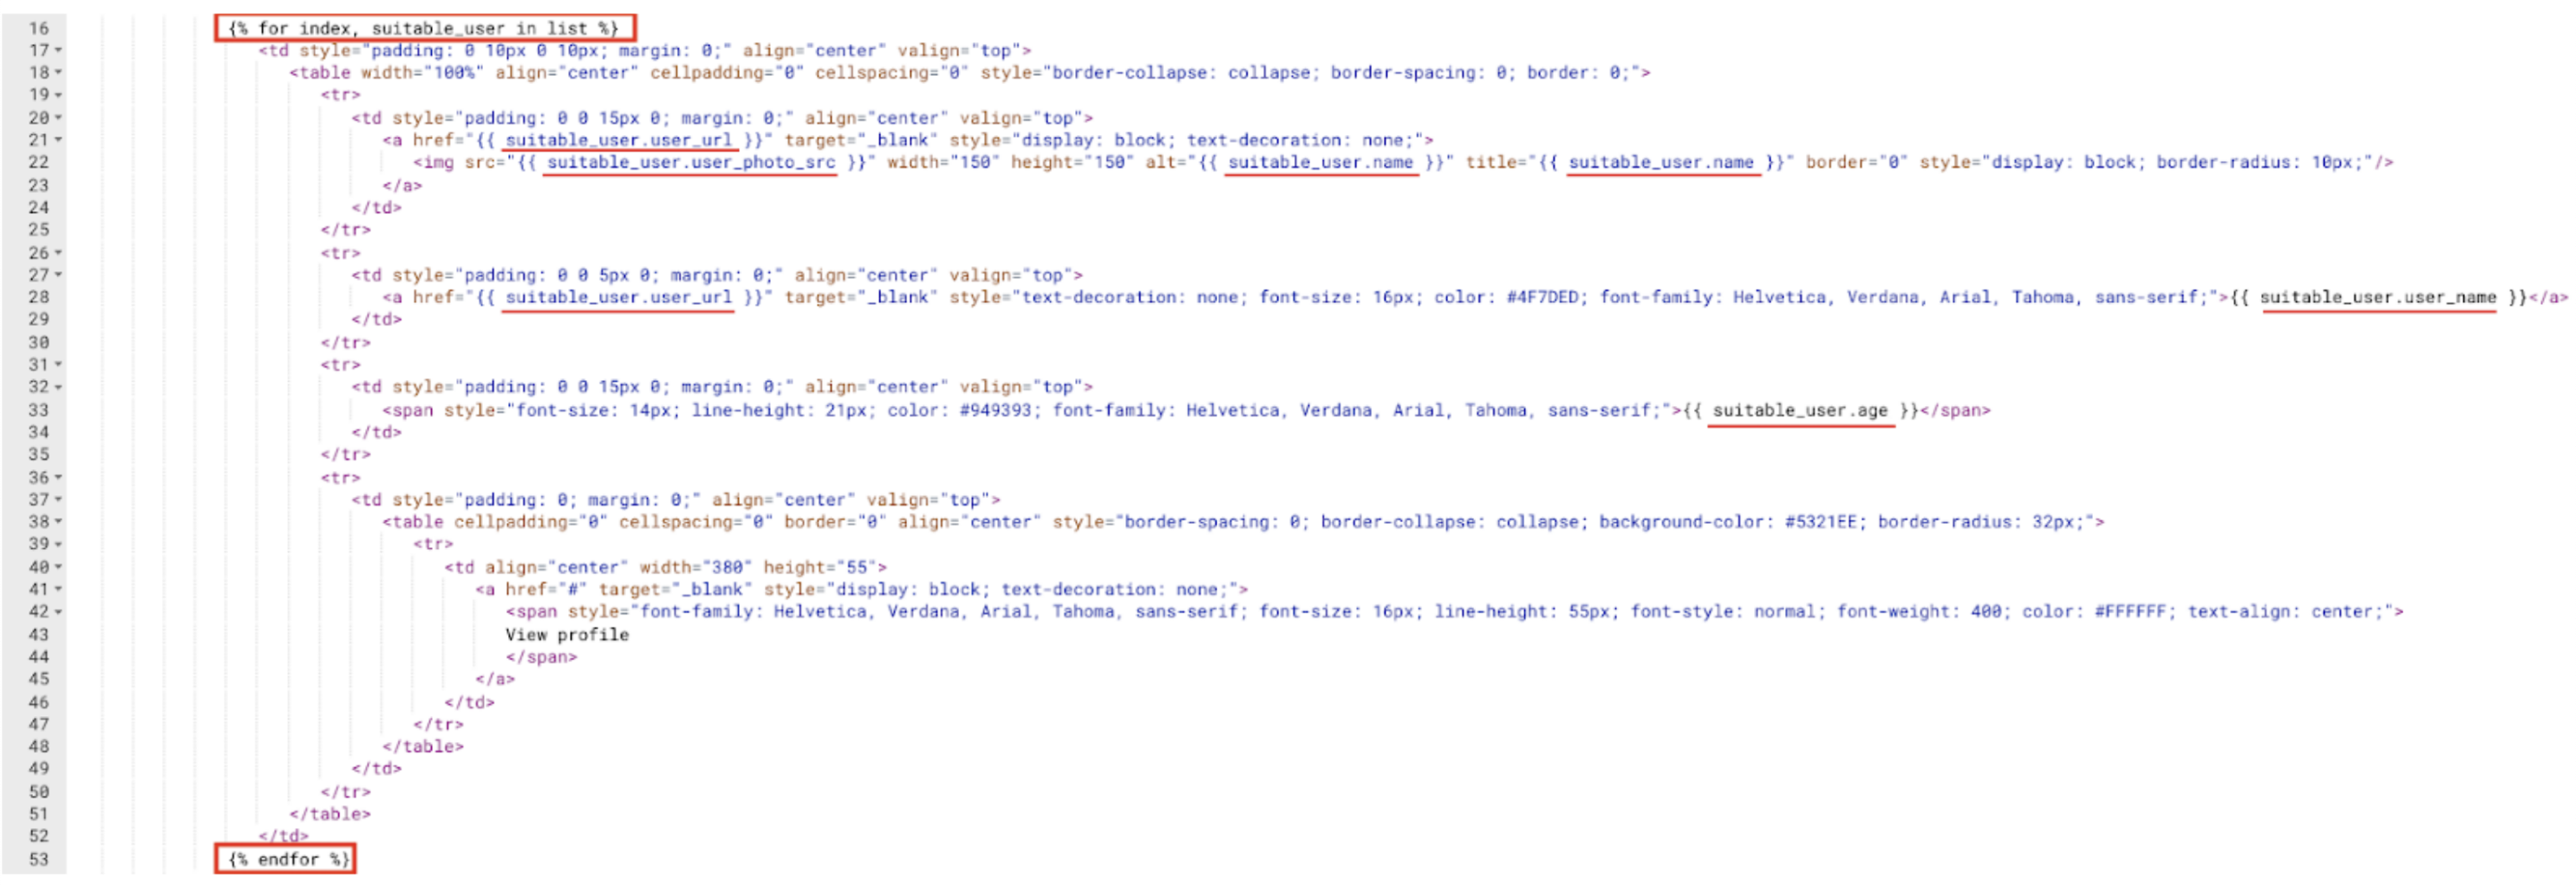
Code to use the cycle in HTML
In the given example, "suitable_user" in the for loop is a custom variable that takes the value of the "list" array.

The result of the loop execution in HTML
To display the data of only one user from the array in the template, you can add a "slice" filter to the for loop:
{% for index, suitable_user in list|slice(0, 1) %}
Read more about the "slice" filter on the corresponding Twig page.
If you prefer not to use a loop, you can use the variables for a specific user by adding the array name and the user's number within the data array:
{{ list.0.user_photo_src }} – displays the photo of the first user from the "list" array;
{{ list.0.age }} – displays the age of the first user from the "list" array;
{{ list.0.user_name }} – displays the name of the first user from the "list" array.
The user count within the array starts with "0".
Project variables
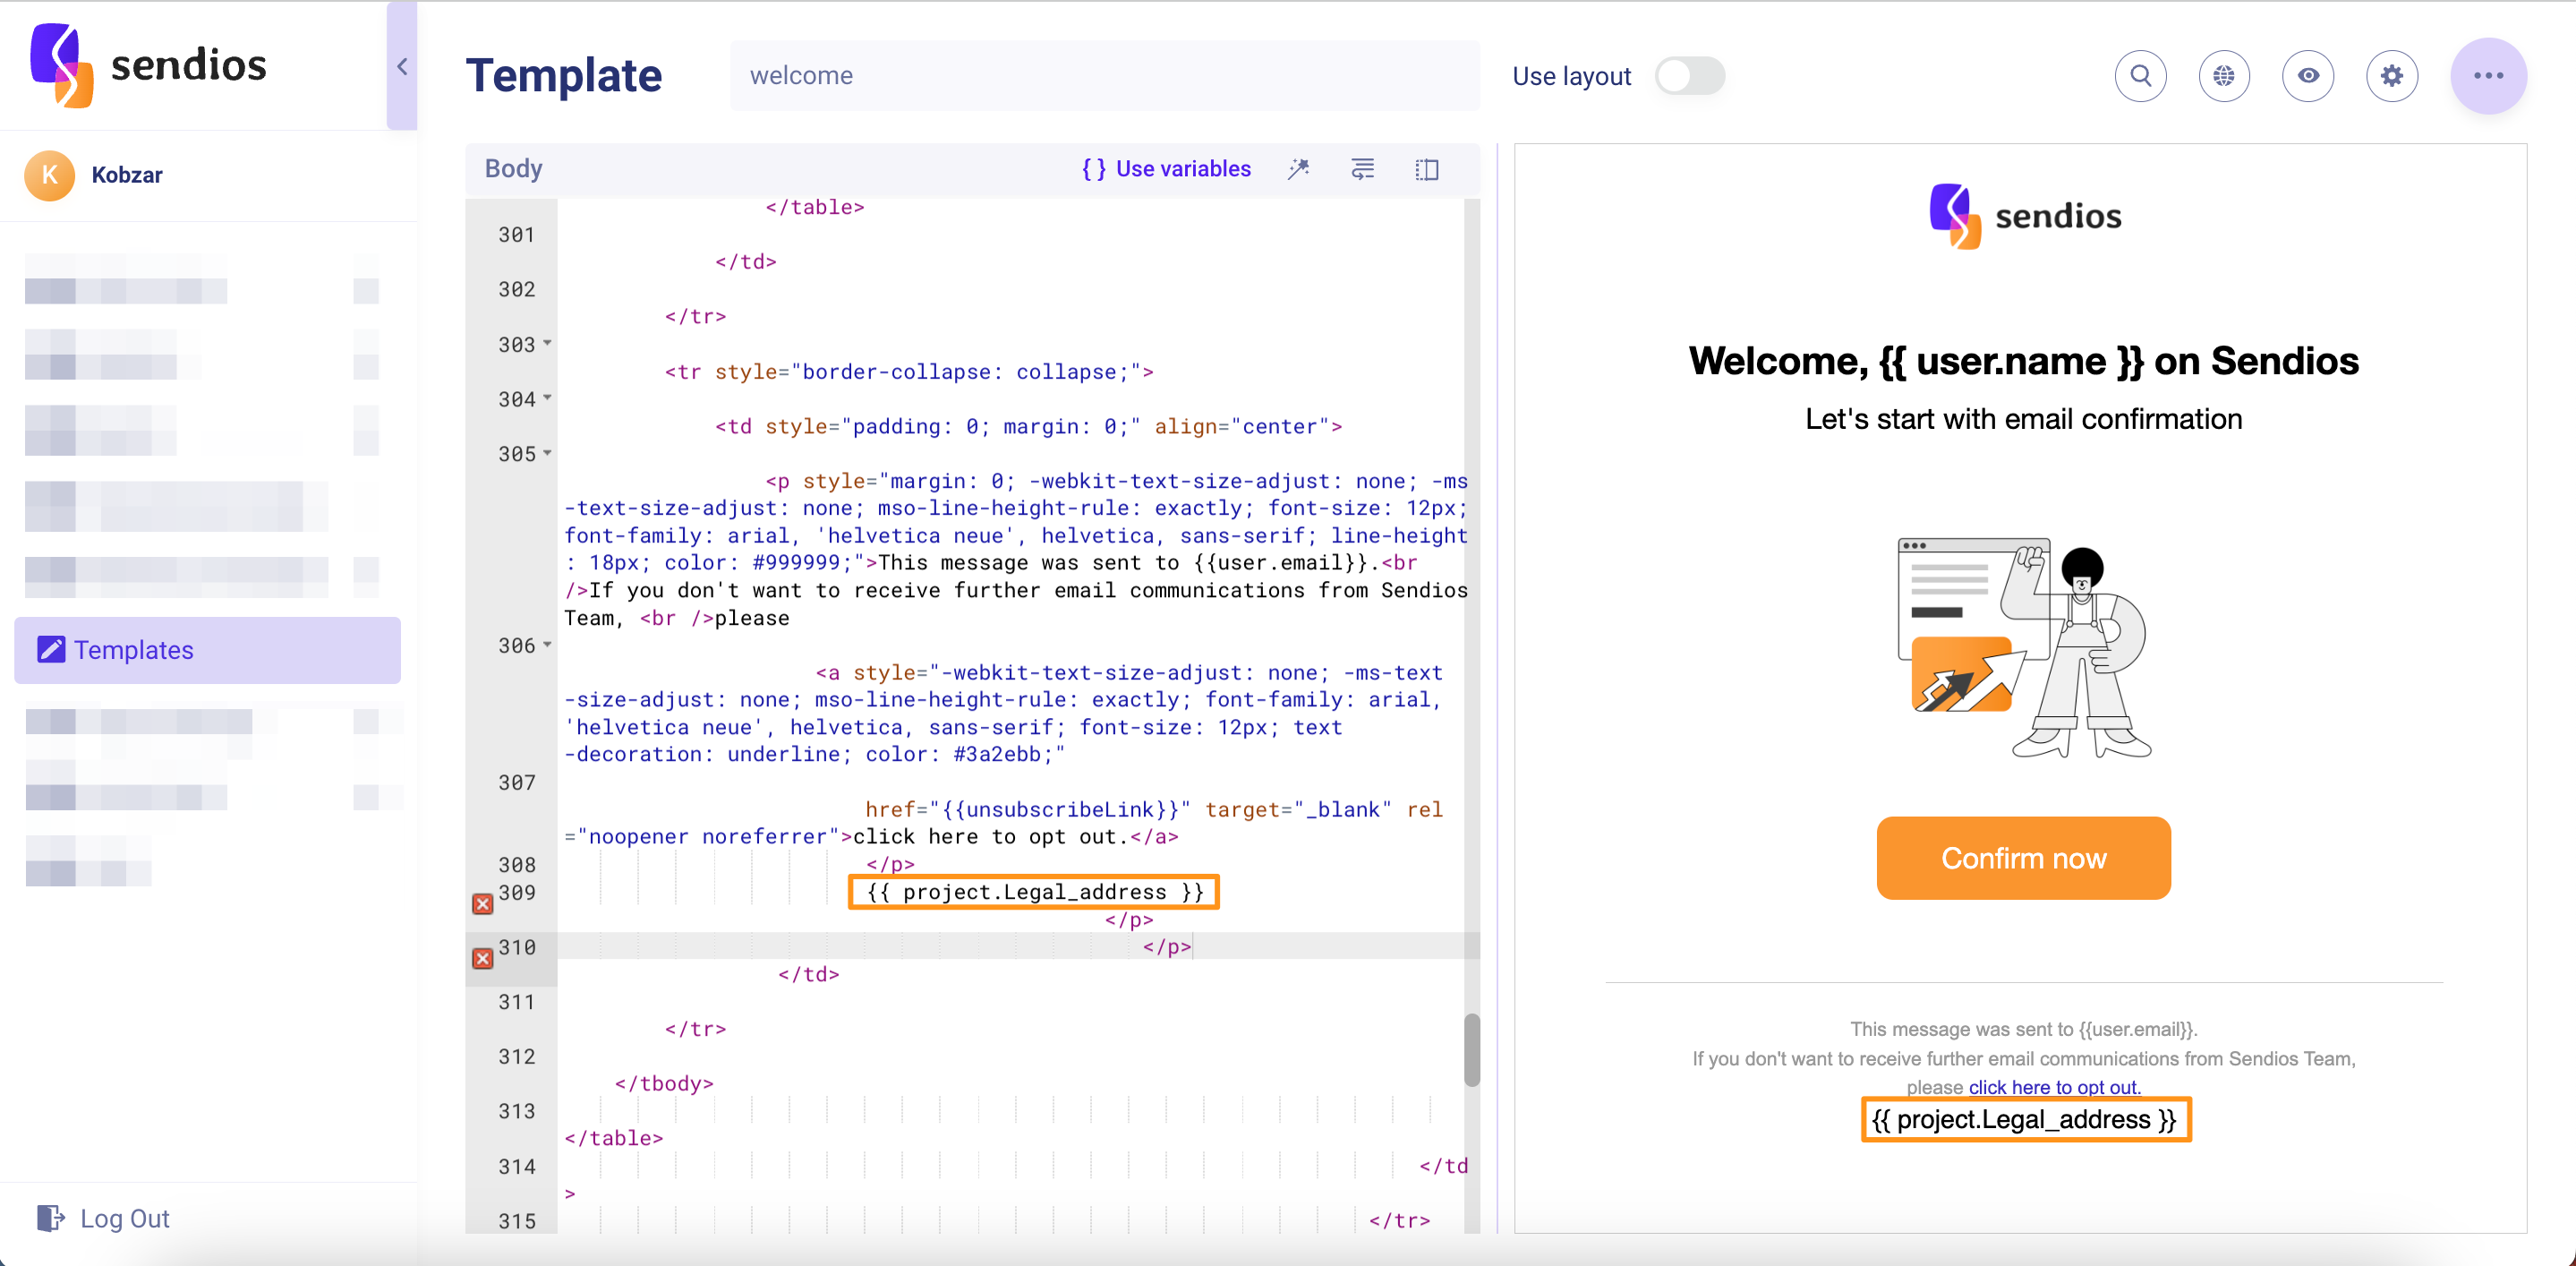
To refer to project variables, use the syntax {{ project.VariableName }}, for example {{ project.sender_name }}. Accessing these variables allows you to insert general information into emails that will be displayed to all recipients.
Variables created from an uploaded CSV file
To reference variables created by uploading a CSV file with users for a marketing campaign in templates, use the syntax "{{ user.camp_VariableName }}".
For example, if there is a column "tp_name" in your CSV file, then you should use the variable "{{ user.camp_tp_name }}" in the template.
Variable must be written as a single word or using the underscore if it consists of several words.
Variables written with a dot or in any other way will not be displayed in the email due to the Twig syntax limitations.
Variables with autologin
With this parameter, you can include special links in emails, following which a user will be redirected to the desired page without an additional request for authorization. For example, we can use variables:
{{ l() }}– to create a link to the search page.
Within the above-specified variable, you can specify a link to any page according to your needs.
For example, to add a link to the mailbox with all messages, write:
{{ l('/mails/inbox/all') }}.
Variable as a part of a link
To personalize links and improve user experience, variables can be used to create links that lead users to specific sections or functions of the system, taking context or parameters into account.
Such variables can be passed in several ways, depending on their use.
Usage variables in transactional sendings (system and trigger emails) and marketing campaigns
| Option | Description | Delivery Channel | Example: |
|---|---|---|---|
| JSON | 1. The link is passed in JSON when sending an email via the corresponding API endpoint. 2. Data is transmitted in the "data" array. 3. The link is controlled on your side, and the email specifies the variable. ✅ This option is most convenient when each user's link is completely different or significantly differs in many parameters. | Via the API endpoint Send system / trigger email ❗️ For marketing campaigns, passing the link via the request to send an email is impossible. | { "data": { "install_url": "https://example.com" } } |
| Composite Link | The link consists of 2 parts: static and dynamic. The static part is added to your email's text, while the dynamic part is in variable format. The dynamic part of the link is managed on your side, and Sendios makes changes to the static part if necessary. ✅ This option is most suitable when the link differs by 1-2 parameters. | 1. Via the API endpoint Send system / trigger email 2. Via the API endpoint Add and update user data by project id and email 3. When uploading a CSV file ❗️ For marketing campaigns, passing the link via the request to send an email is impossible. Instead, use the API endpoint to update user data or pass the necessary values when uploading a CSV file in the admin panel. | 1. Via the request to send an email: https://example.com/{{ client_user_id }}, where {{ client_user_id }} is the value of client_user_id passed as a variable in JSON. 2. Via the request to update user data: https://example.com/{{ user.client_user_id }}, where {{ user.client_user_id }} is the client_user_id parameter passed to the API endpoint to update user data (user fields). 3. When uploading a CSV file: {{ user.camp_VariableName }}, where VariableName is the name of the corresponding column in the file. |
| Static Link | 1. The link is added to templates by us and is the same for all users. 2. The link control and changes are made on the Sendios side. 3. You pass the link only once before sending an email. ✅ This option is suitable when the link is the same for all recipients. | https://sendios.io/ | |
| Variable | 1. The link is managed on your side. ✅ This option is most convenient when the link often changes, or completely different links are used for different users. | Only via the API endpoint Add and update user data by project id and email ❗️ For marketing campaigns, passing the link via the request to send an email is impossible. | {{ user.sales_url }}, where user.sales_url is the value of sales_url passed to the API endpoint to update user data (user fields). |
Adding variables to templates easily
In addition to the syntax examples mentioned above for adding variable to templates, you can also include variables by copying them from the list of available options when creating or editing a template.
To apply a created variable to a template:
- Navigate to the Templates section;
- Open the desired template from the existing ones or create a new one if needed;
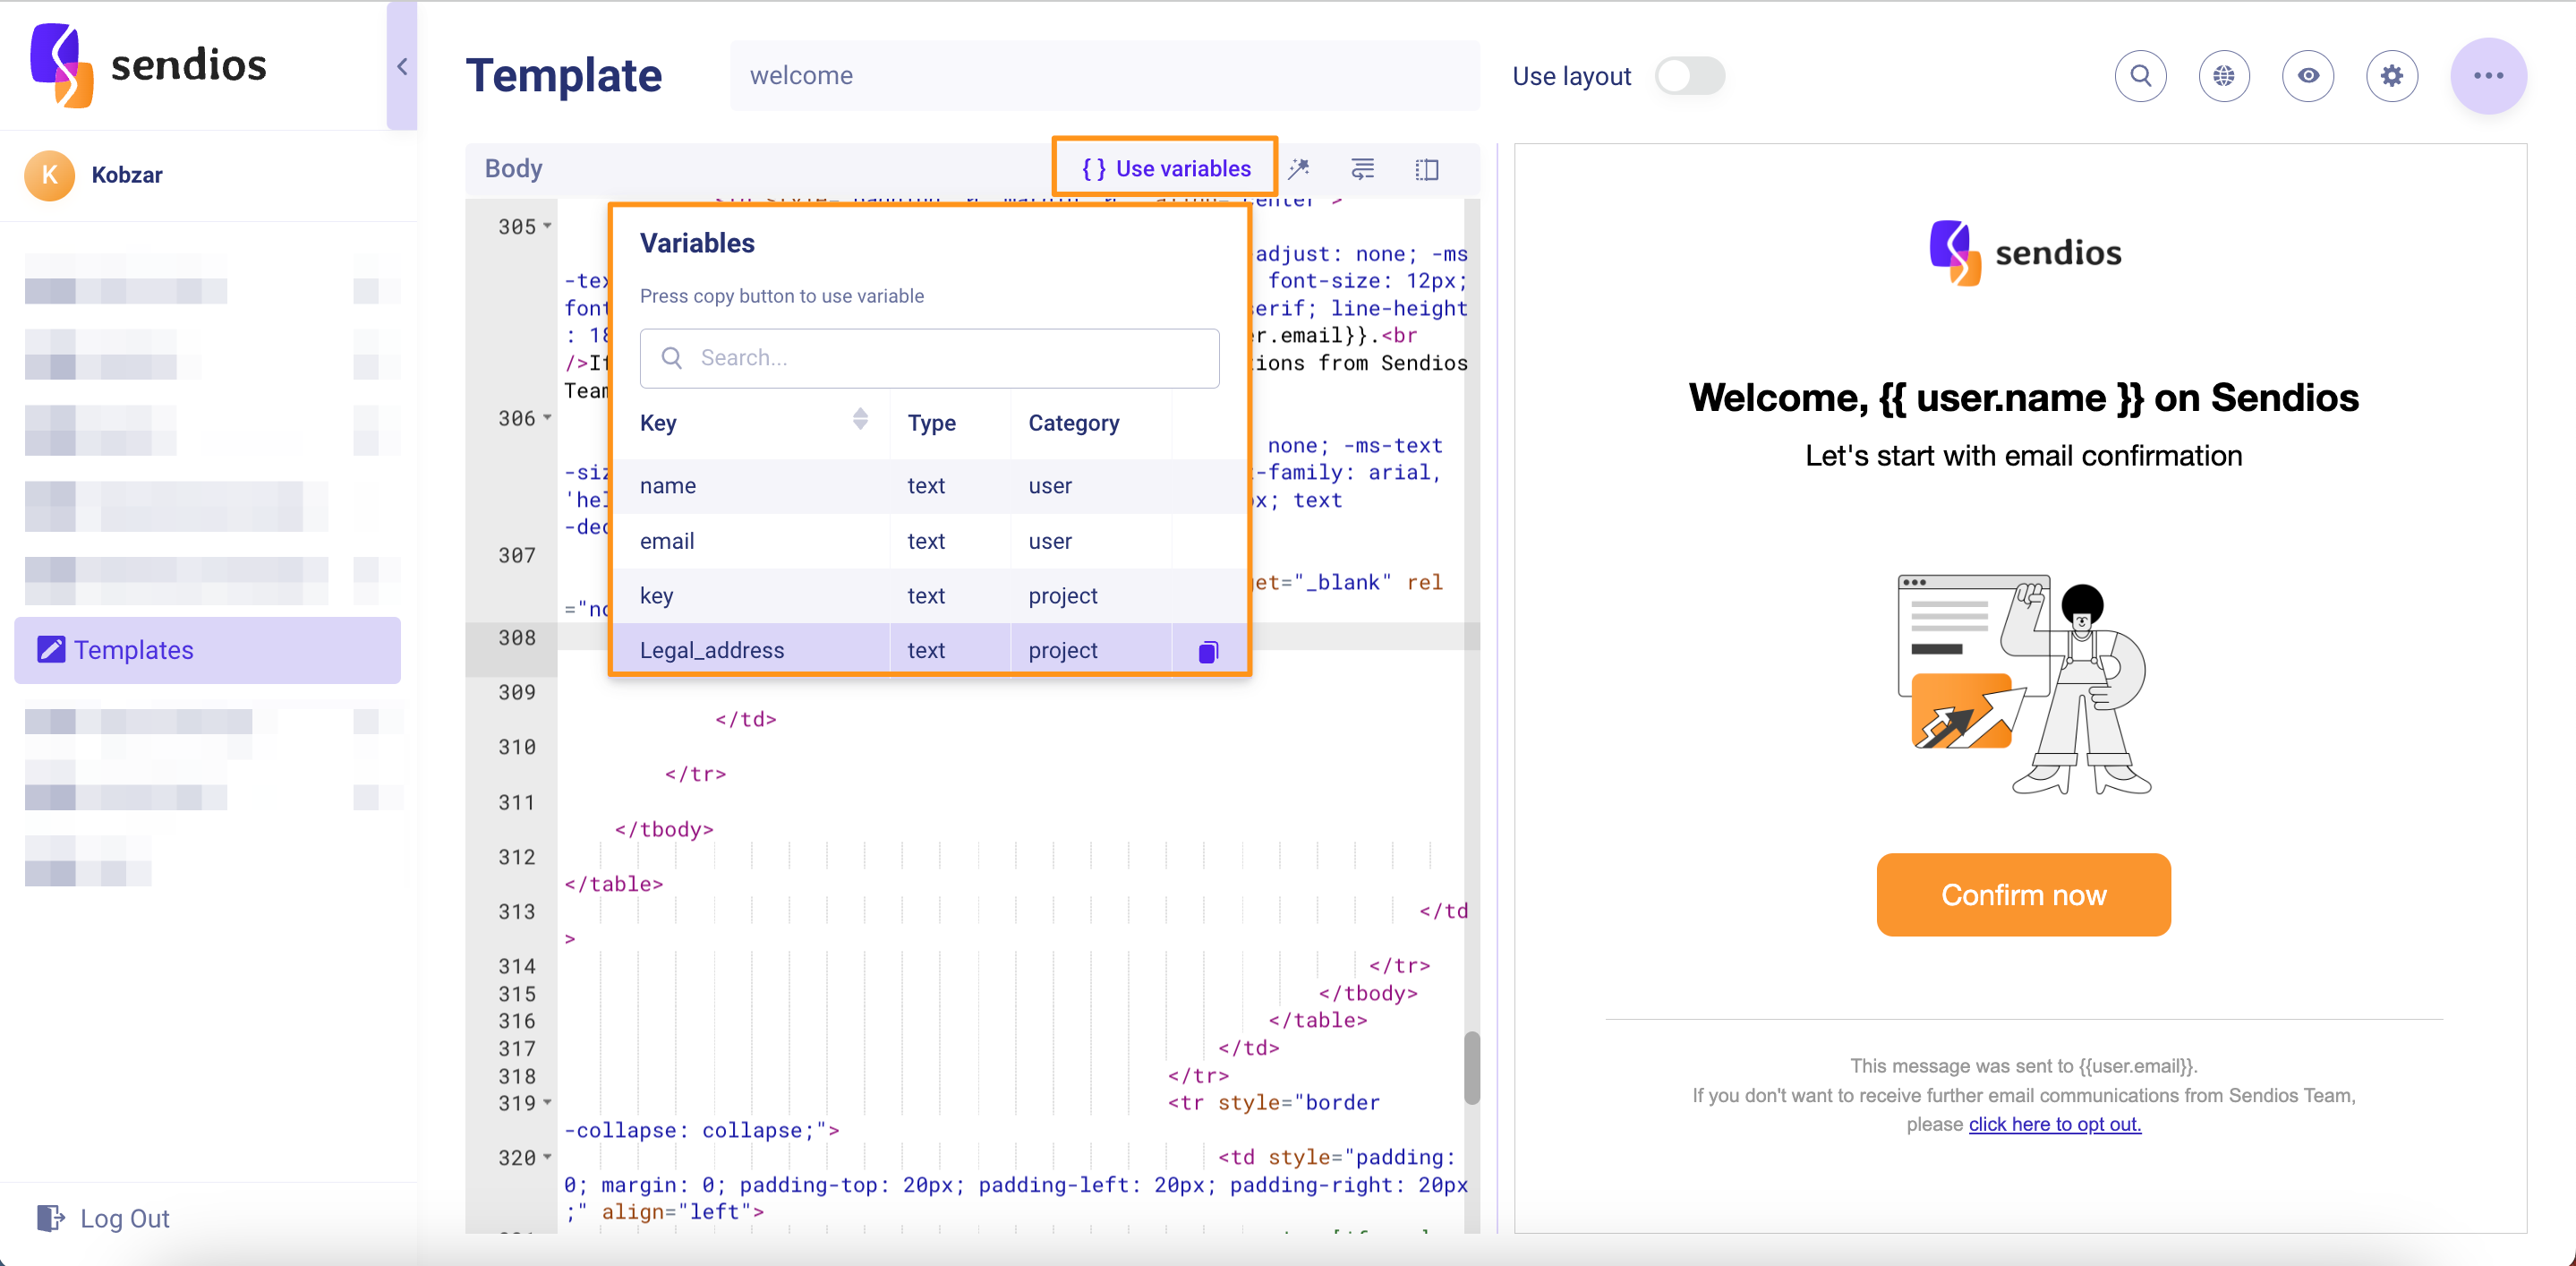
- Click on {} Use variables in the top toolbar of the editor and copy the necessary variable;
- Paste it into the template where needed and verify its correctness in the preview.
Updated over 2 years ago