How to create a template?
Template is a template form for your transactional emails and campaigns.
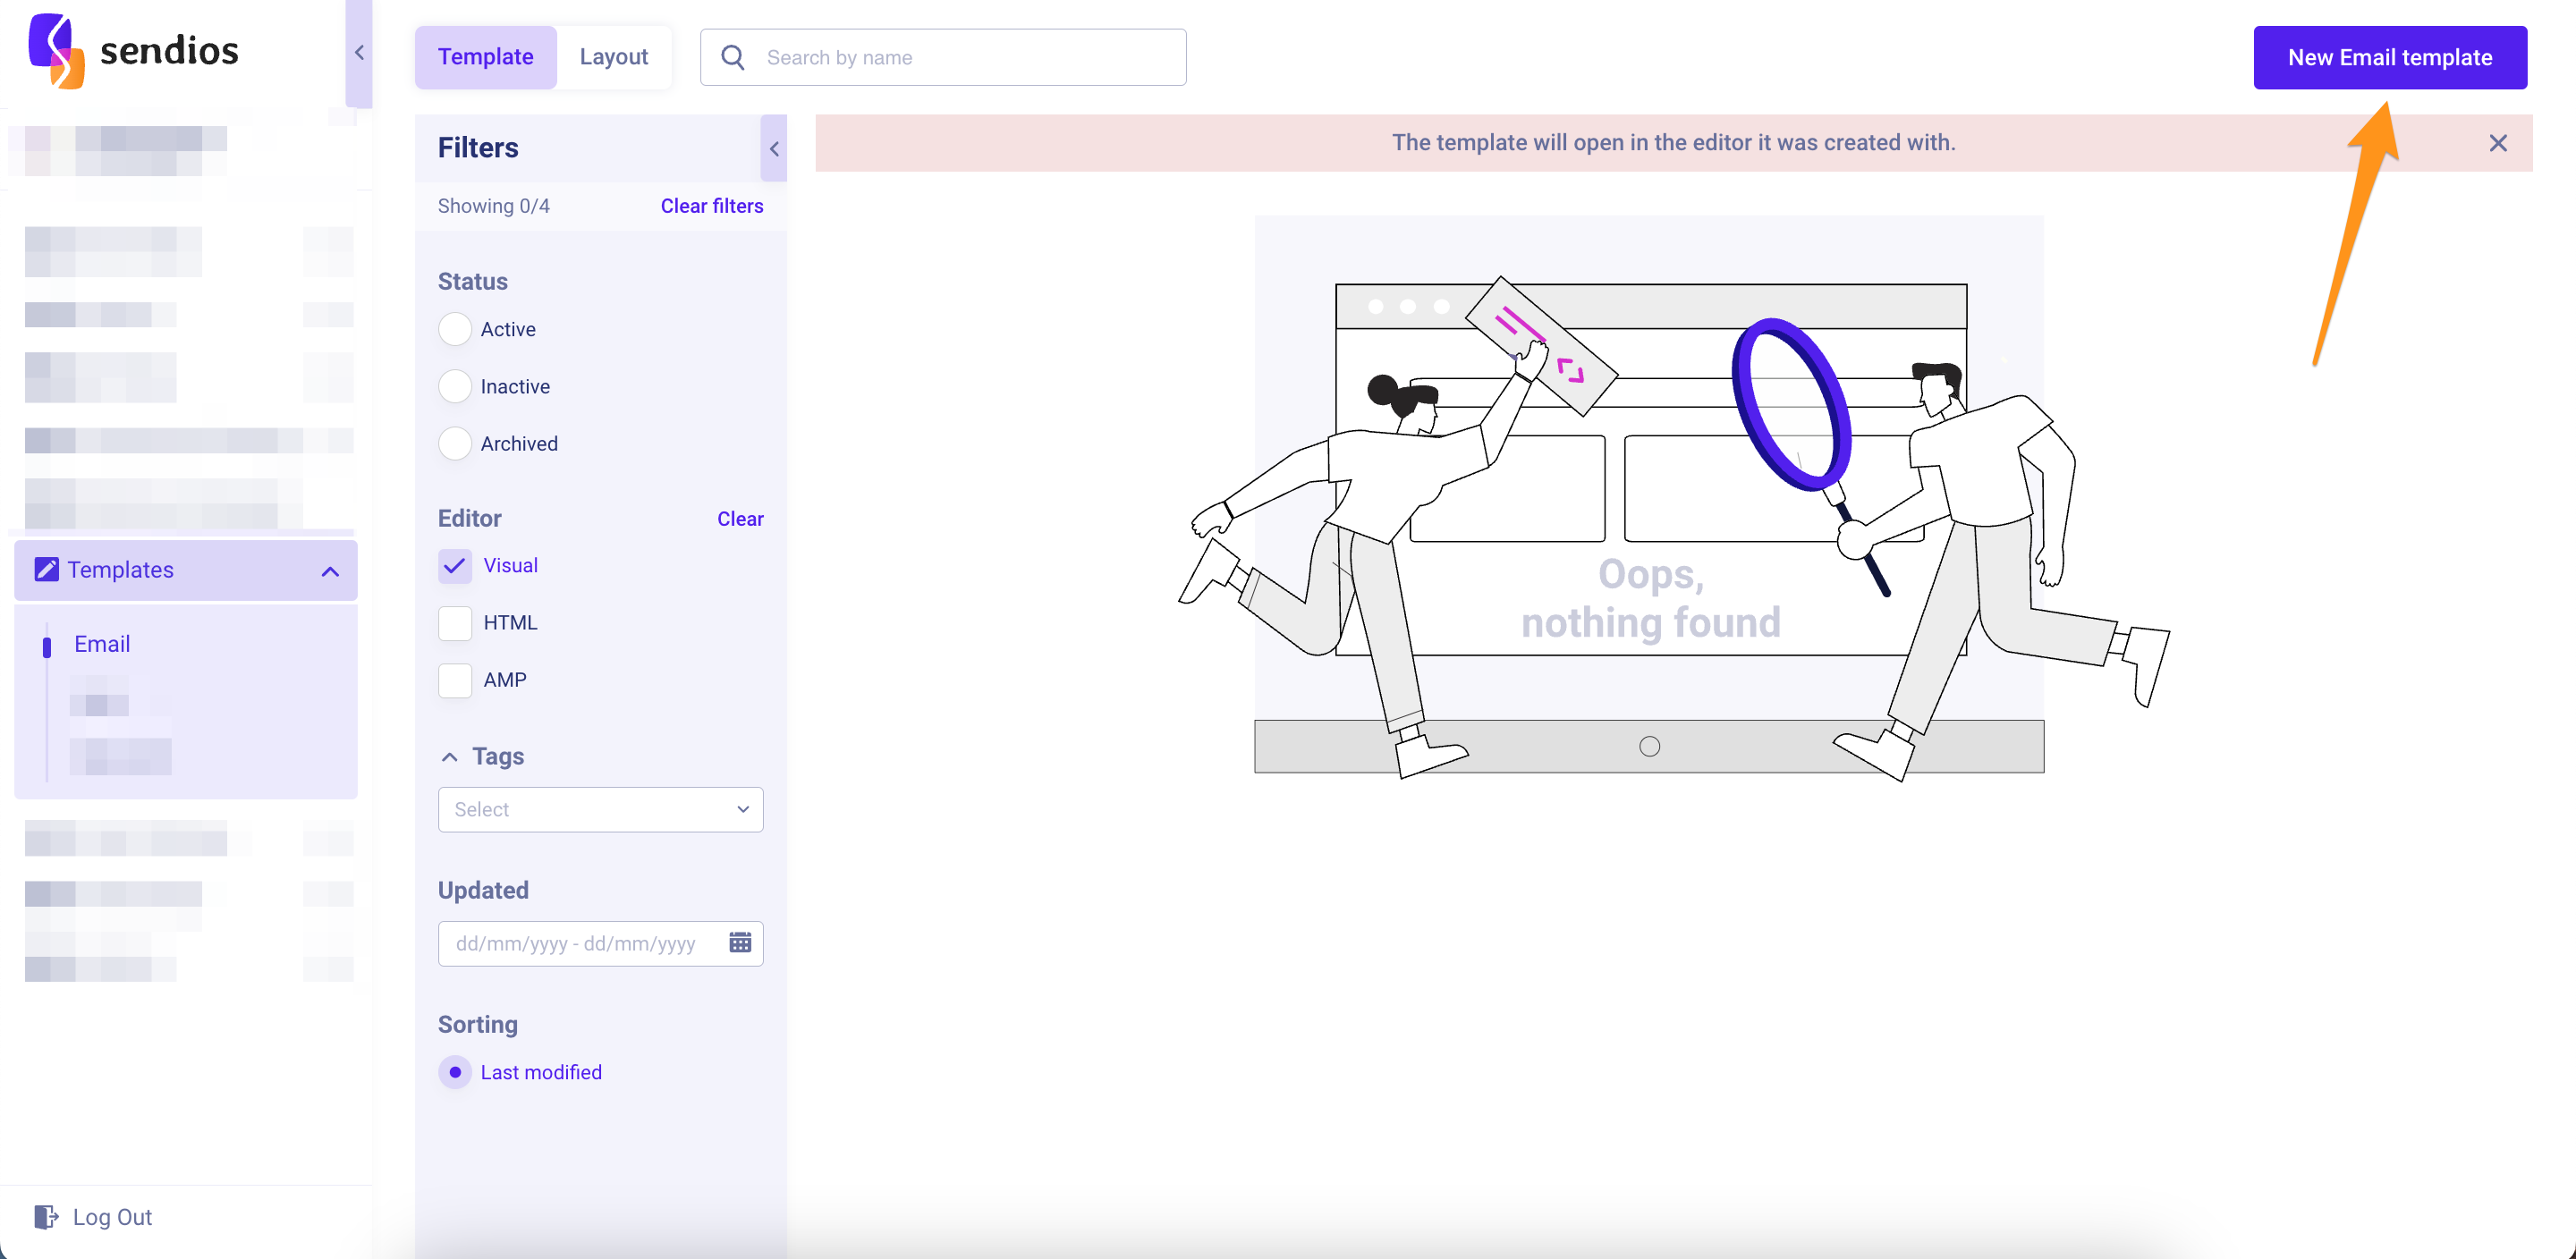
Creating a new template
Navigate to the Templates → Email page and click on +.
In the modal window that appears, choose your preferred method of creating the template: either by using the visual builder or the code editor. Let's explore each option in detail.
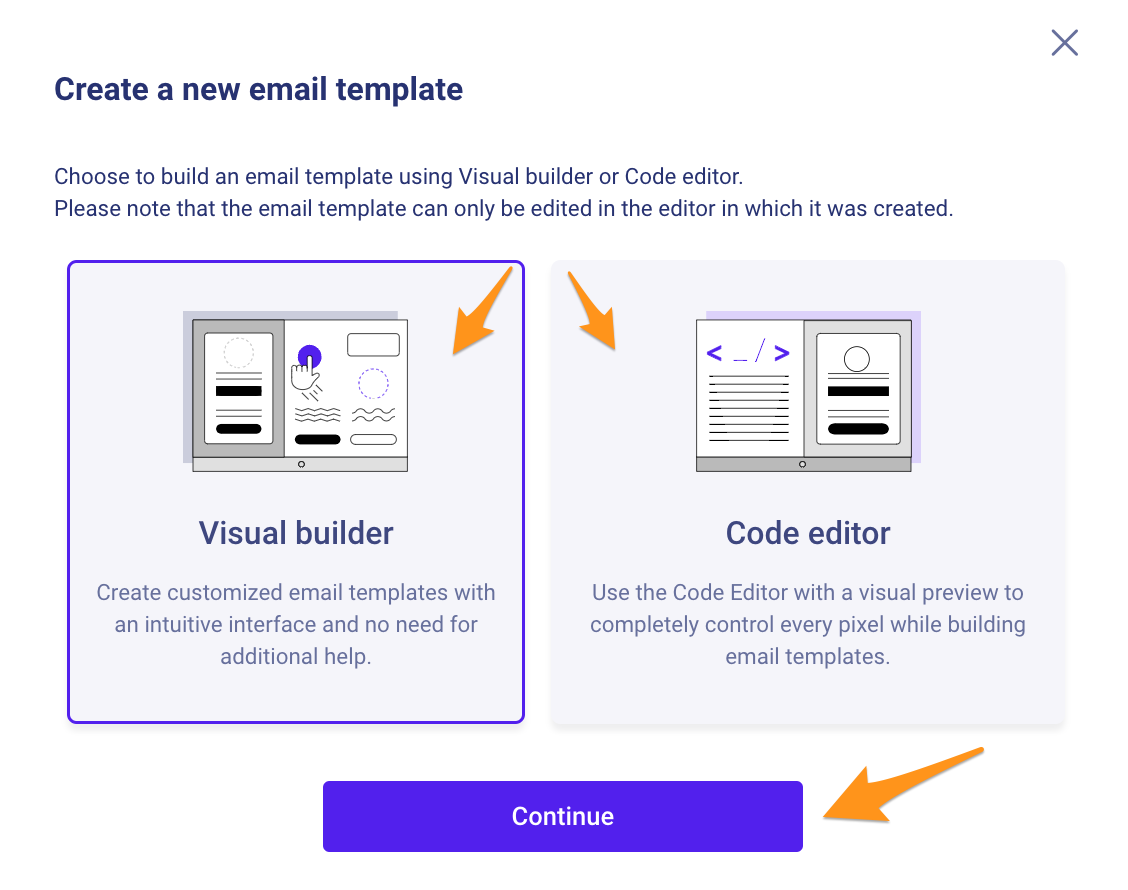
Please note that templates created using the code editor can only be edited in the code editor, while templates created in the visual builder can be edited in both the visual builder and the code editor.
Creating a template with the visual builder
When using the visual builder, you'll find a set of tools for template creation on the left side, while the preview of your template is displayed on the right side. The template editor consists of two settings columns: Appearance and Content.
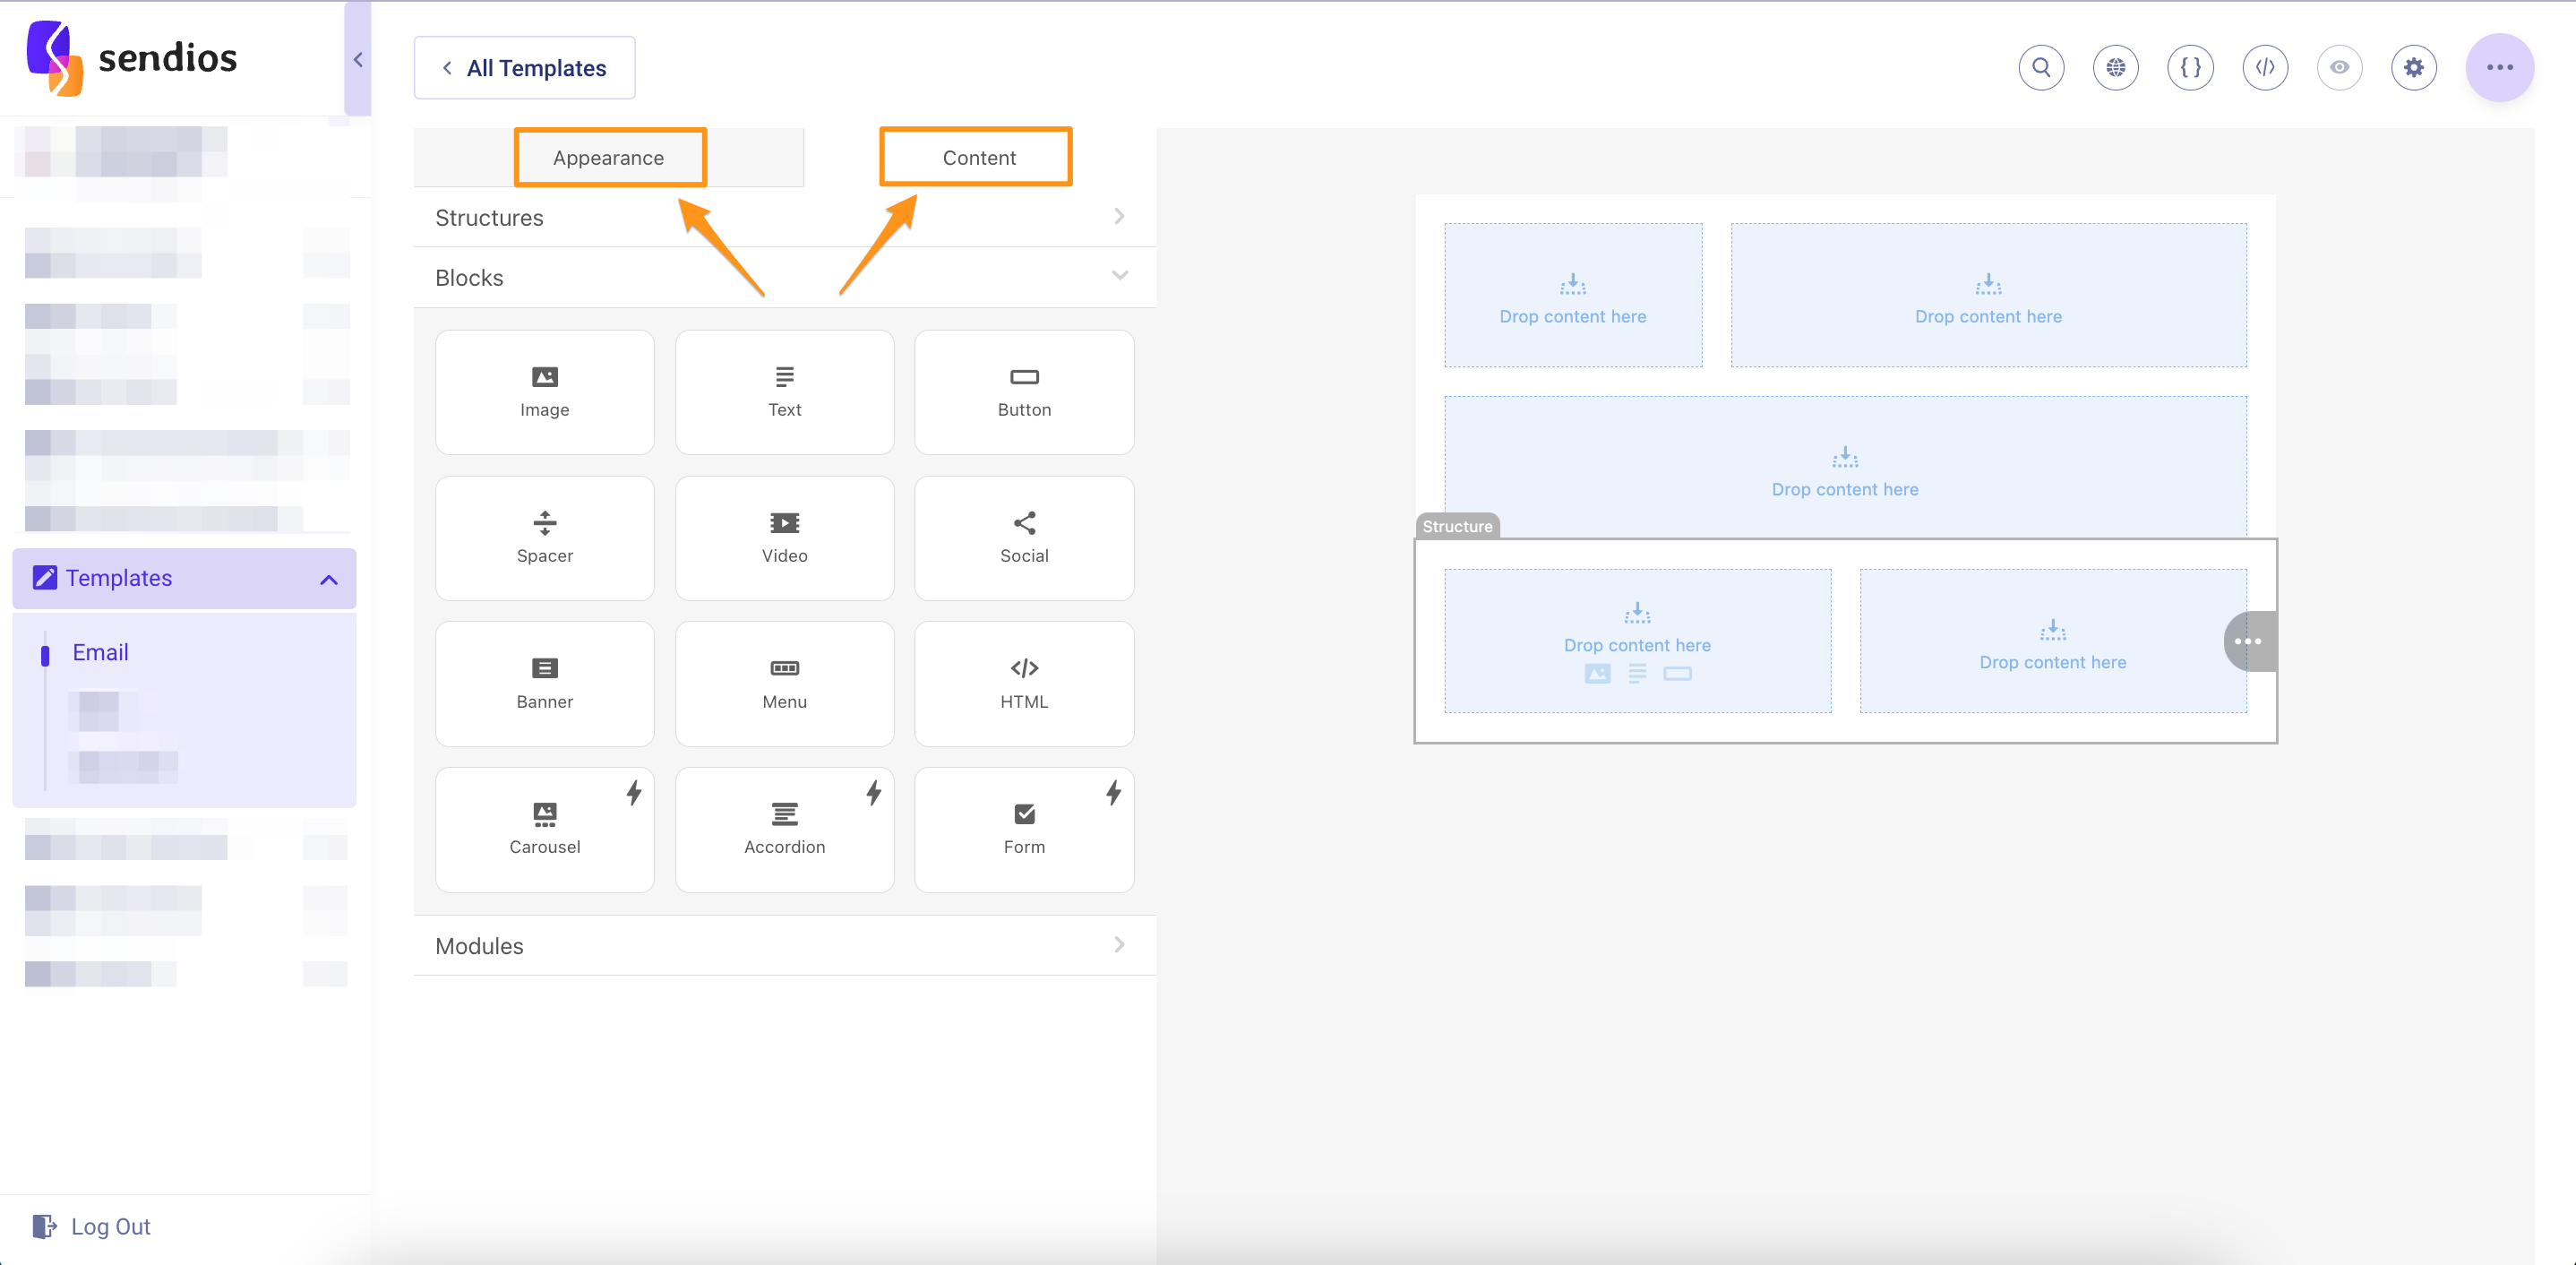
- The Appearance tab contains general parameters for the email template;
- The Content tab allows you to work on individual blocks within the template.
Creating a template with the code editor
Similar to the visual builder, the code editor provides a split-screen view, with the code editor on the left and the preview on the right.
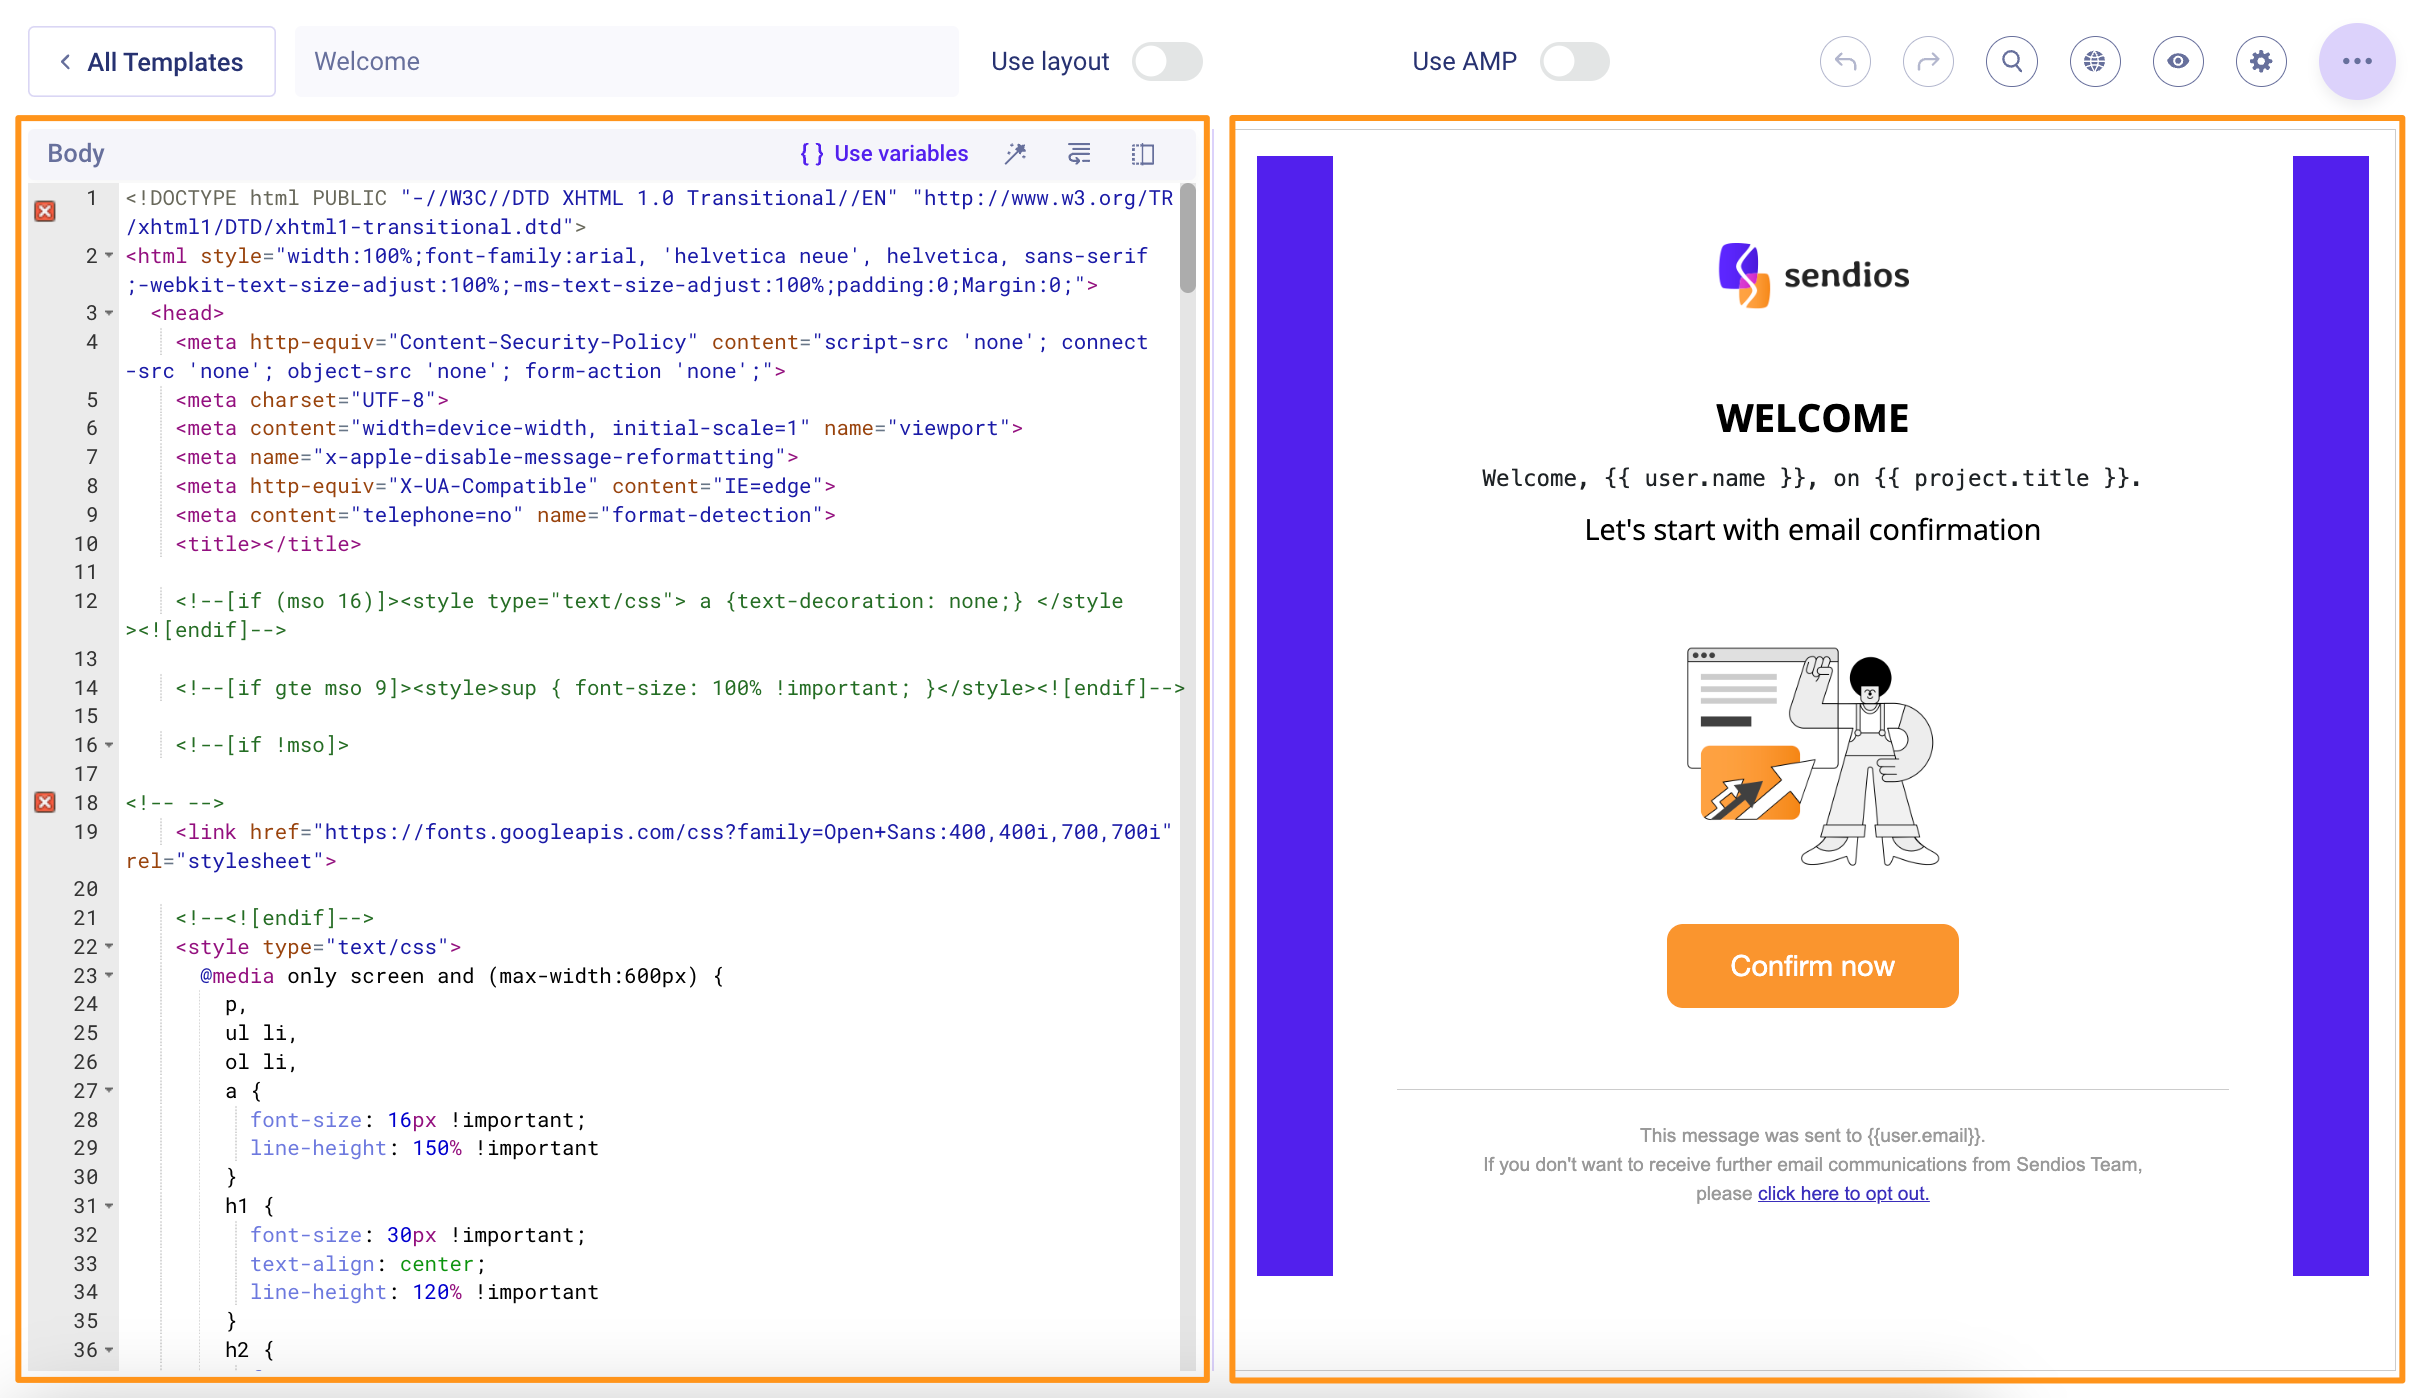
Use the code editor on the left to create your template and make adjustments. The preview on the right provides a visual representation of the changes you make.
At the top of the page, you can:

-
All Templates – exit the editing mode of the current template and return to the list of all templates;
-
See that template's name (it will be displayed here once you name it);
-
Add layouts to your template. You just need to turn on the switch and choose a layout from among the existing options or create a new one;
-
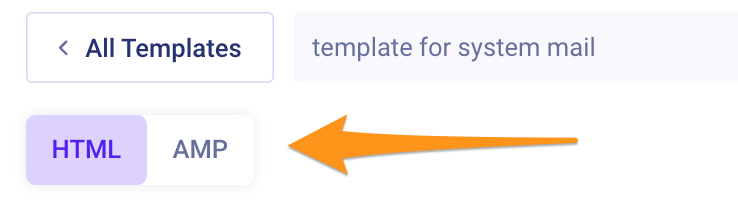
Use AMP – allows you to create email templates using AMP (Accelerated Mobile Pages) technology;
-
When using this option, you can switch between HTML and AMP tabs.
-
-
In the upper right corner of the page, there are several tools:
- Undo / Redo – allows you to revert the last action you performed or to reapply an action that was undone;
- Search – find and open another template in a new tab;
- The Translation button – if translations are enabled, clicking this button displays the status of translations for the template in other languages;
- The Preview button – available after saving the template, this feature allows you to see how the email will look and even perform a test sending;
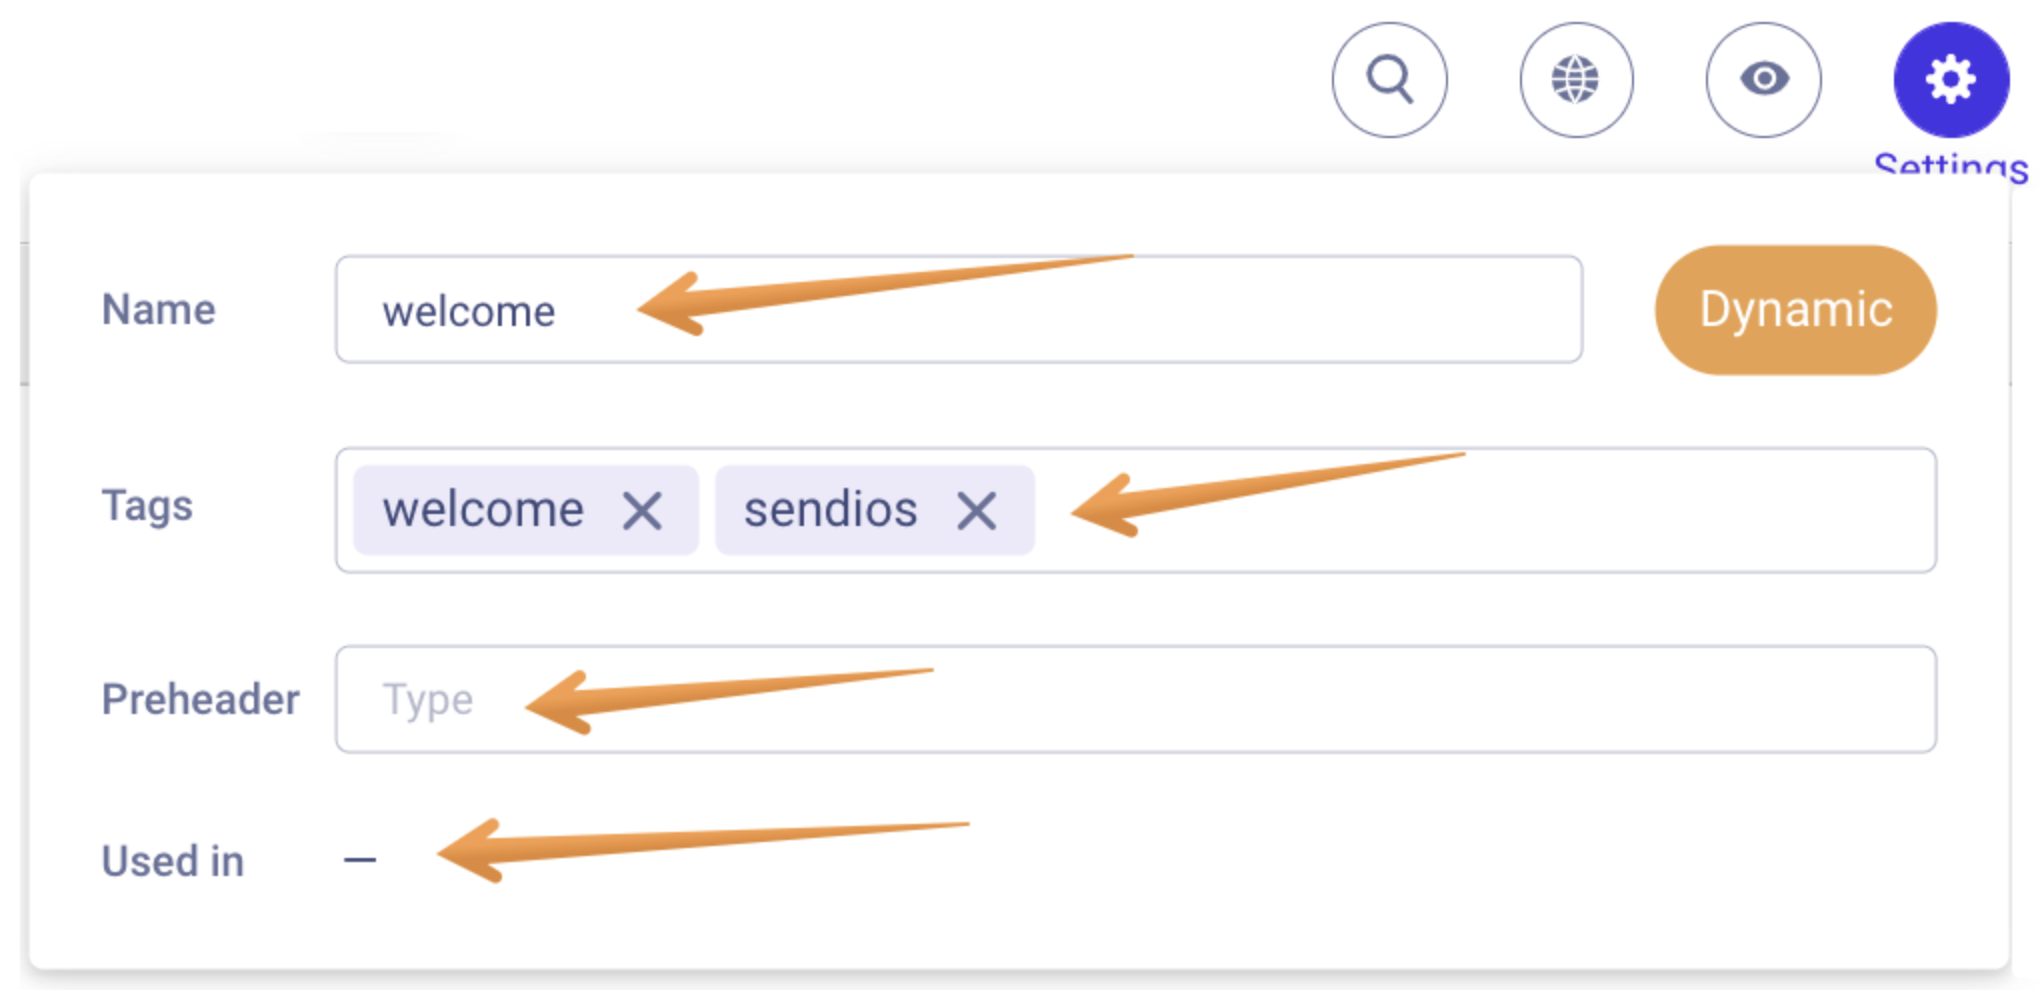
- The Settings button, which contains the following components:
- Name – add or change the name of the template;
- Tags – create new tags or add existing ones to categorize your templates;
- Preheader – add a preheader to the template;
- Used in – see which transactional emails use this template.
Additional options
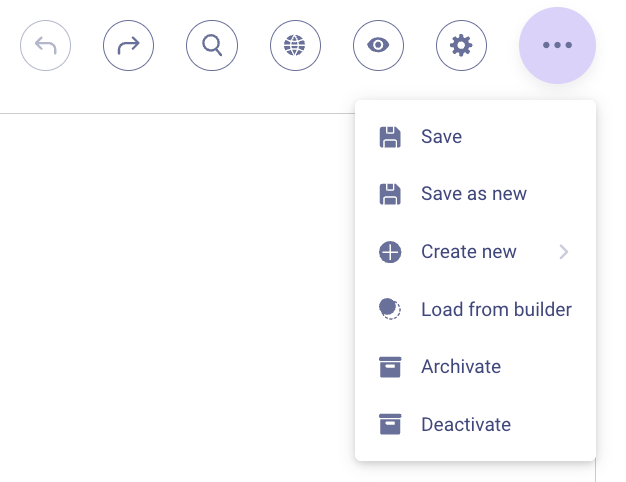
By clicking on the three dots, you can:
-
Save – save a template;
-
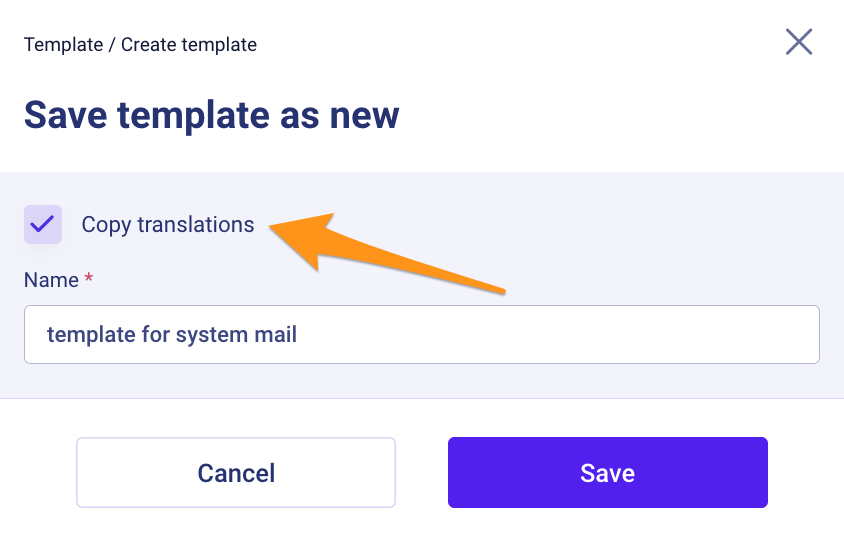
Save as new – save the template as a new one;
- You can activate the Copy translations option to automatically copy translations to the newly created template (relevant for Crowdin integration);
-
Create new – begin creating a new template or layout;
-
Load from builder – open a template created using the visual builder in the code editor (only if the code editor is open);
-
Archive – archive template;
-
Deactivate – deactivate template (available for active templates only). Once deactivated, the template will be removed from the campaign / transactional type, acquiring an "Inactive" status, provided it is not the only template used in the corresponding marketing campaign or transactional email.
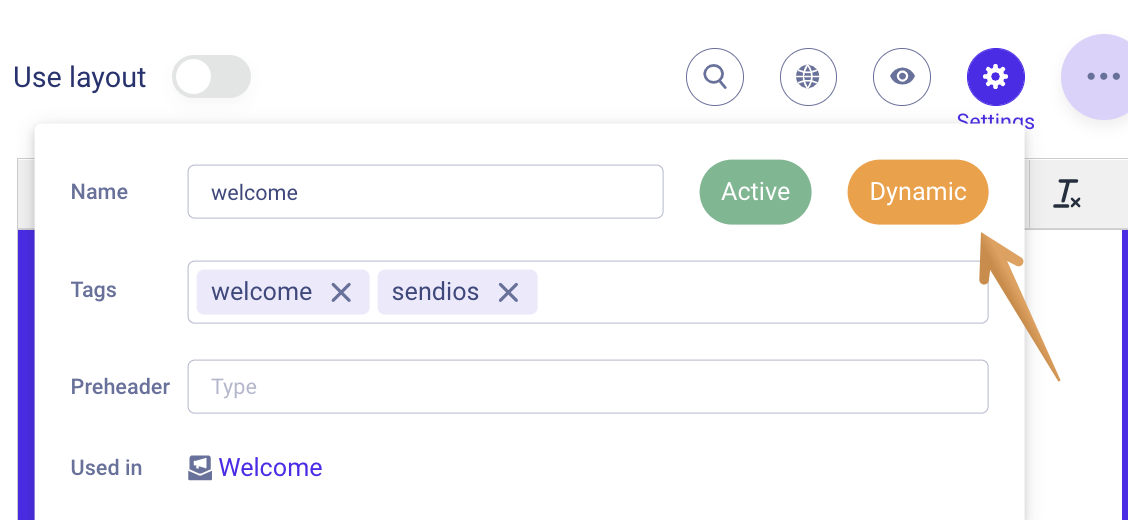
Please also note that templates containing dynamic variables are marked as "Dynamic." These templates can only be used in transactional emails and cannot be used in marketing campaigns.
For more tips and tricks on creating templates, check out our article "Useful tips for creating a template".
How to hide sensitive data when creating a template
If you need to send sensitive data to users via email and want to hide it on the Mail sent page, you can use the following tag when creating the template:
<span class="sendios-sensitive-data">sensitive_data</span>
Note: Do not apply any additional styles to this tag, as it may interfere with its functionality.
Also, you can add several such tags in different places in the template if necessary.
Please be aware that this tag only hides data during actual mailings to users and does not affect test sendings.
Updated over 2 years ago