How to create a transactional email?
Transactional emails are automatic emails sent to the users based on their actions or related events. Examples of transactional emails include notifications about successful payments on the platform or the end of a promotion.
1. Creating a new transactional email
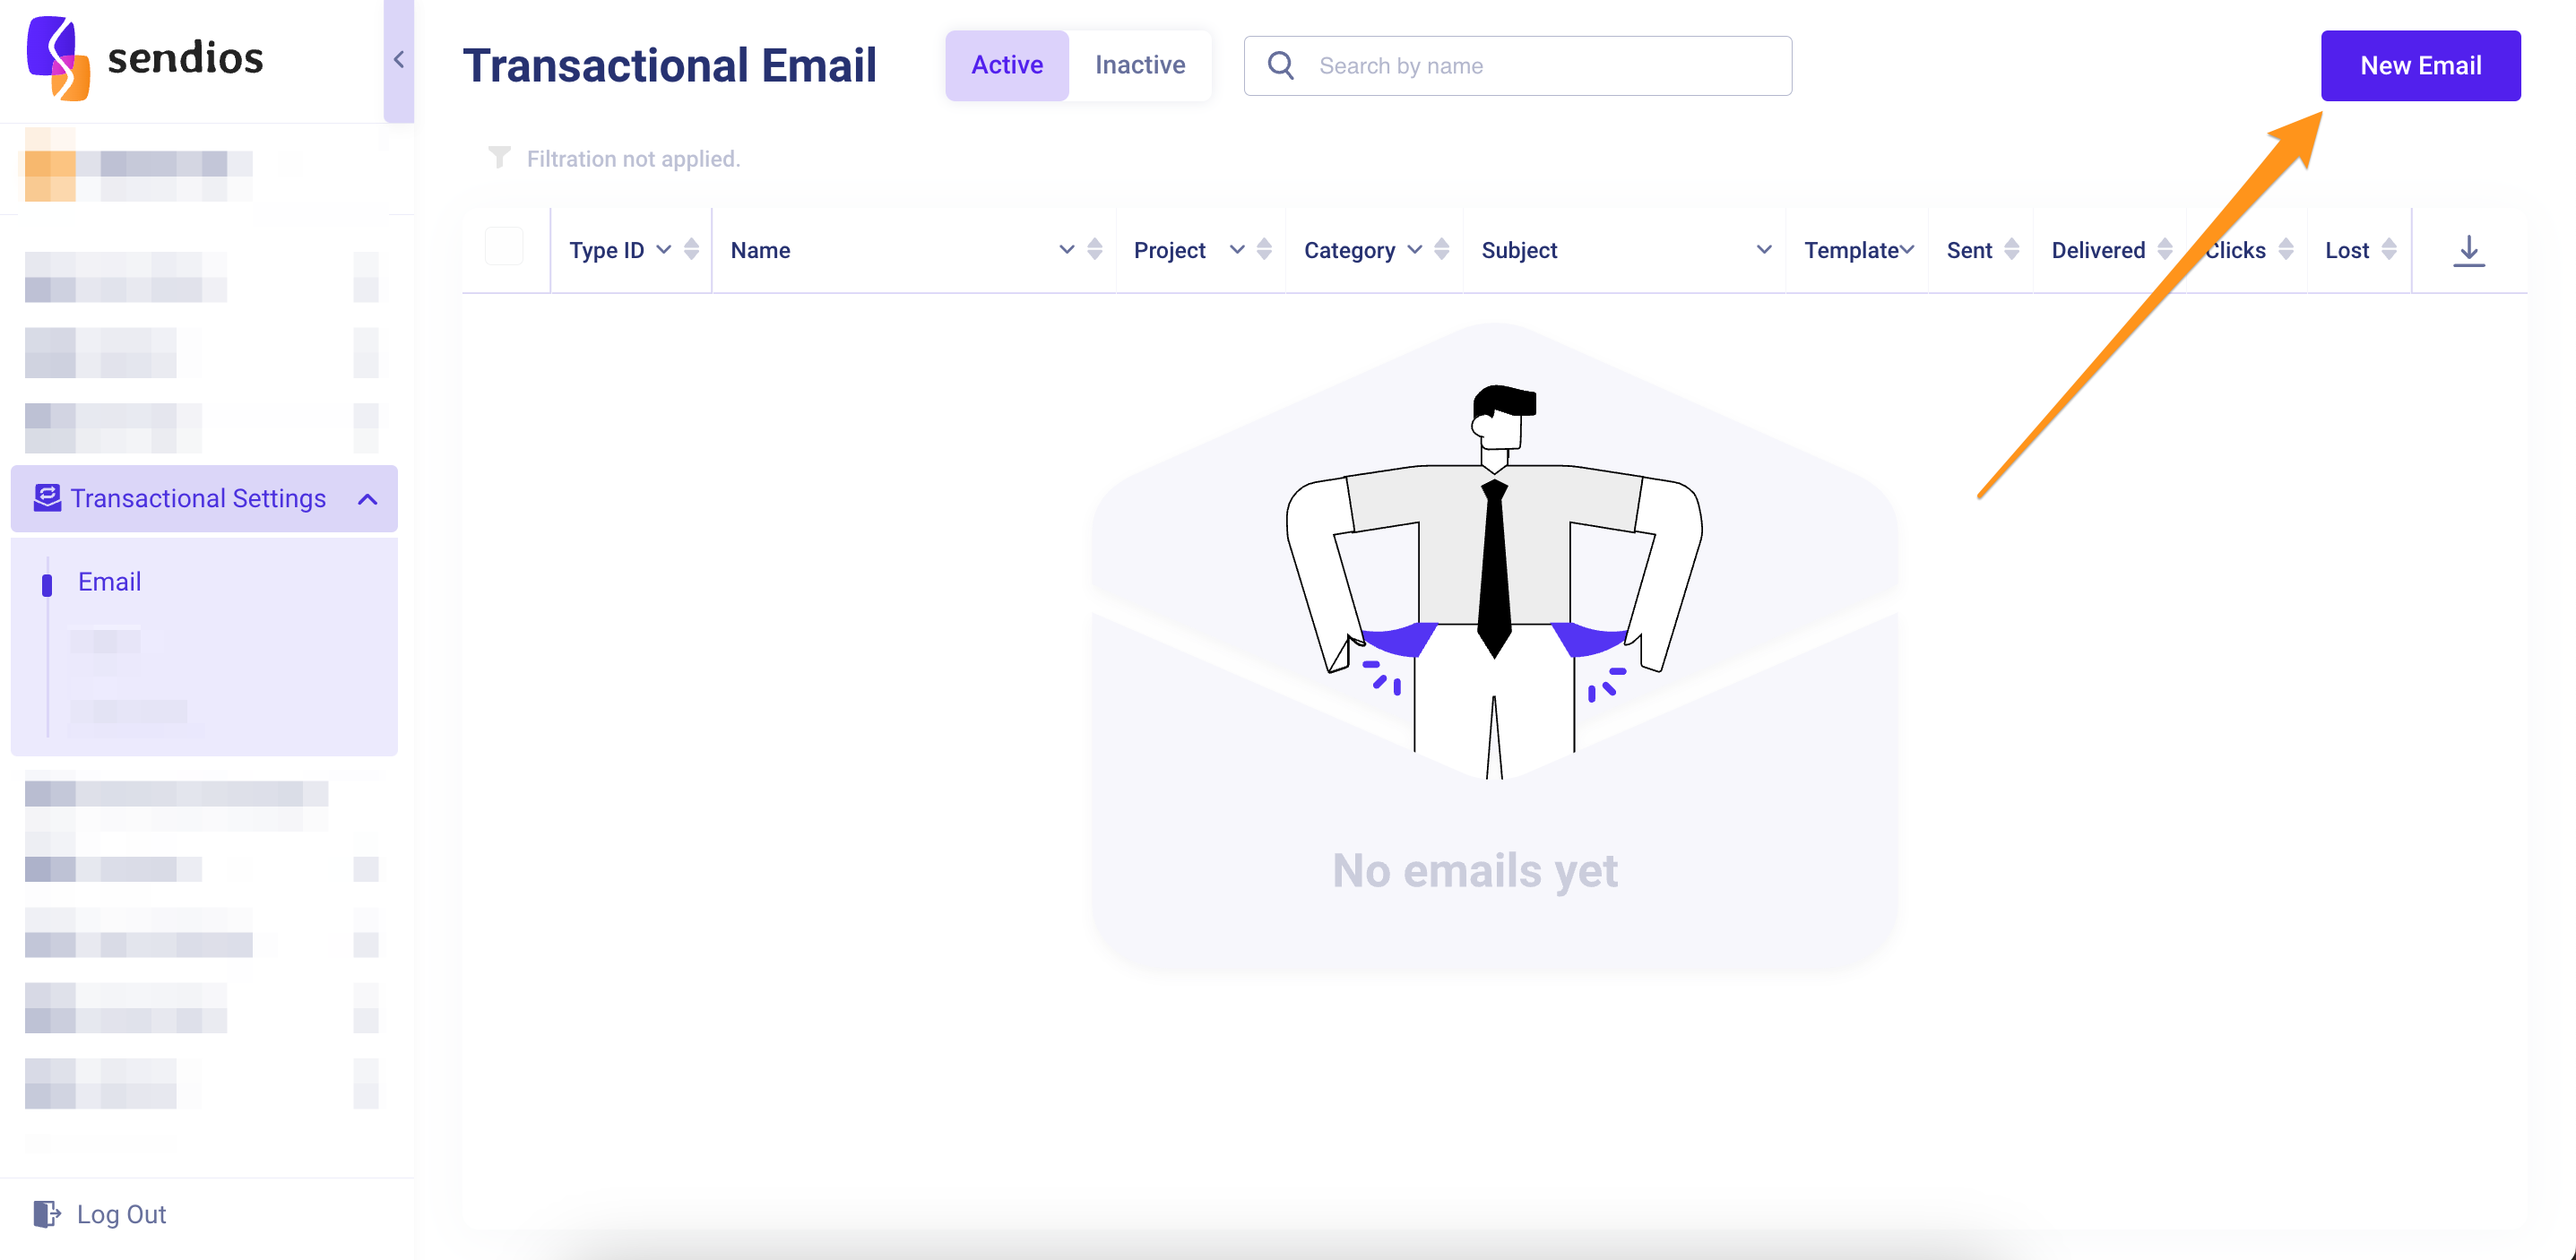
To create a transactional email, go to the Transactional emails page and click on New Email. You also can access the list of your transactional emailss on this page.
2. Filling in the main information
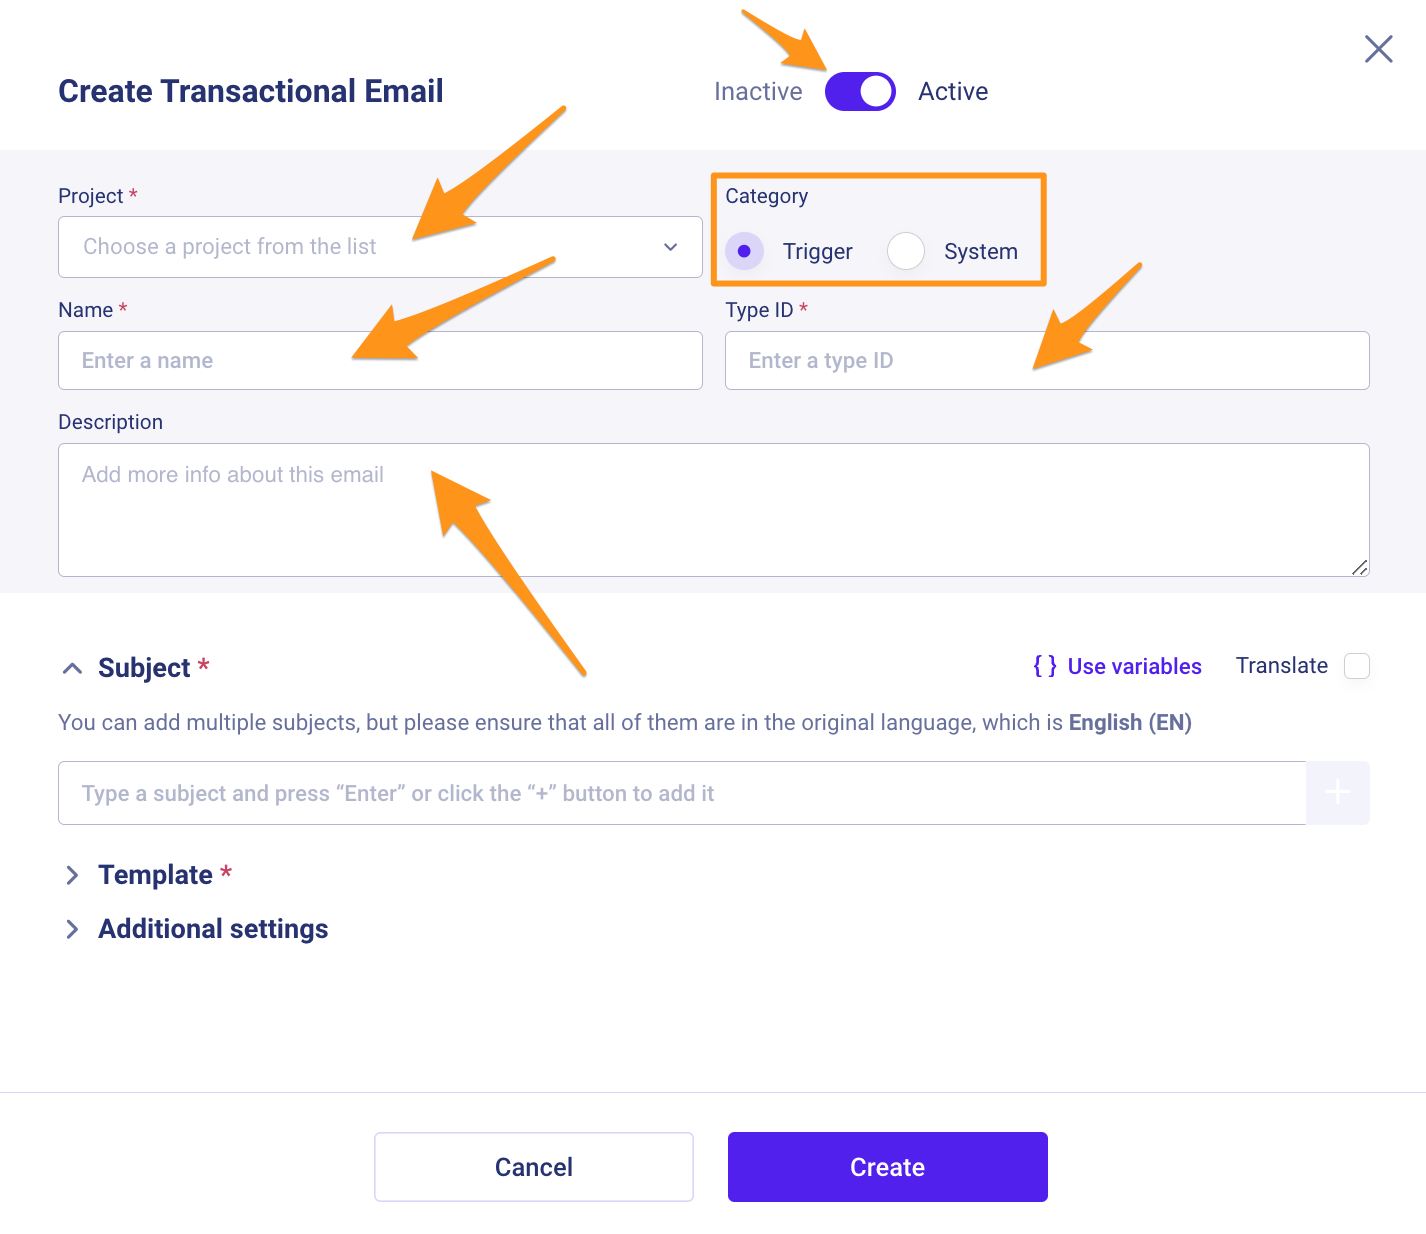
In the first section of the window that opens:
- Project – select the Project for which you are creating the transactional emails from the list of existing projects;
- Name – enter a name for the transactional email;
- Category – choose a category (trigger email or system email);
- ID – enter an identifier;
- Description – add description to the transactional email.
Please note that this is not the ID of the transactional email.
Therefore, multiple transactional emails can have the same ID (as long as they have a different combination of Type ID + Project).
How do we recommend using it?
Use the same Type ID for emails of the same type. For example, all "Welcome" emails can have Type ID 1, all "Reset Password" emails – Type ID 2, etc.
2.1 Store PDF option for system emails
Store PDF (available only for system emails) – enabling this option will store sent system emails in the Sendios system for 1 month. To download them in PDF format, navigate to the Users → Webhooks page and select the desired user.

Read more about downloading the PDF file in [New] User Profile article in section How to download PDF file of sent system email?.
3. Adding the email subject
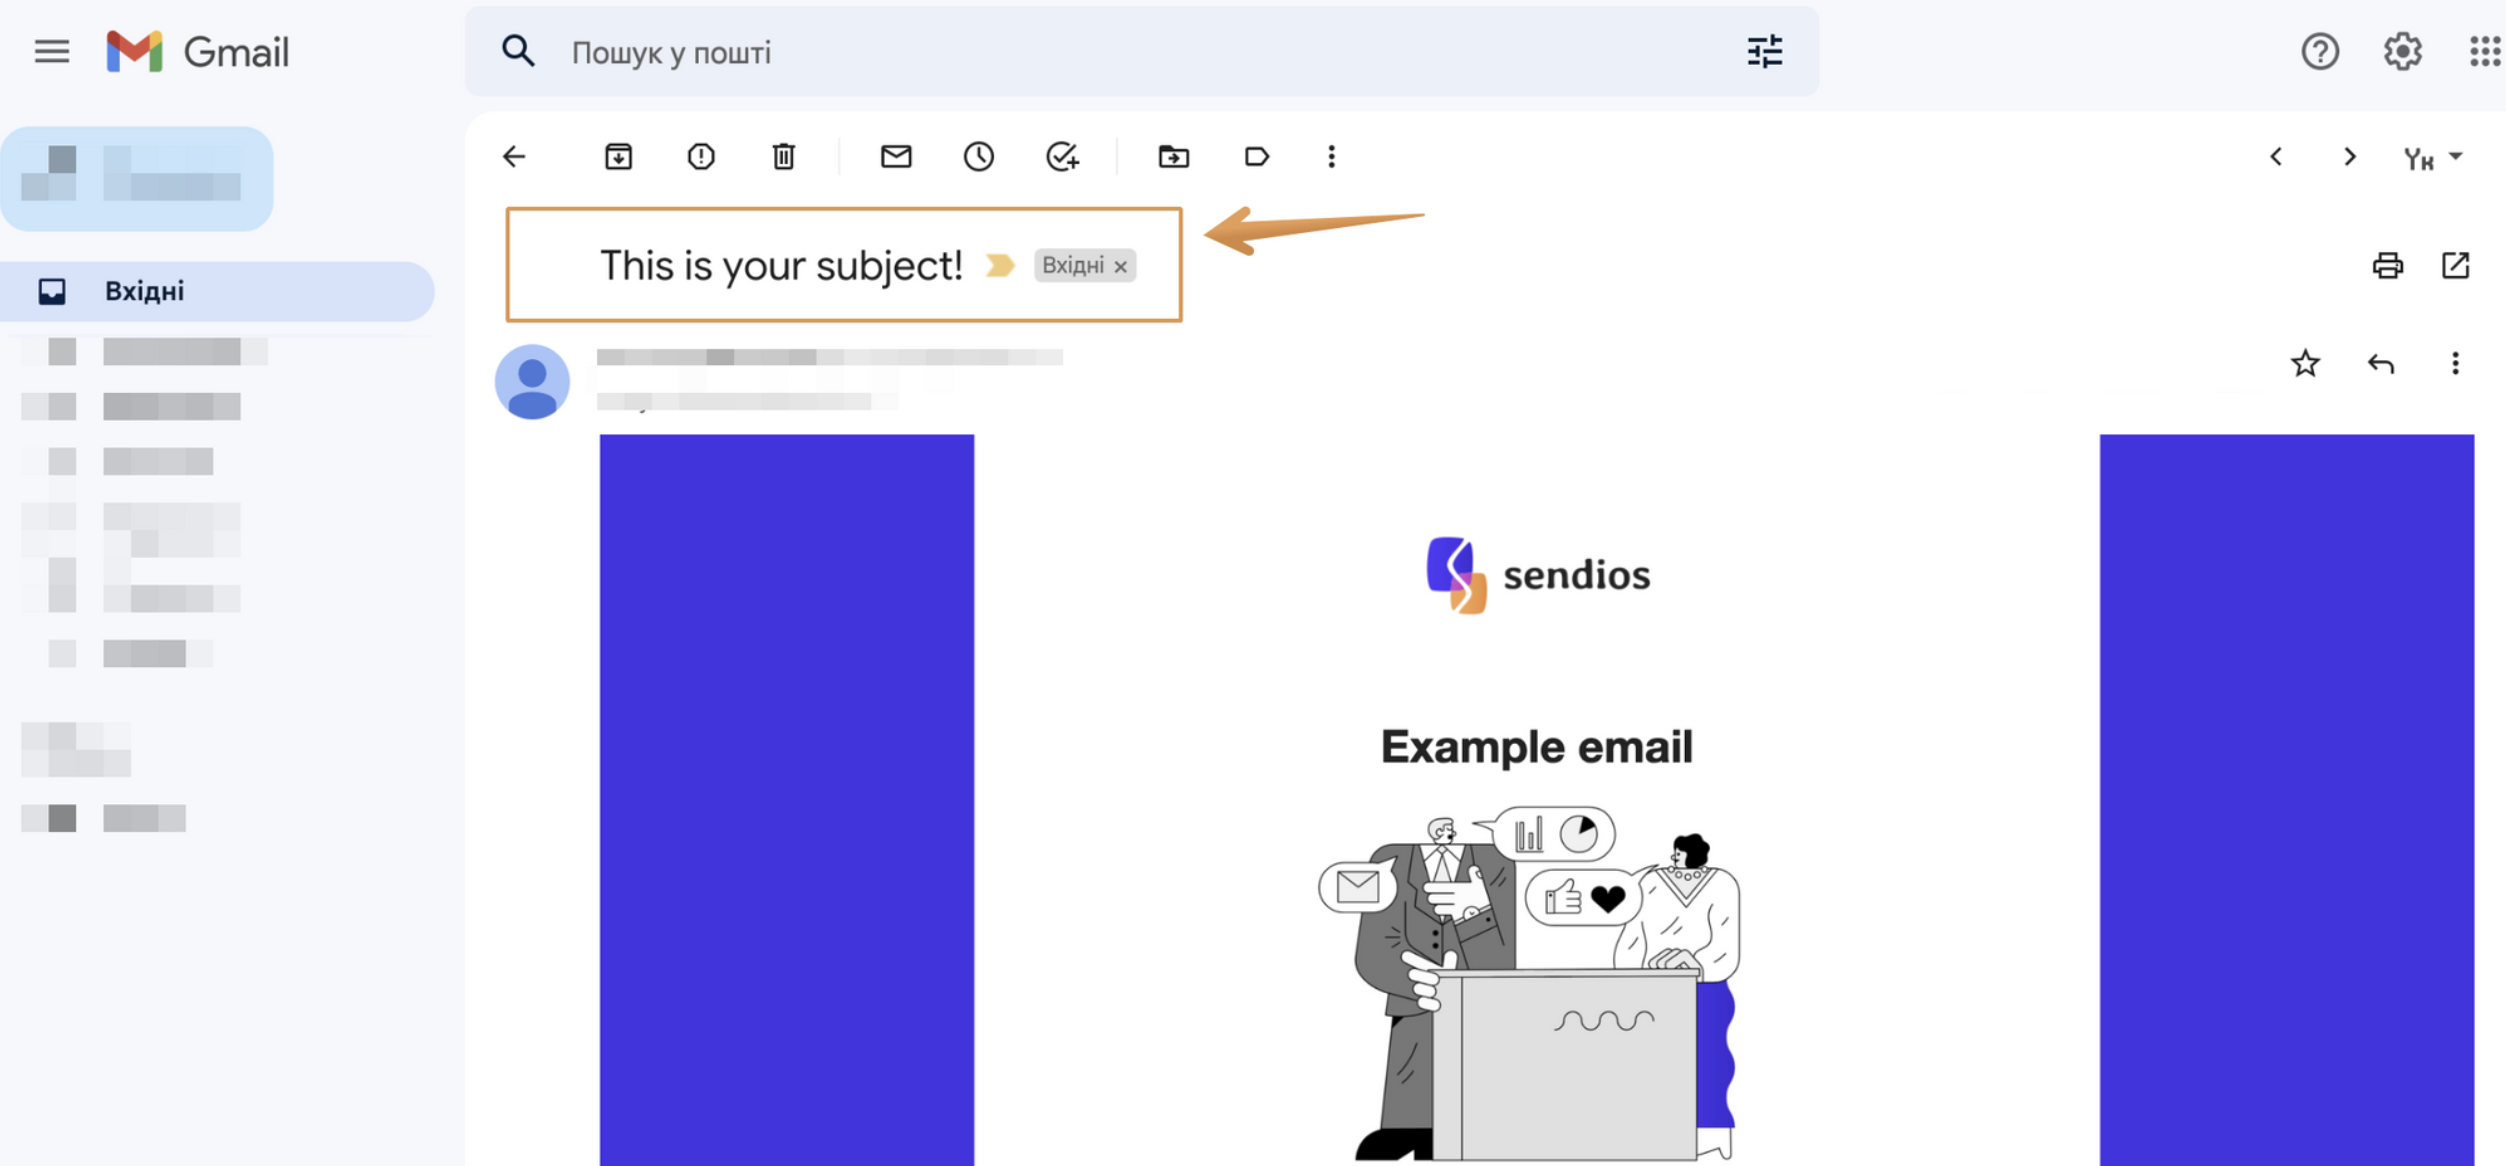
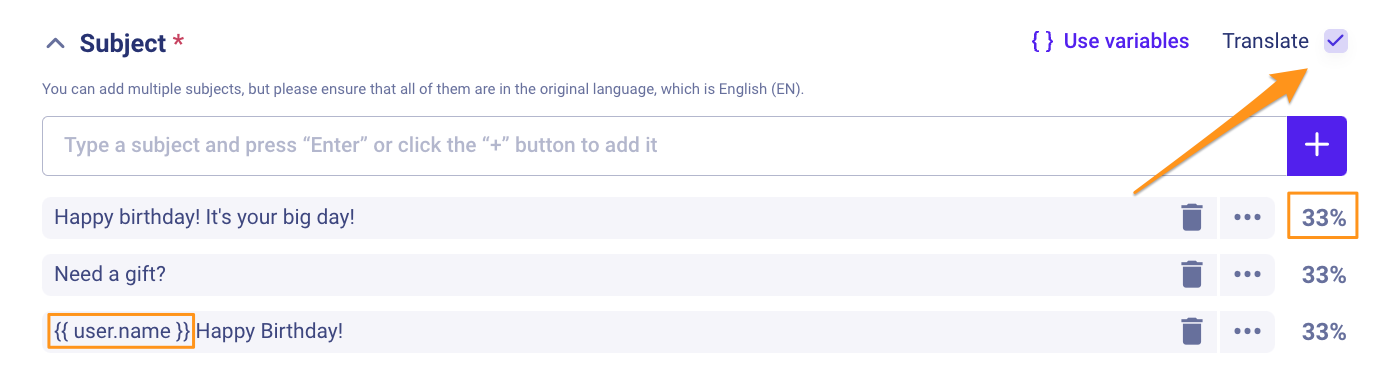
In the next Subject section, add the subject of the email by clicking + or pressing Enter.

The subject is the first thing recipients see and helps them understand the purpose of the email.
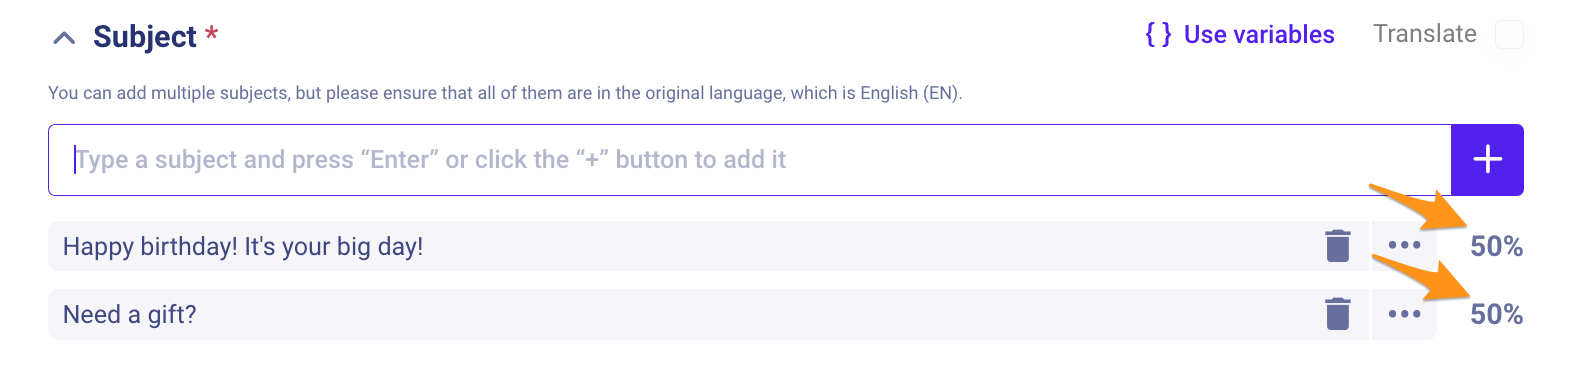
You can add one or several subjects. The user will receive an email with one of the existing subject options based on the indicated probability.
3.1 Using variables
You can also use variables in the email subject. The values for these variables are passed through the API endpoint.
Variables are entities that represent dynamic values, numeric or text, which can vary based on the context. They are used to personalize and customize content in transactional emails.
For example, the variable {{user.name}} can be replaced with the actual name of each user, providing a unique experience for recipients.
3.2 Translate functionality
If you want to use translations for your subject, please contact your CSM to activate this option. Once activated, you can enable the Translate checkbox.
4. Adding a template
Move to the Templates section. Here, you can add a template for the transactional email. Similar to adding multiple email subjects, you can add multiple templates for one transactional email.
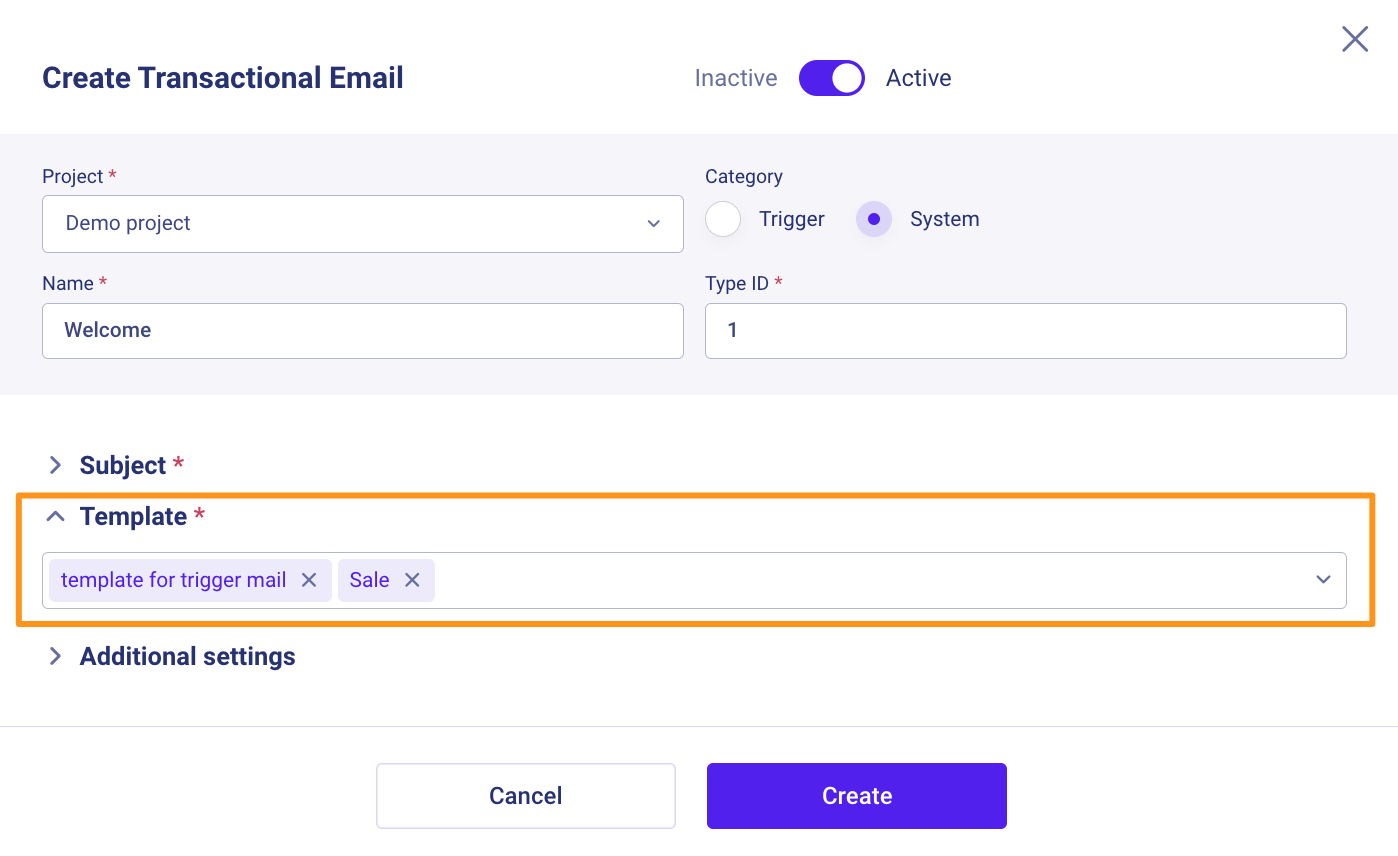
With two email subjects created and two templates added, you will have four options for your email. Each option may be sent to the user with a probability of 25%.

Learn how to create a template in the corresponding article How to create a template?.
You can also preview a template by clicking on its name in this section.
5. Configuring custom settings
The last section, Additional settings, is optional. Here, you can configure custom values for:
- Sender name – the name of the sender that recipients see in the email;
- Sender email – the email address from which the email is sent;
- Reply to – the email address where replies to your email will be received.
These custom values are only used for these particular transactional emails.
If you don't add custom values, the default values you configured when creating the Project will be used. The default values are highlighted in red below each input field.
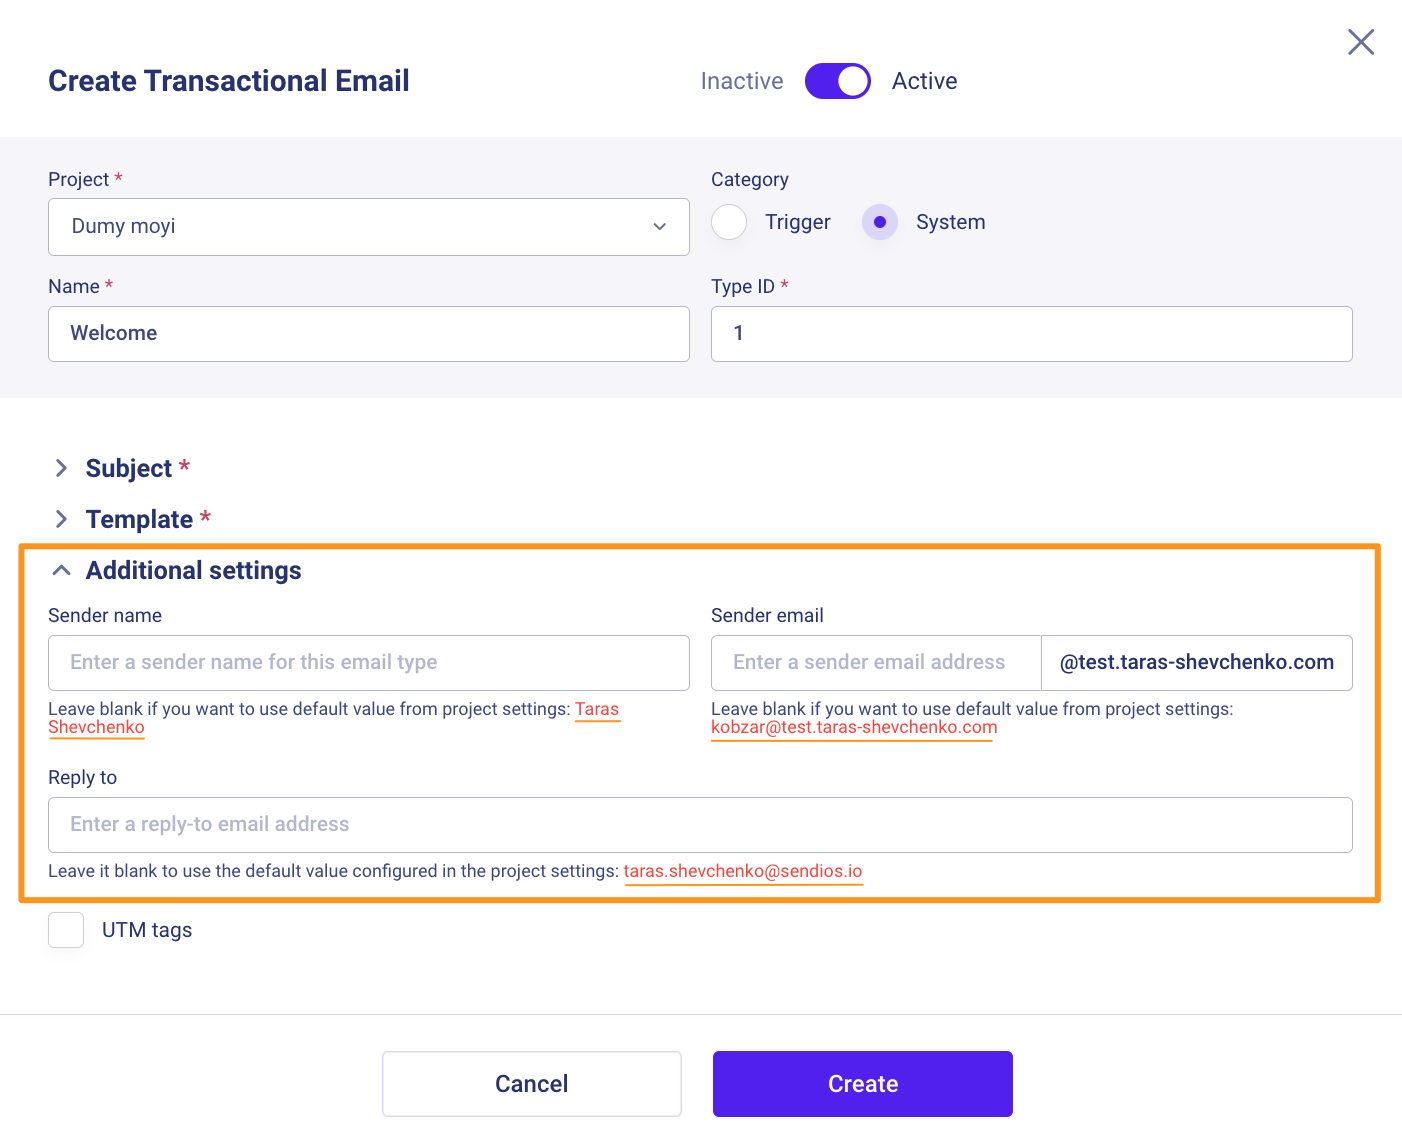
5.1 UTM tags
In the Additional settings section, you can also add UTM tags. These tags help you gather information about each traffic source.

Updated over 2 years ago