Sender Domain configuration
The article provides detailed instructions on adding and verifying a new Sender Domain for successful email delivery.
Why configure sender domains?
When receiving emails, postal systems verify whether the sender is authorized to send them on your behalf. If the emails are not verified, they might end up discarded as "Spam" or labeled as "Dangerous."
To prevent this from happening, we strongly advise all our customers to configure and validate their sender domains. This process does not take much time and is limited to adding specific DNS settings for your Domain.
You can find more details about this in our article on Domain settings.
View your sender domains
To view your existing sender domains and add new ones, navigate to the Project Settings → Sender Domains tab.
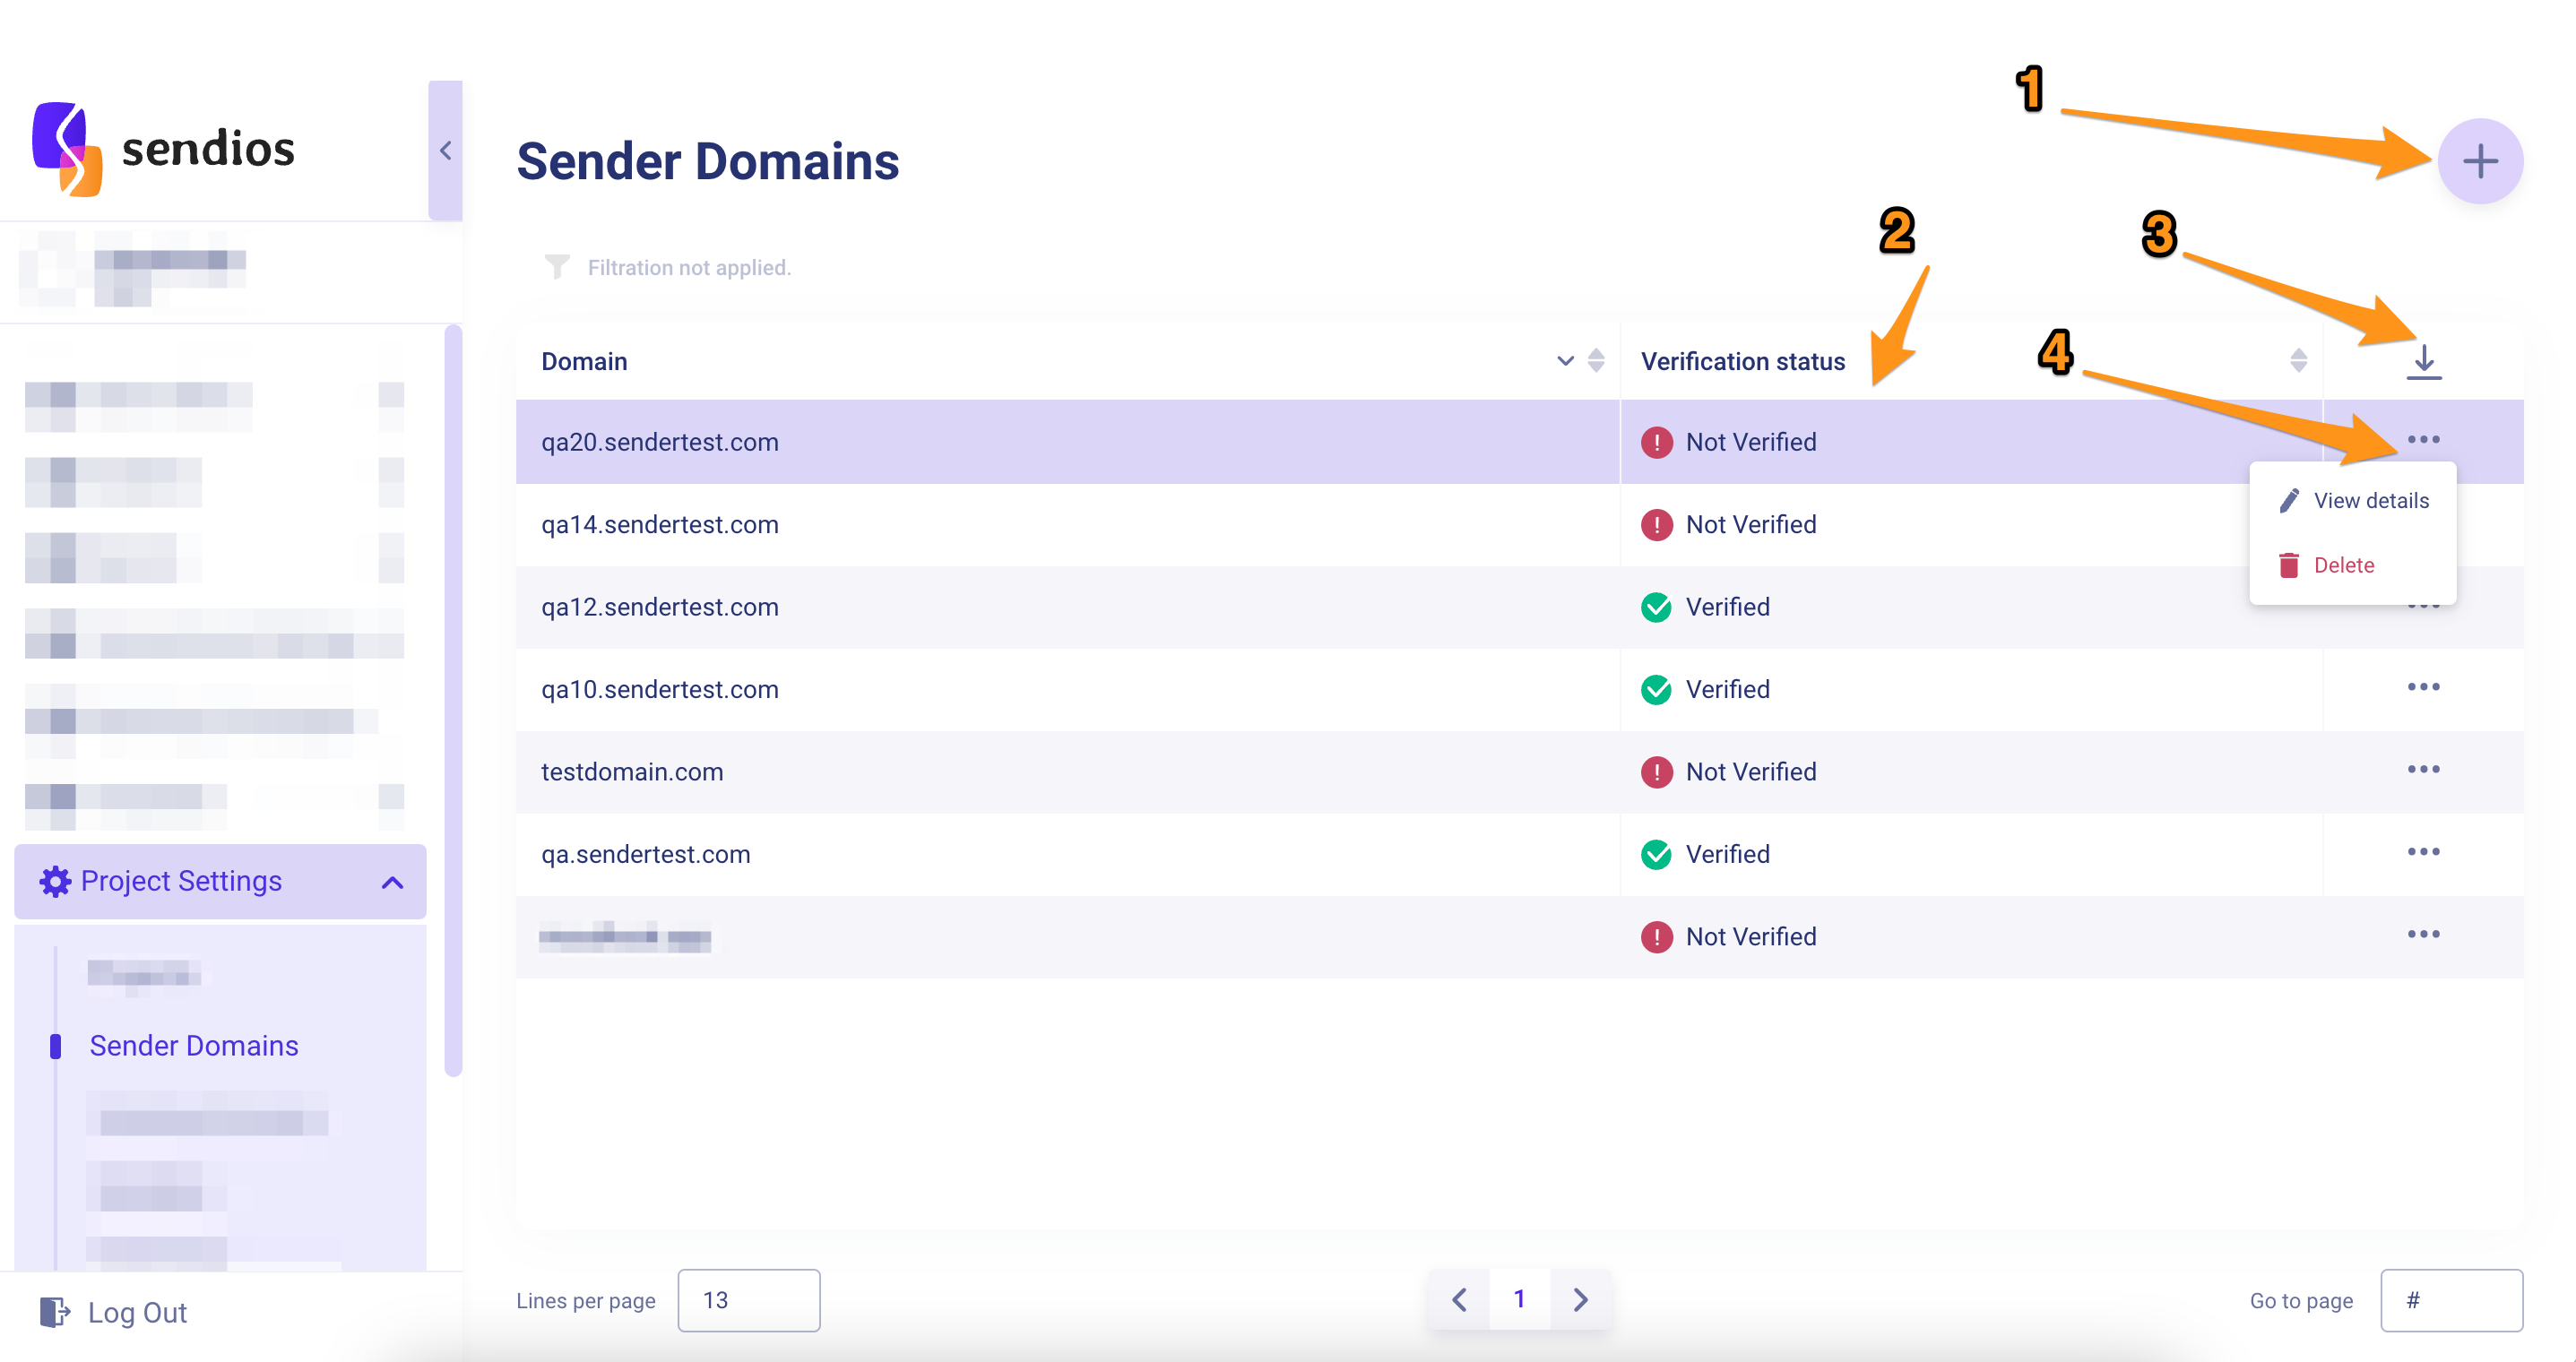
The numbers on the screenshot indicate the following:
- Adding a new Sender Domain;
- Reviewing the validation statuses of the existing domains (checked once a day to promptly detect any issues by our system);
- Ability to export a table with data in CSV format;
- Viewing and / or deleting the Domain.
Pleaser note: you can only delete a Sender Domain after unlinking it from all your projects. The system won't allow you to delete it before this step is completed.
Add a new Sender Domain
To set up a new Sender Domain, follow these steps:
- Choose between http or https protocol for your Domain;
- Enter the Domain address;
- Click Create button.
It's crucial to choose the correct protocol value, as it may be used in templates to create personalized links in the future.

Next, you will need to add some records for your Sender Domain. Please be aware that specific entries must be added for a particular sub-domain:
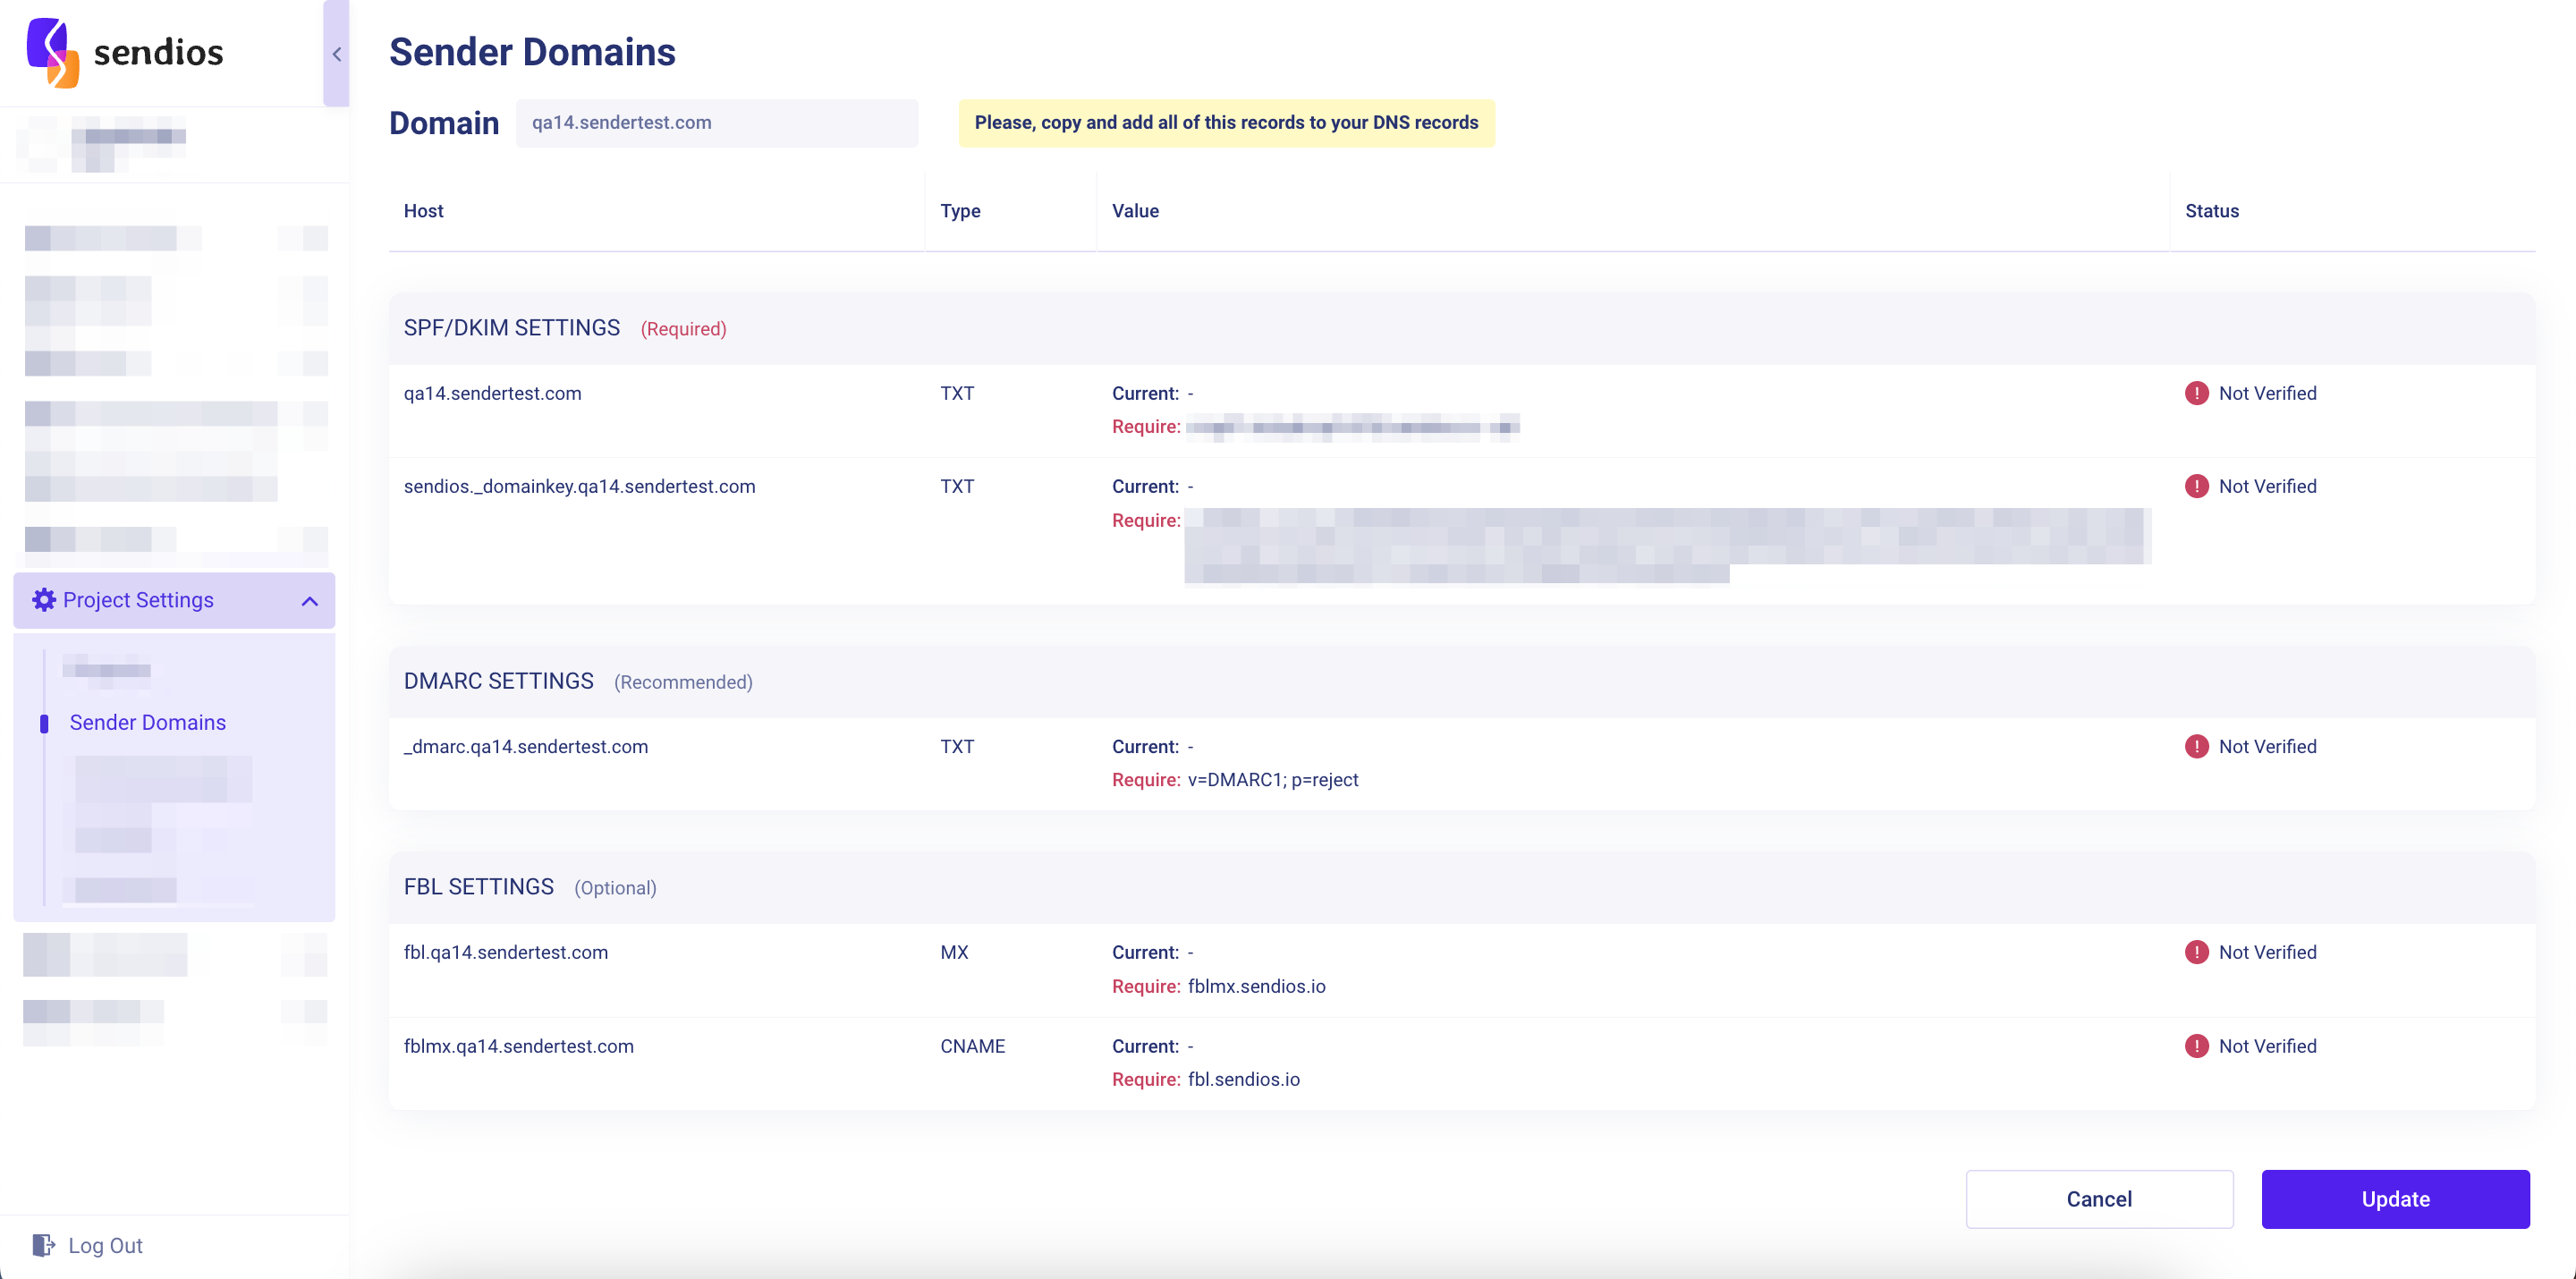
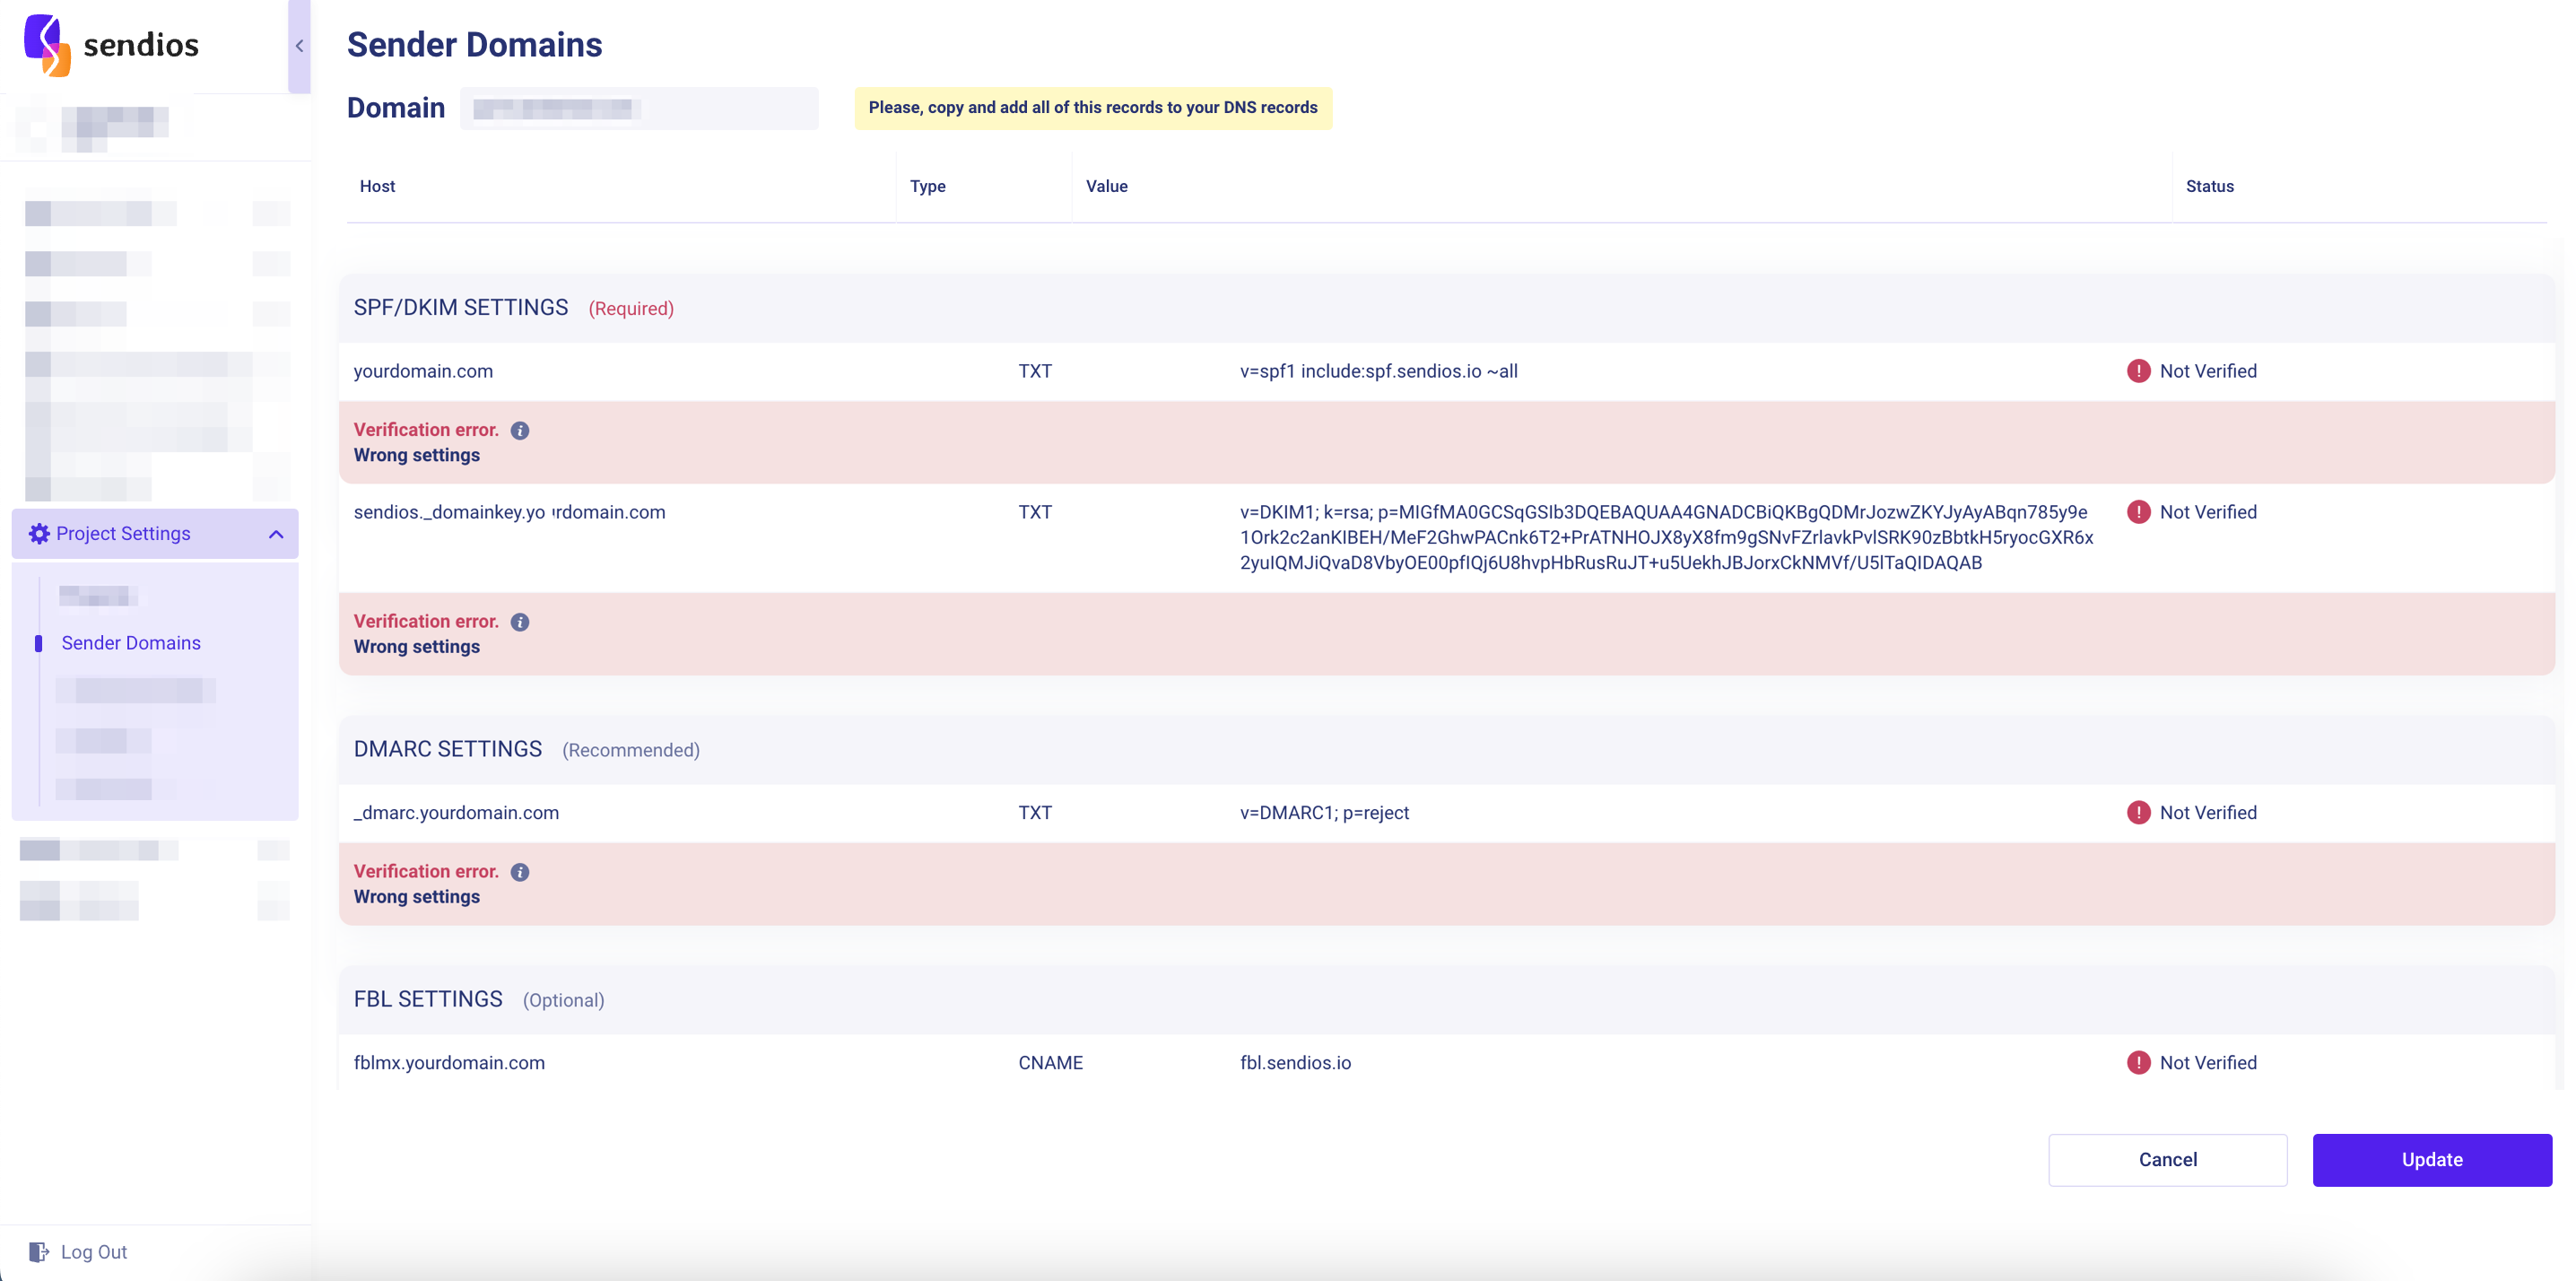
After configuring all the necessary settings, you can update the verification status of the records by clicking the Update button. If any of the records remain "Not verified," an error message will be displayed:
SPF and DKIM records are mandatory and must be set correctly for the Domain to obtain a "Verified" status.
DMARK and FBL are optional, but it is advisable to add them as well.
If you use SPF record not only for the Sendios system, you must combine the entries into one record.
Having two separate records may conflict and prevent successful verification.
Combine multiple SPF records
Using separate entries for different SPF records may result in conflicts hindering the successful verification of the Sender Domain on our side:
v=spf1 include:mail.zendesk.com ~all & v=spf1 include:spf.4647.sendios.io ~all
If you use SPF records for external services, apart from the Sendios system, you must combine all SPF records into one using the following structure:
v=
Include: [SPF-запис №1]
Include: [SPF-запис №2]
Include: [SPF-запис №3]
~all
v=spf1 include:spf.4647.sendios.io include:mail.zendesk.com ~all
Please note that due to the specifics of Sender Domain settings, record verification can take up to 24 hours.
If your records do not have view permissions for external services, we won't be able to verify them. In such cases, we recommend consulting your CSM.
Our system automatically checks the Sender Domain settings in the background every 24 hours. If there are any issues, the information will appear in the admin panel.
Updated over 2 years ago