List of your transactional emails
Viewing your transactional emails
You can find your list of transactional emails on the Transactional emails page. The list displays all the fields you filled in when creating the transactional email, including:
- Type ID – the identifier you assigned to specific types of transactional emails;
- Name – the name of the transactional email;
- Project – the Project for which the transactional email was created;
- Category – the category: trigger email or system email;
- Subject – the subject of the email;
- Template – the template used for the email.
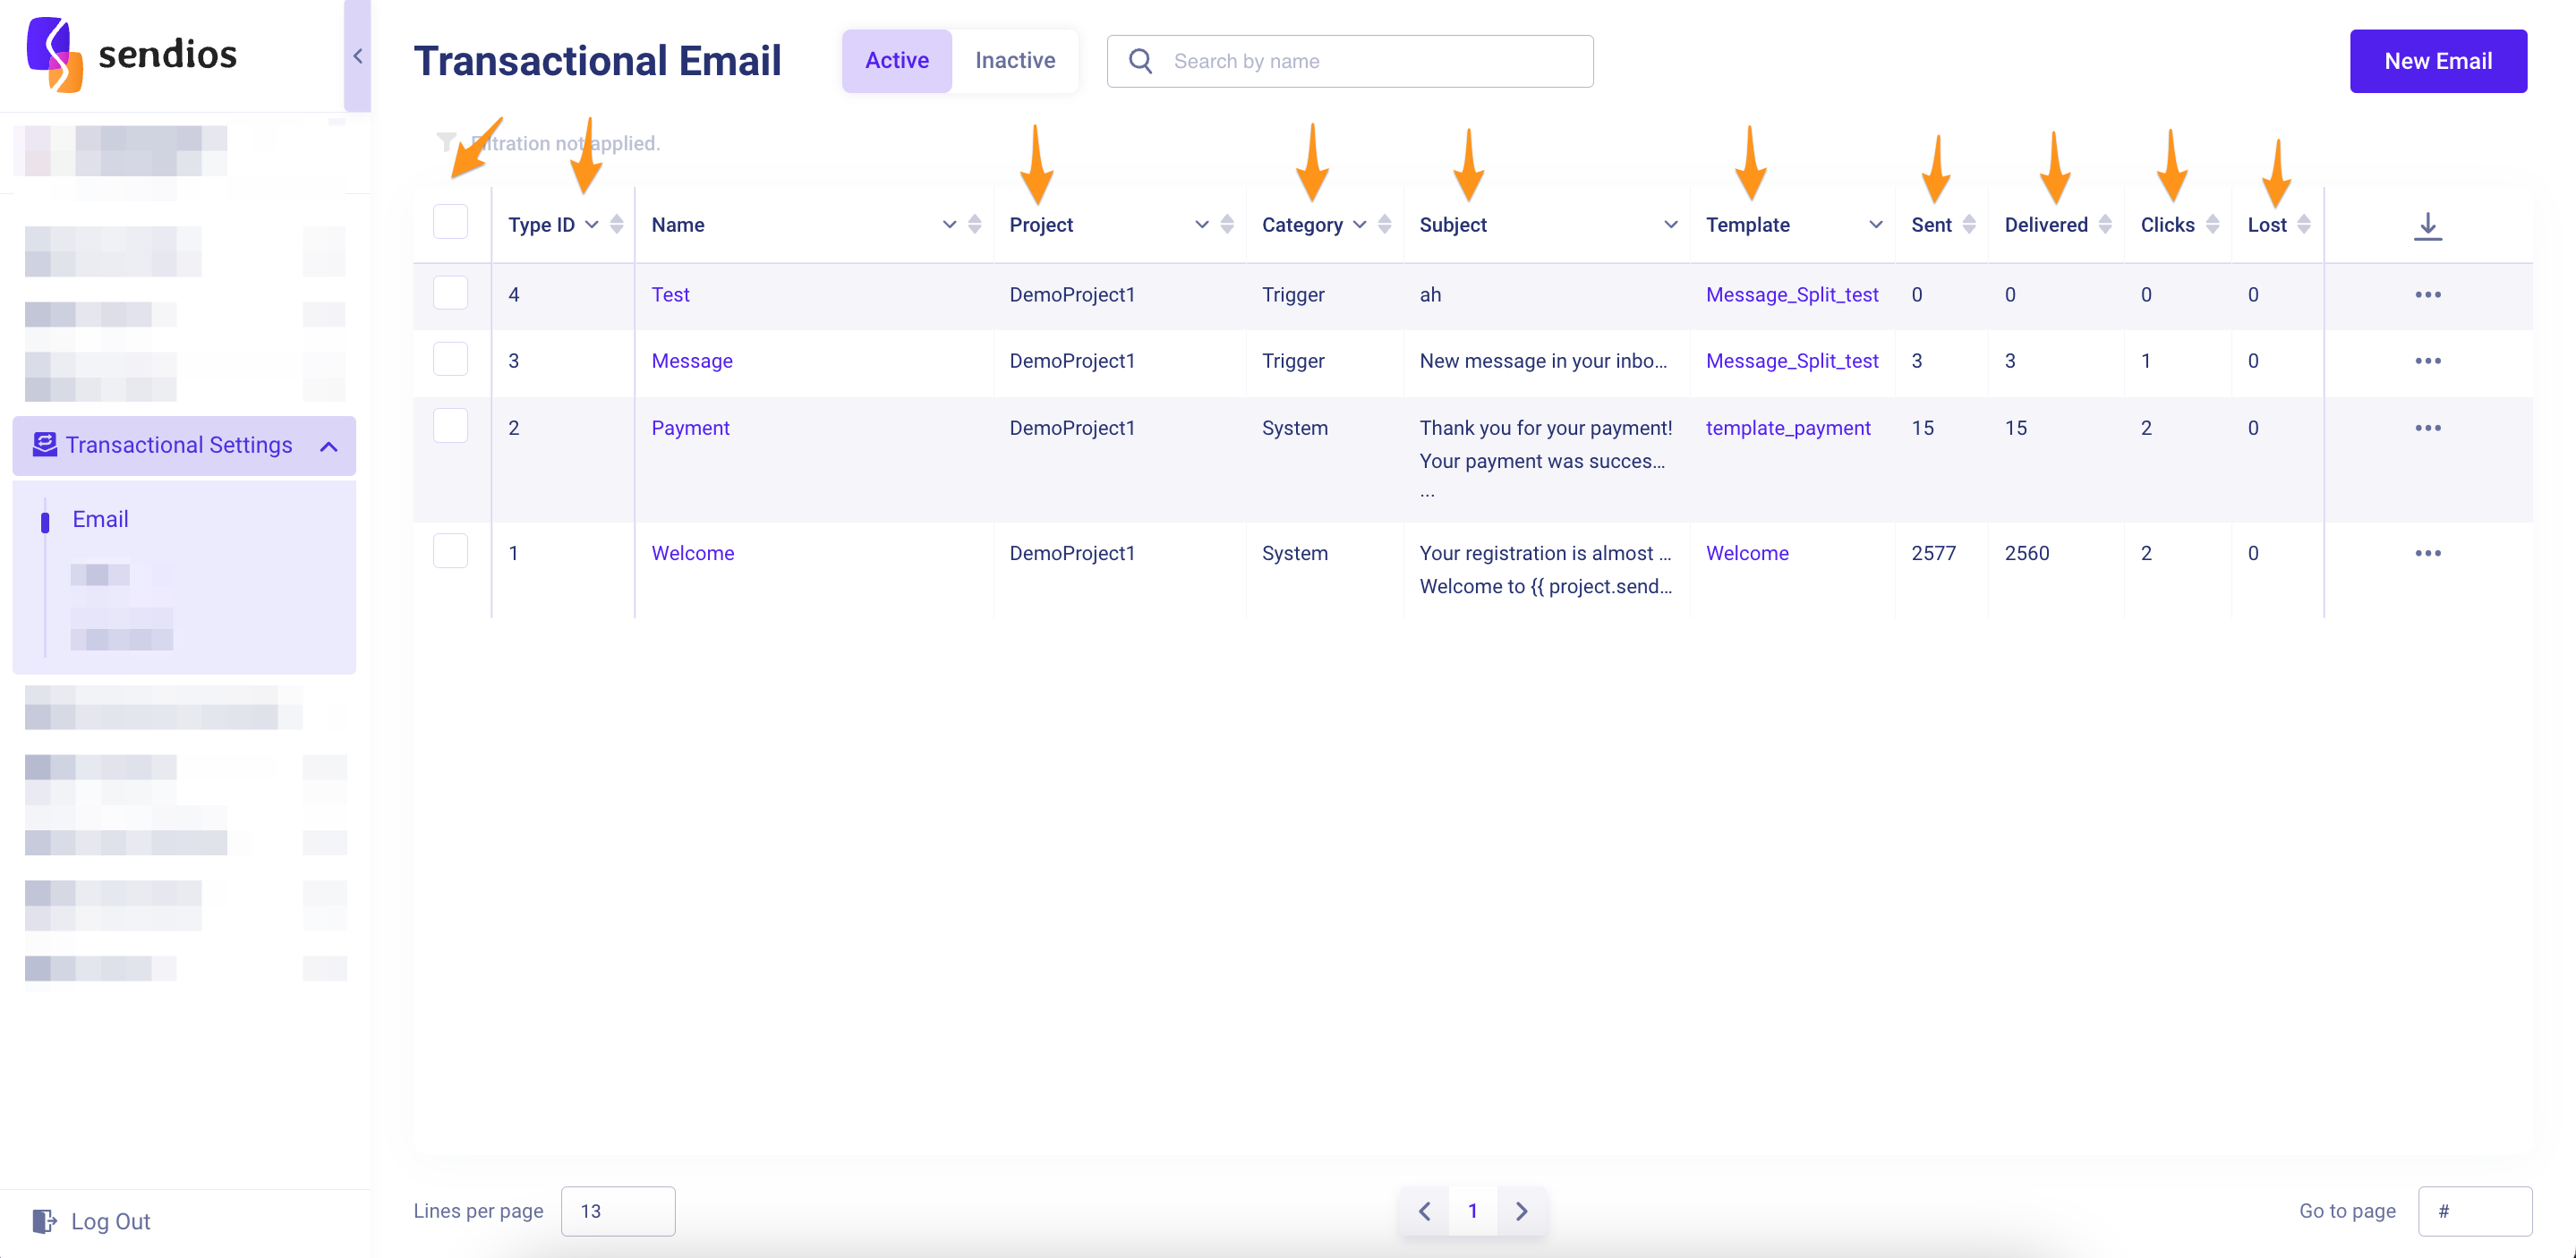
You can also review statistics for sent transactional emails:
- Sent – the total number of sent emails;
- Delivered – the total number of delivered emails;
- Clicks – the total number of clicks in emails;
- Lost – the total number of emails that were not delivered to the user.
Additional options
The page also offers the following features:
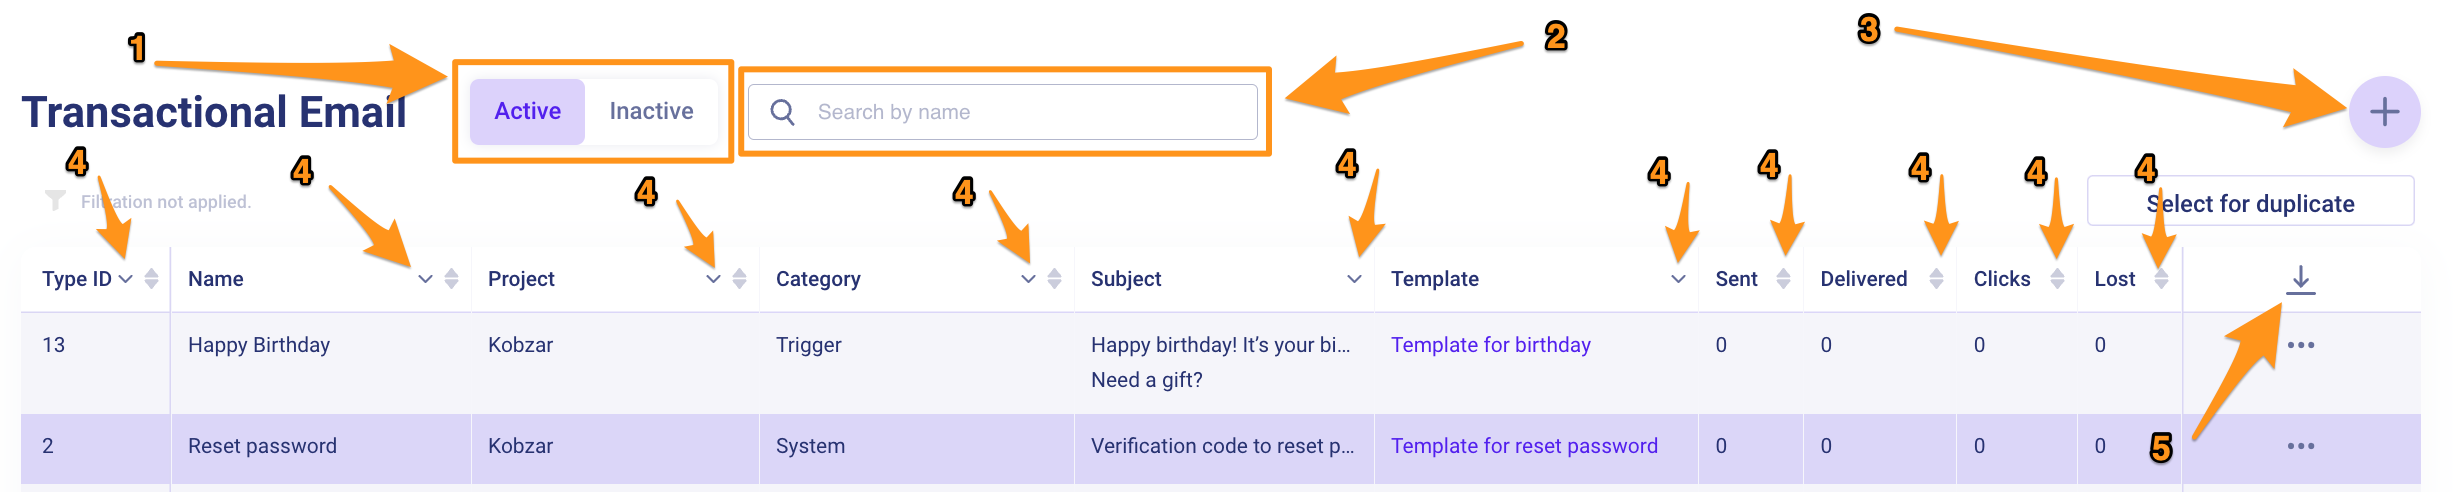
- Active / Inactive – tabs with the lists of active and deactivated emails;
- Search by name – search function by the name of the transactional email;
- Button New Email – to create a new transactional email;
- Sorting and filtering by each field in the list;
- Ability to export the entire list of transactional emails to a CSV file.
Copying transactional email
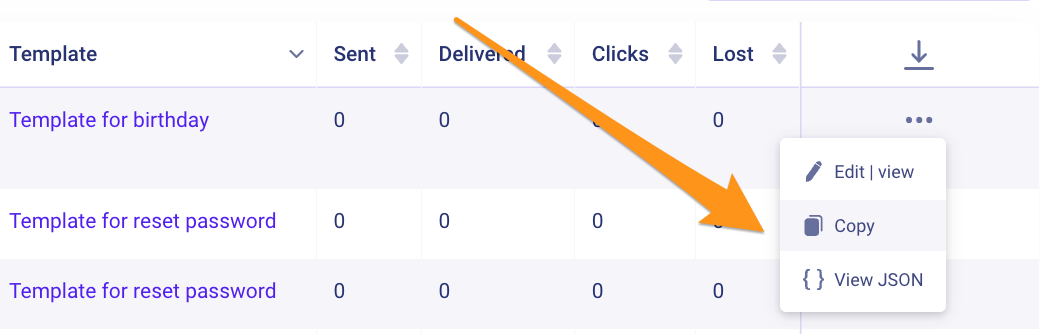
Additionally, an important function available is the copying of transactional emails:
- You can duplicate a transactional email from one Project to another by clicking the three dots → Copy option.
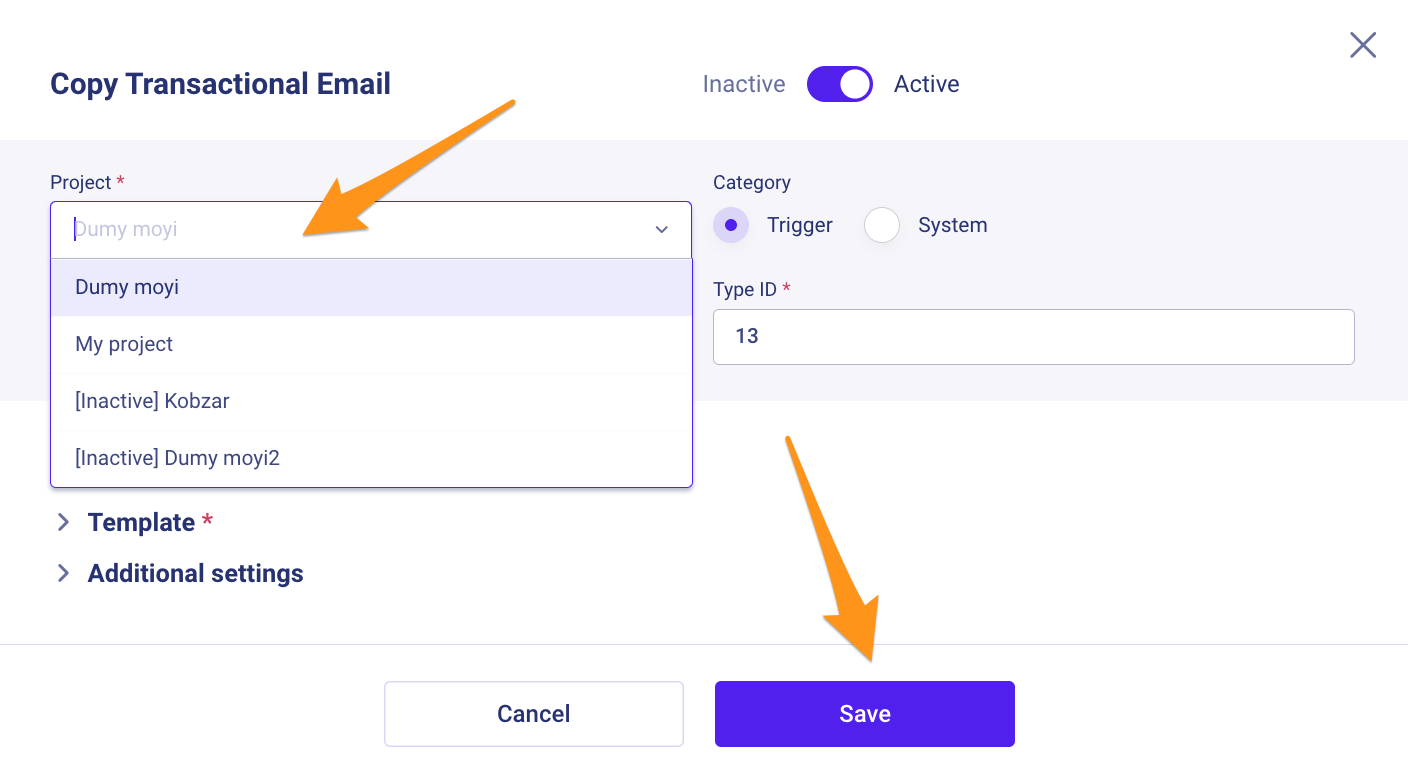
In the open window, select the name of another Project for which you want to copy the transactional email and click Save.
Copying multiple emails
You can also copy multiple transactional emails simultaneously using the Select for duplicate button:
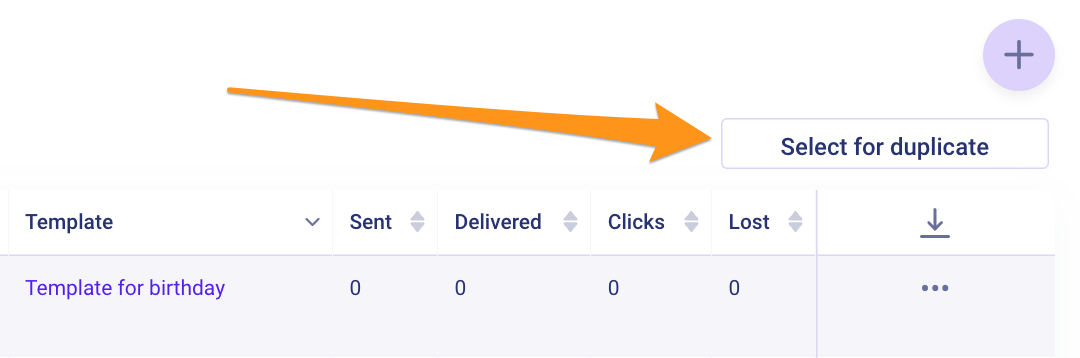
To copy multiple emails:
- Click Select for duplicate;
- Choose transactional emails with unique Type IDs, and click the Duplicate button in the top right corner;
- Select the Project(s) where you want to duplicate the selected transactional emails and click Continue;
- Follow the instructions provided in the pop-up;
- You can replace the existing Type ID with a new one by clicking Replace all, or resolve any conflicts by making the data unique with the Resolve option.
Updated over 2 years ago
Did this page help you?