Integration with Zapier
The article describes the integration process with the Zapier platform and explains the algorithm for creating Zaps. An example of integration with Pipedrive and the use of Sendios to send emails and add user data illustrates the capabilities of this integration.
Zapier is an automation platform that connects several applications. The connection is carried out according to the scheme "IF the event X happened, THEN the action Y is performed."
Where to begin?
- Complete a simple registration on Zapier.
- Provide your Customer Success Manager with the email address you used for Zapier registration.
- At the specified email address, you will receive an invitation email to gain access to Sendios applications.

- After following the link from the email, click Accept Invite and Build a Zap on this page:

- Now, you can start creating a Zap.
What is a Zap?
A Zap is a connection or integration between two or more applications that allows you to automate your daily work.
The simplest Zap consists of two steps:
- Trigger – an event that starts a process;
- Action – a thing that gets done in this case.
Zaps are launched automatically to transfer or manage data without your involvement.
Some kind of event that occurs in applications such as Google Calendar, Gmail, Pipedrive, etc., can become a trigger.
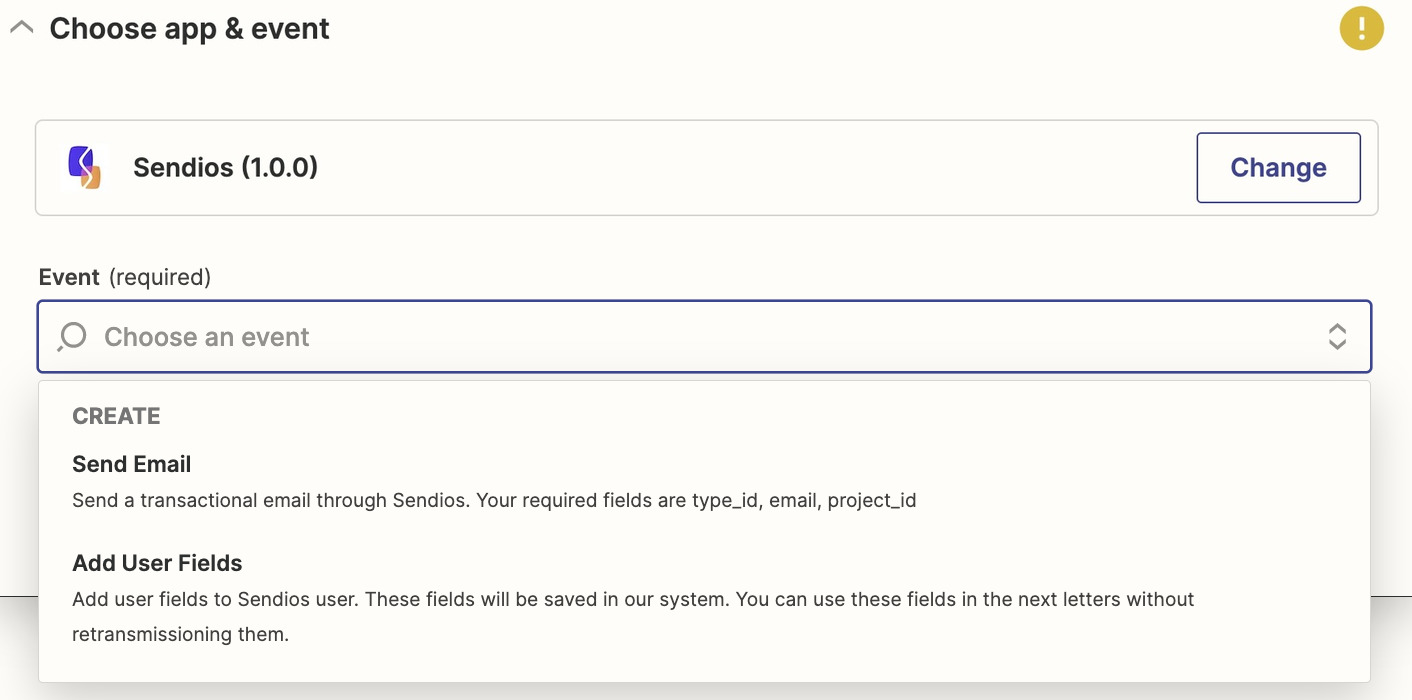
In response to this, Sendios will perform one of the following actions:
- Send email – creating a new user in the system and sending them a system email;
- Add user fields – saving user data in the Sendios system.
Pipedrive integration example
- Click the Create a Zap button on the main page.
- As the first step, choose the Pipedrive app.

- From the list of available events, select the one that suits you. In our example, it will be creating a new user in Pipedrive.

- Then, choose an account in Pipedrive to access Pipedrive data.

- The final step of the first stage is verifying the connection between Zapier and your Pipedrive account.

- After a successful test, proceed to the second stage of creating a Zap – adding an action. In the pop-up window, find Sendios.

- Select a desired event.
- Next, log in to the Sendios system by specifying your {clientId}:{api_key} encoded in base64.

It will be enough to configure it once. In the future, you will just choose your Sendios account.
Please reach out to your Customer Success Manager if you have any questions.
- Enter the data for the selected event.
More details about what information you need to specify can be found in the following chapters: Send Email, Add user fields.
- Test the configured event.

You can add several actions to one Zap, which will be performed sequentially.
- To run your Zap, click Publish Zap. Here, you can also manage all of your Zaps.

Send Email
Send a system email similar to API endpoint of sending system / trigger email.

Fields to fill:
- Email of the receiver (mandatory) – the email address to which the email will be sent;
- Transactional type ID (mandatory) – the type ID of the transactional email sent to the user. You can find it in the admin panel;
- Project ID (mandatory) – project ID also can be found in our admin panel;
- Data for letter – a block for adding dynamic variables that will be substituted into emails;
- User data – a block for adding user information, which will be stored along with other user data in the Sendios system and can be utilized later. It gives you the possibility to add other fields that may be used as variables in the email (as indicated by the product_url type key).
Add user fields
Store user data in the Sendios system similar to API endpoint of adding or updating user data.

Fields to fill:
- User data – a block for adding user information, which will be stored along with other user data in the Sendios system and can be utilized later;
- Email of the receiver (mandatory) – the email address to which the email will be sent;
- Project ID (mandatory) – you may find it in the admin panel.
Limitations
The free version of Zapier gives you access to:
- 100 tasks per month and 5 Zaps;
- Data transfer every 15 minutes.
You can learn more about the prices and services of paid versions in the Plans and pricing.
Updated over 2 years ago