How to configure the Sender Domain?
Sender Domain represents the Domain used for sending emails. It corresponds to the part of the sender's email address that comes after the "@" symbol.
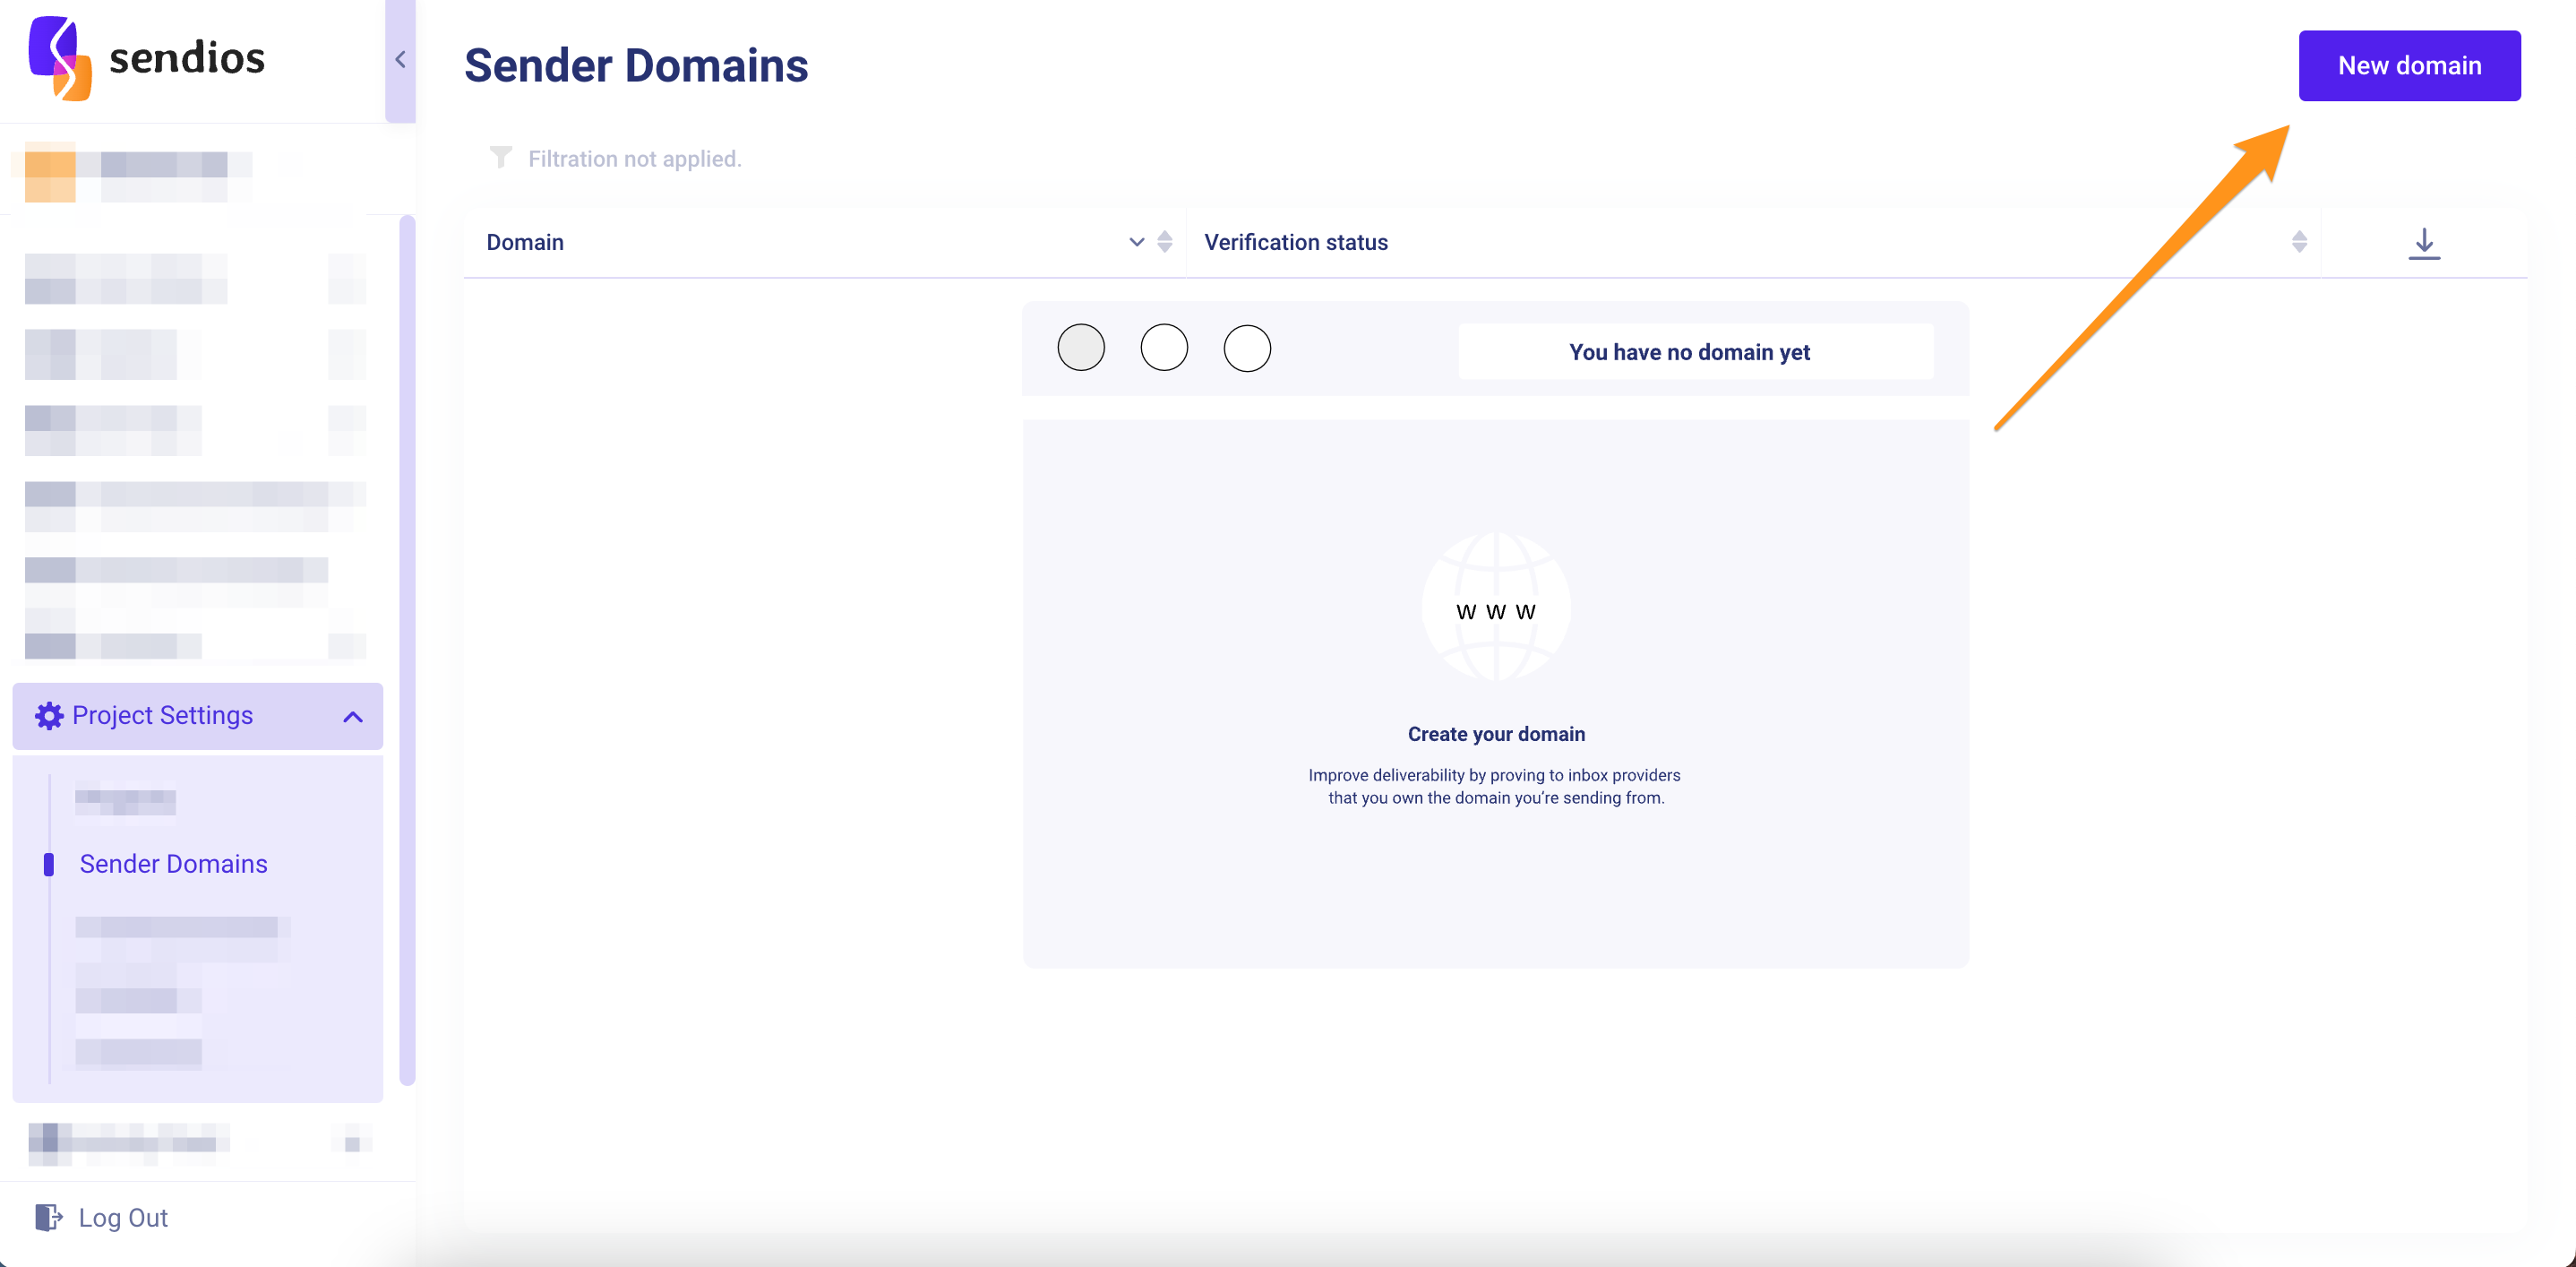
1. Adding a new Sender Domain
To add your Sender Domain, go to the Project Settings → Sender Domains page and click New domain.
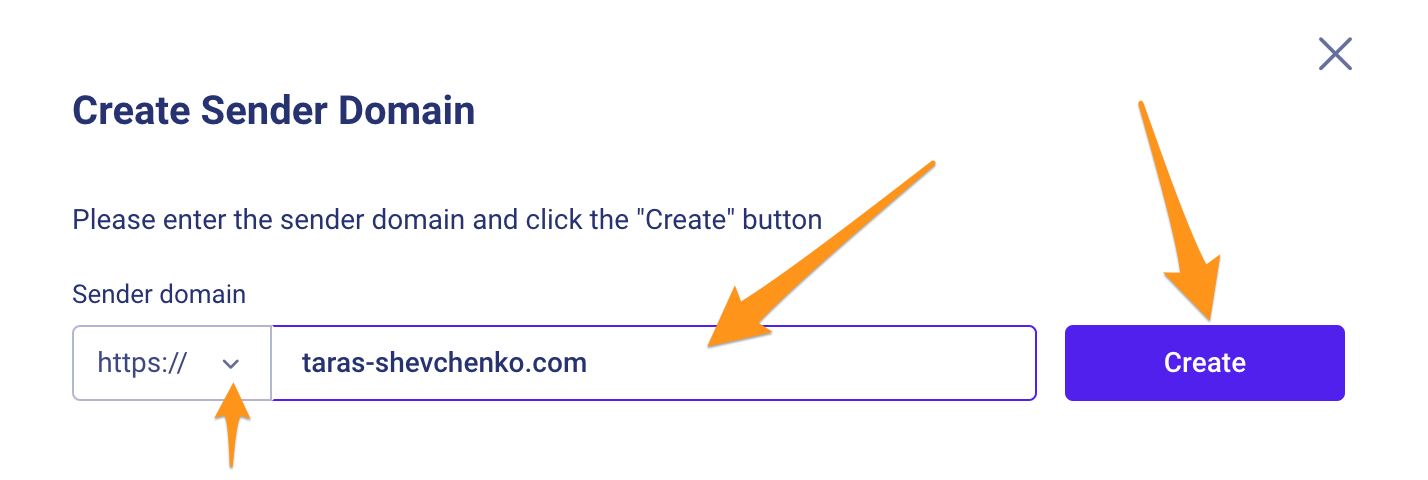
2. Entering the Sender Domain address
- Select the protocol between HTTP and HTTPS.
- Enter the address of your Domain and click Create.
3. Configuring SPF and DKIM records
You will be redirected to the Sender Domains page where you can check the status of your Sender Domain.
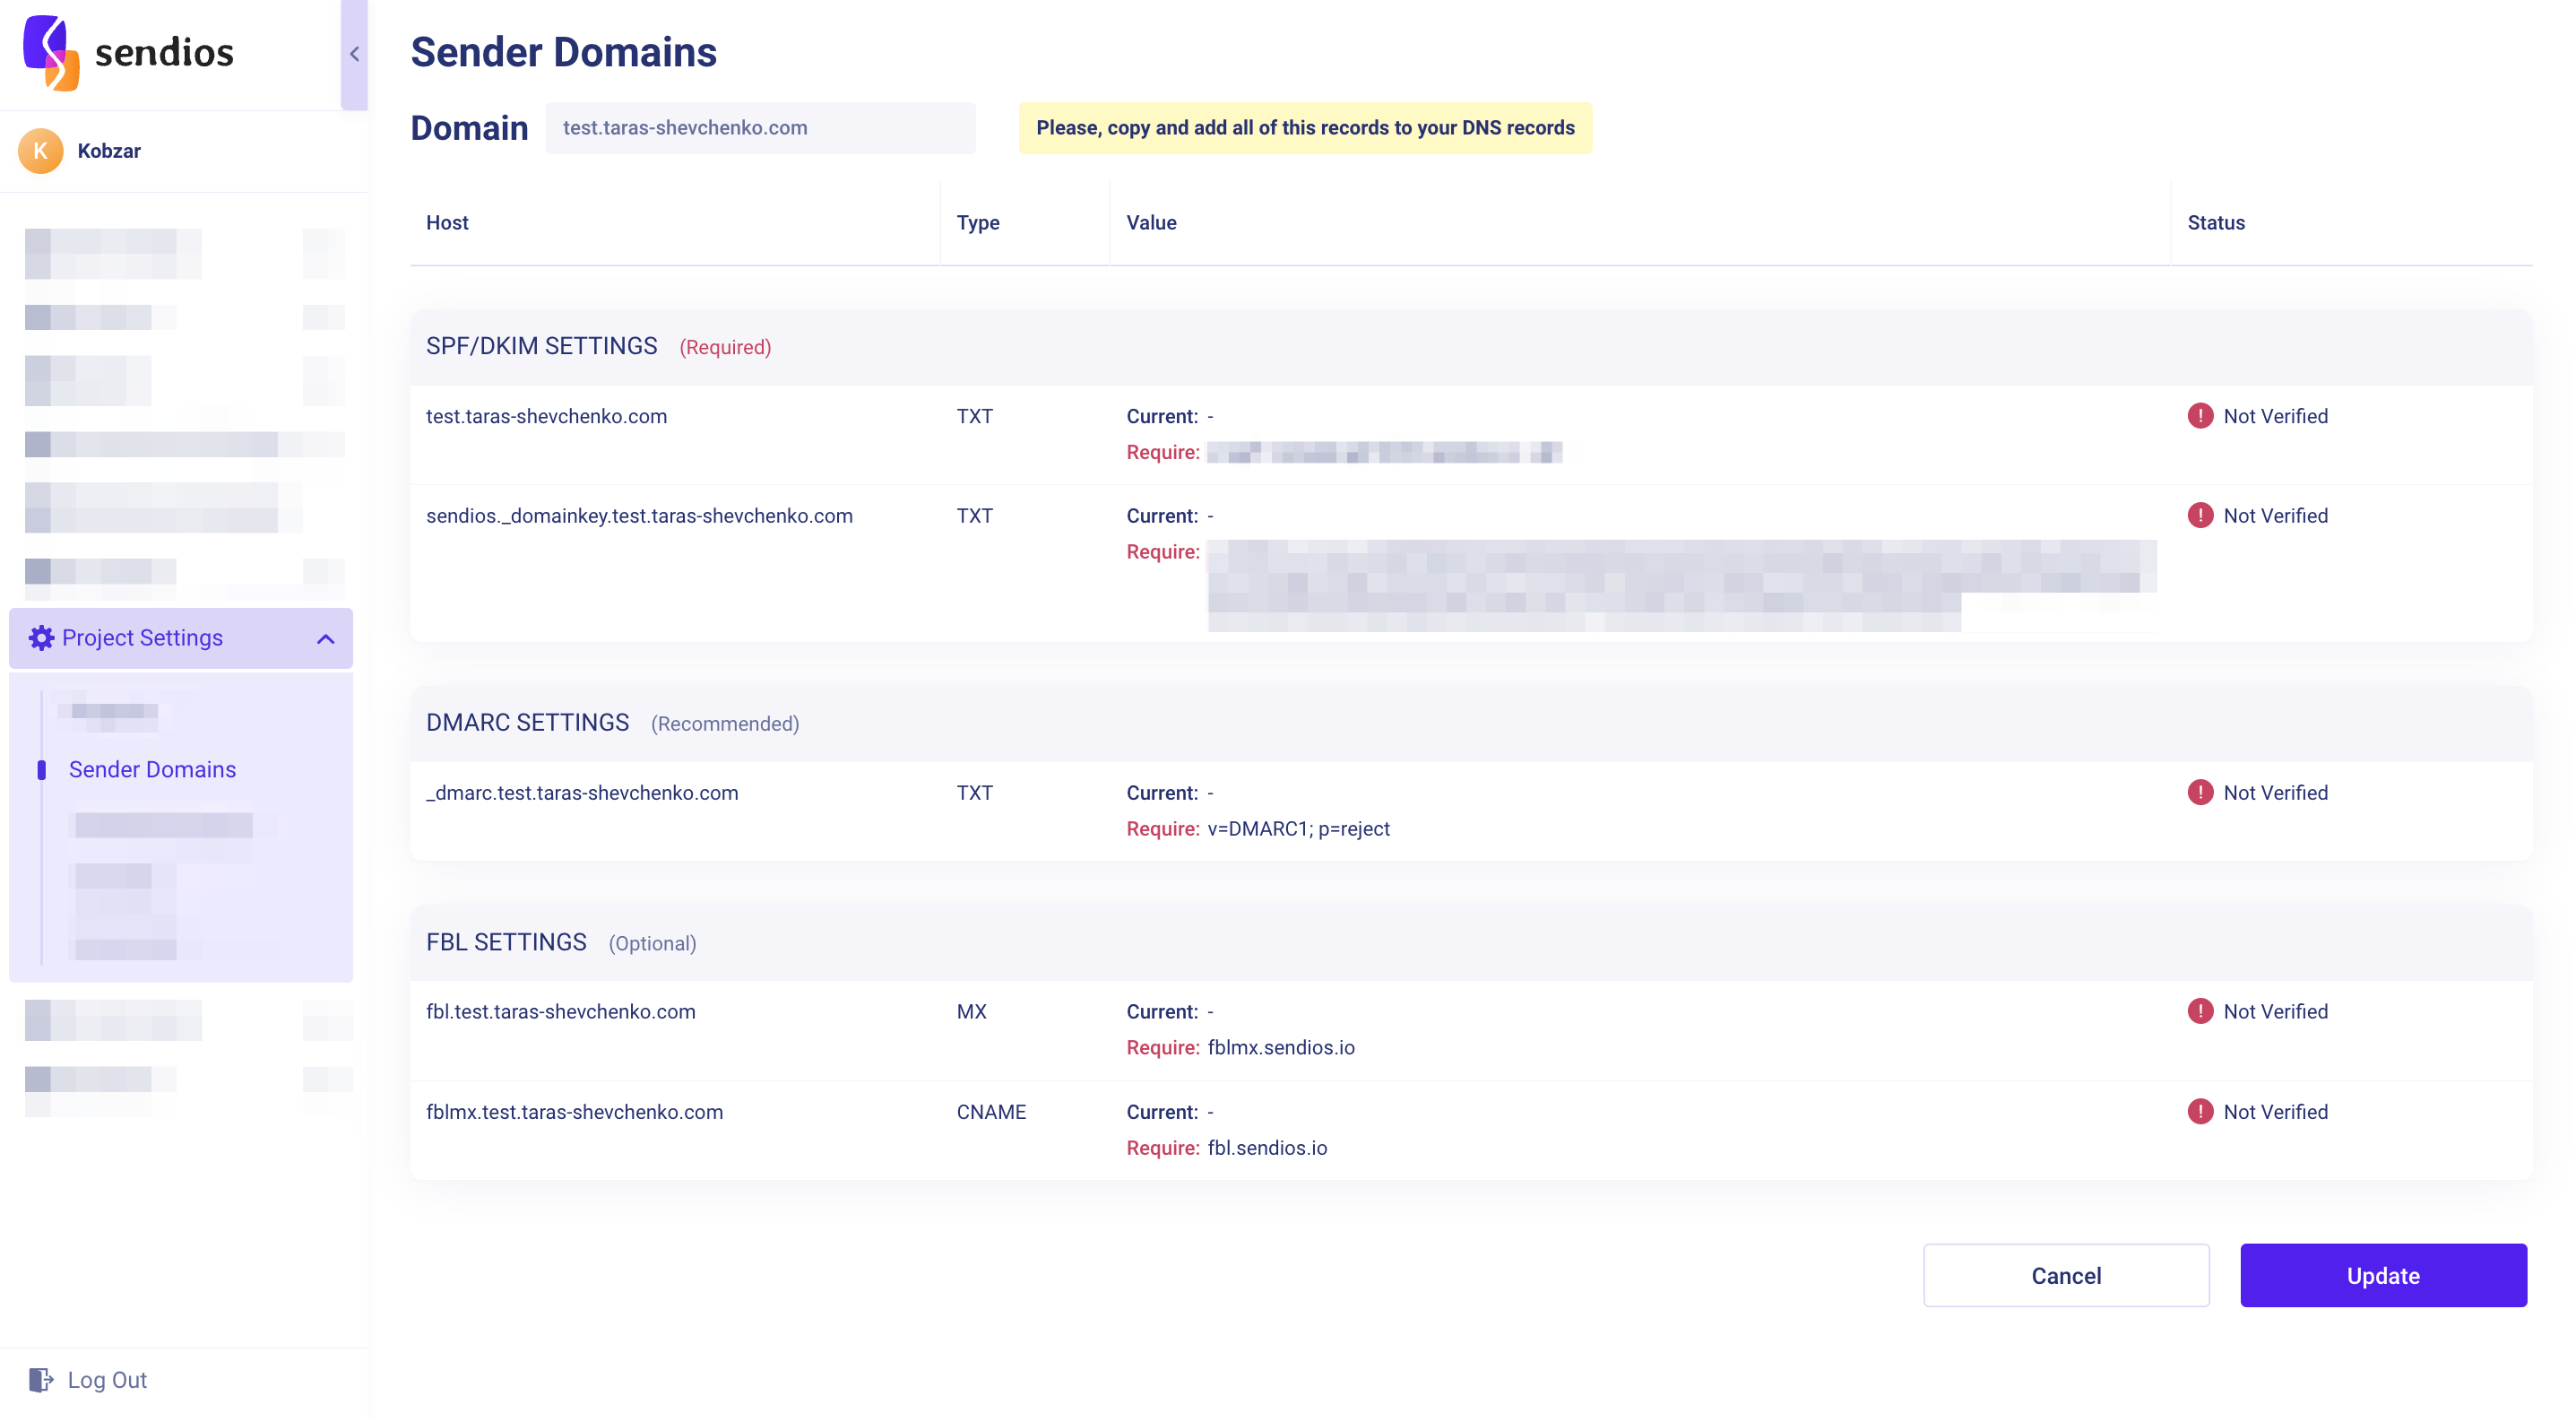
- Copy the settings provided on this page and paste them into your Domain's settings. These settings are generated by Sendios for security purposes.
SPF and DKIM settings are mandatory.
Your Sender Domain will obtain the "Verified" status once SPF and DKIM records are verified.
DMARK and FBL settings are optional, but we recommend adding them as well.
If you are using SPF record not only for the Sendios system, you must combine the entries into one record.
Having two separate records may conflict and prevent successful verification.
How to combine multiple SPF records into one?
Using separate settings for different SPF records may result in conflicts hindering the successful verification of the Sender Domain on our side:
An example of invalid records:v=spf1 include:mail.zendesk.com ~all & v=spf1 include:spf.4647.sendios.io ~all
If you use SPF records for external services, apart from the Sendios system, you must combine all SPF records into one using the following structure:
v=
Include: [SPF-запис №1]
Include: [SPF-запис №2]
Include: [SPF-запис №3]
~all
An example of correct record: v=spf1 include:spf.4647.sendios.io include:mail.zendesk.com ~all
4. Verifying your Sender Domain
Once you have configured the settings, the status of your Sender Domain will change to "Verified".
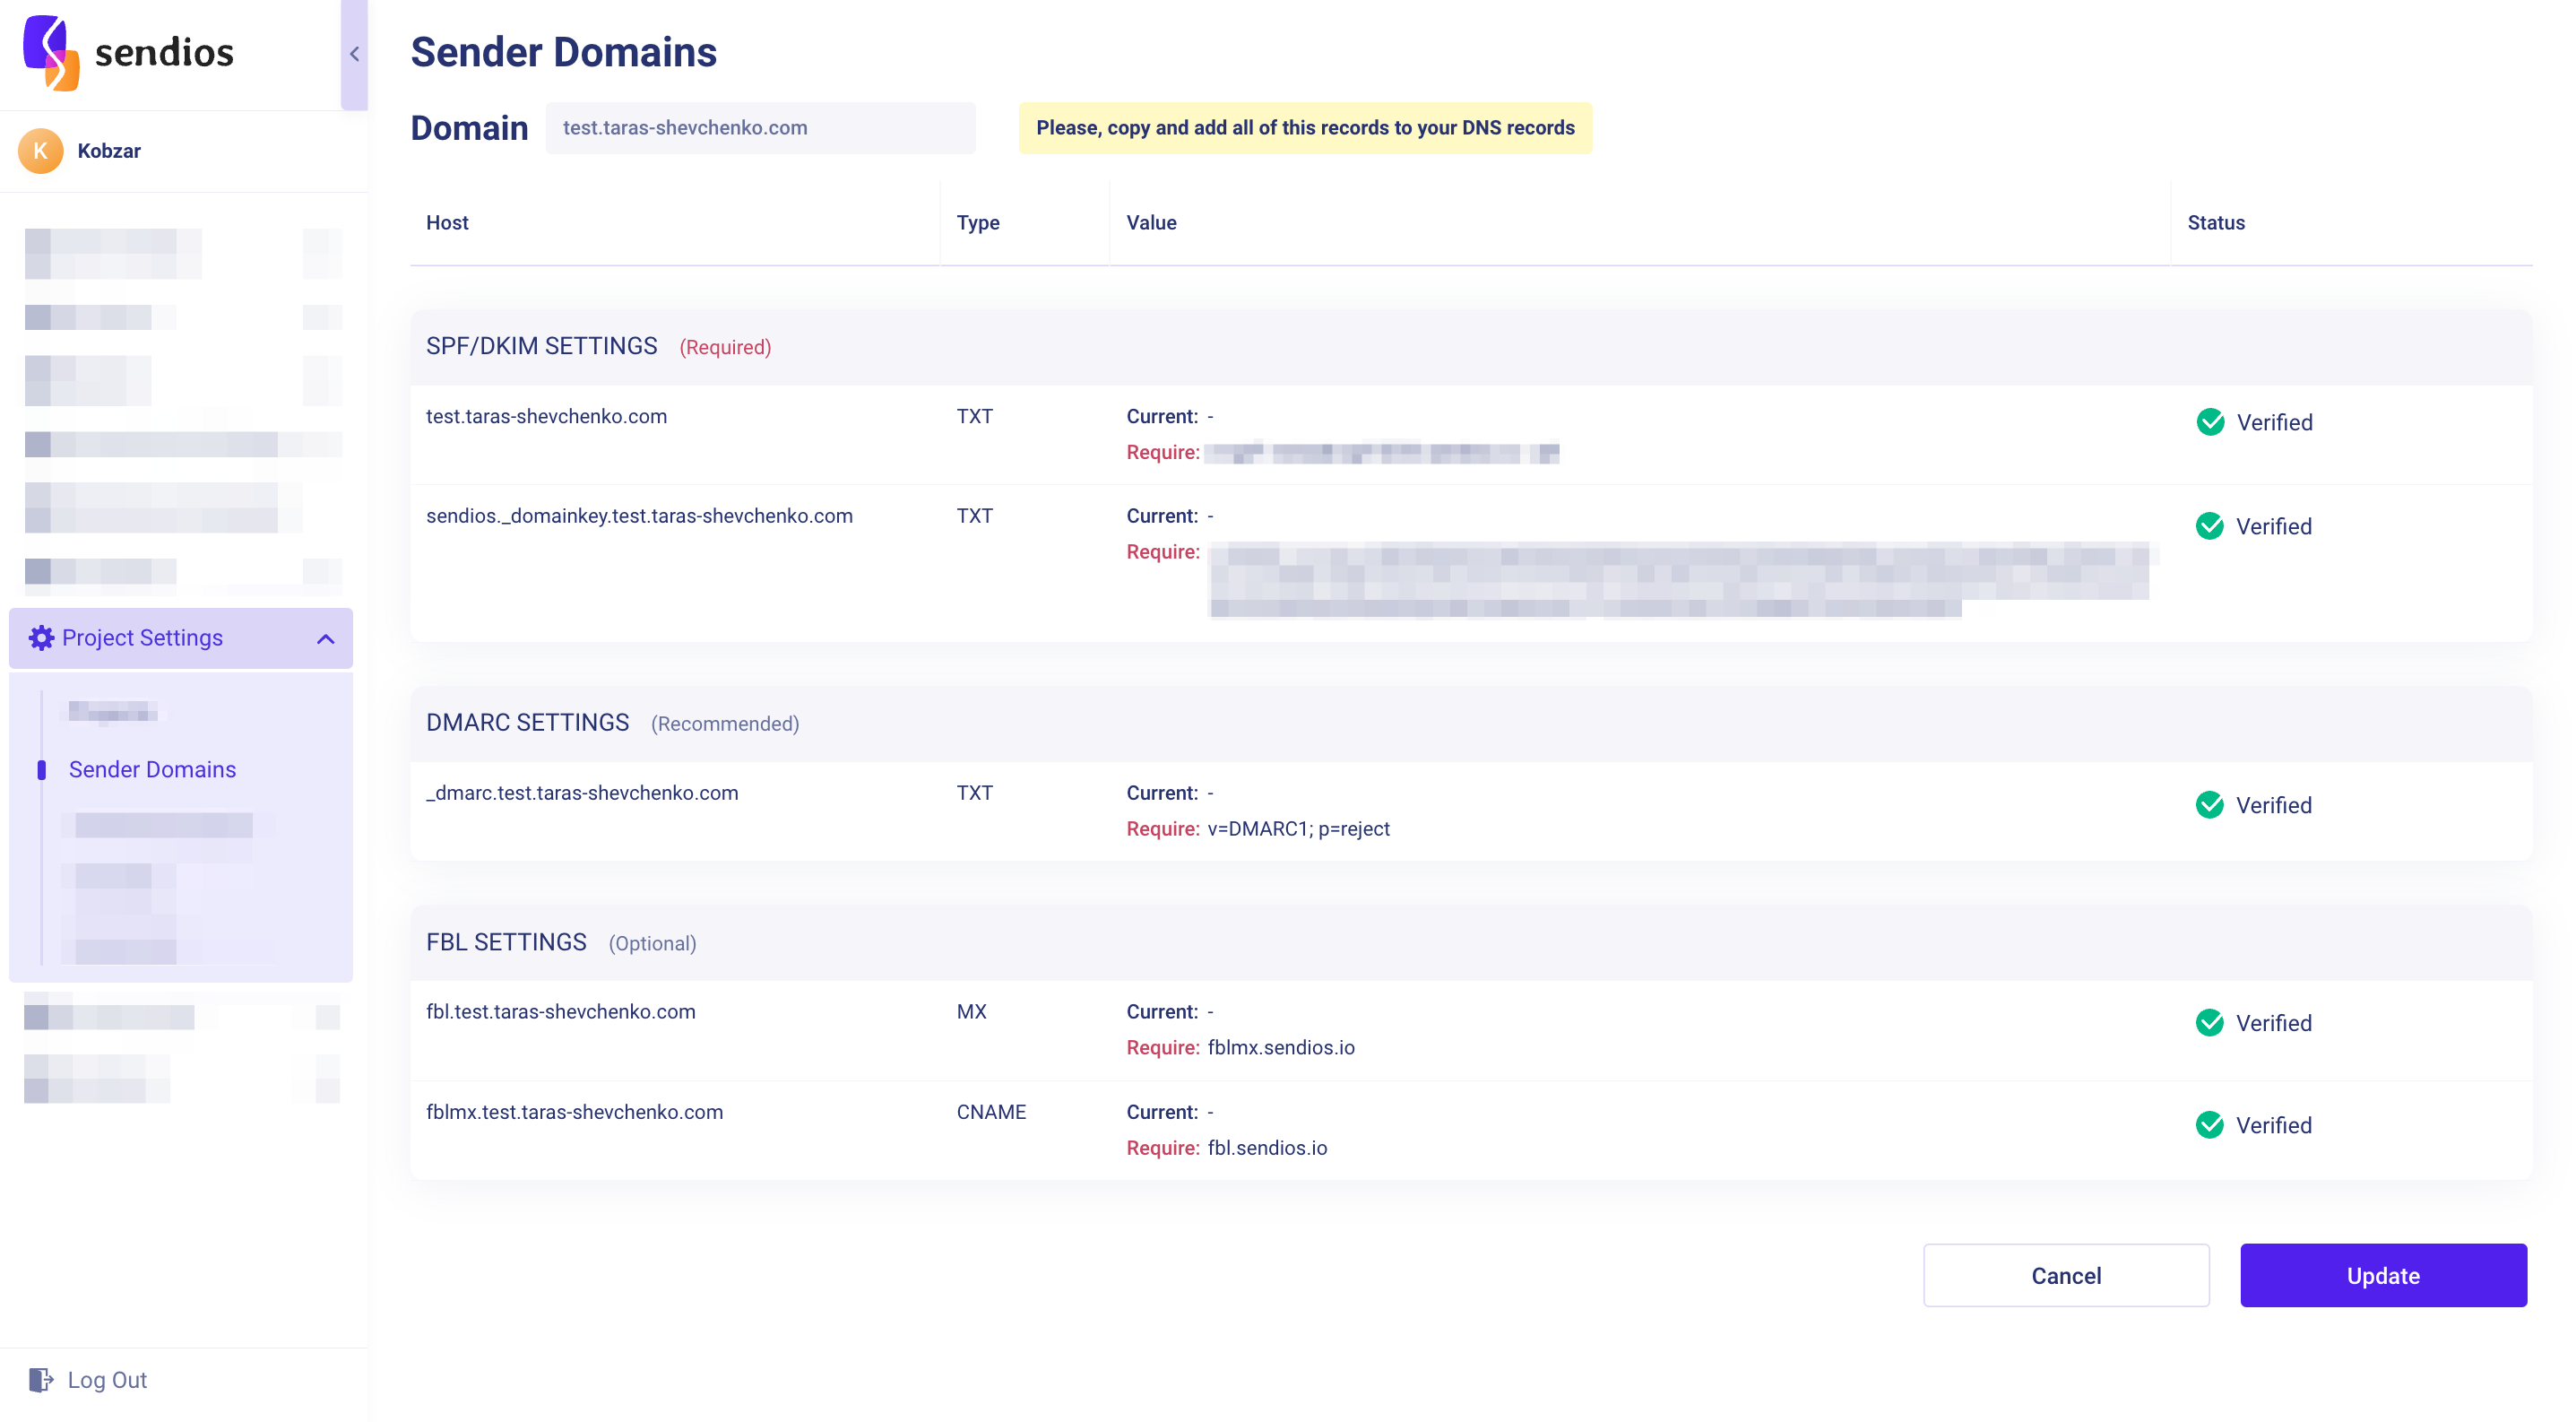
Please note that due to the specific nature of Sender Domain settings configuration, the verification process may take up to 24 hours.
If your records are blocked from being read by external services, we will not be able to verify them. In such cases, we recommend consulting with your CSM (Customer Success Manager).
Updated over 2 years ago