Editing your Project
When clicking Edit | view on the List of your Projects page, a modal window opens for editing project data.

General settings
The General tab contains the main Project settings.
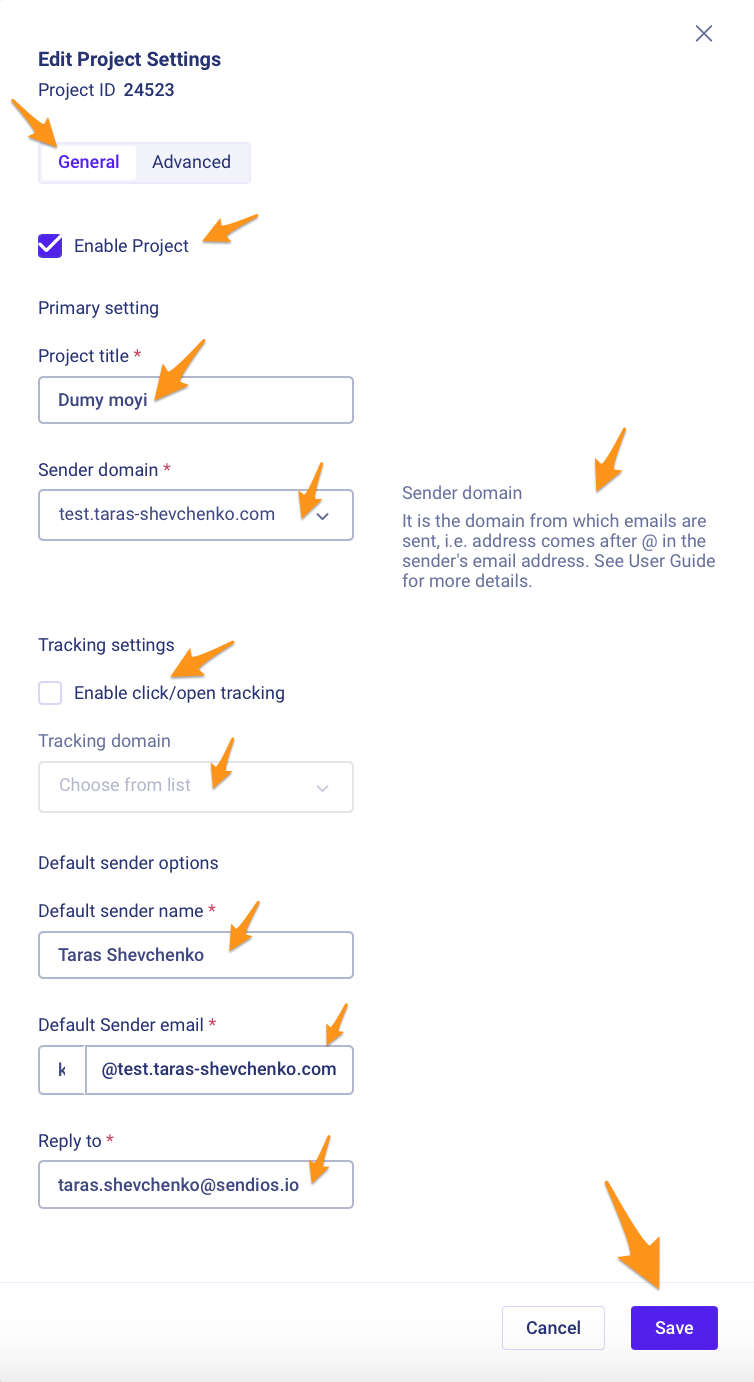
Here, you can edit all the fields that were configured when creating the Project, including:
- Project title – the name of the Project;
- Sender Domain – the Domain used for sending;
- Enable click / open tracking – enable / disable the tracking of opens and clicks;
- Tracking Domain – the Domain used for tracking;
- Default Sender name – the name of the sender visible to the recipients;
- Default Sender email – the email address from which the email is sent;
- Reply to – the email address where replies to your email will be received.
When you hover over the data input field, a tooltip will appear, providing information about this field.
Remember to save your changes by clicking the Save button.
On this page, you can also change your Project's activity status (Active / Inactive): deactivate the Project or, vice versa, activate it again.
More details about the deactivation process can be found in the article How to deactivate your Project.
Additional settings
The Advanced tab contains additional Project settings.
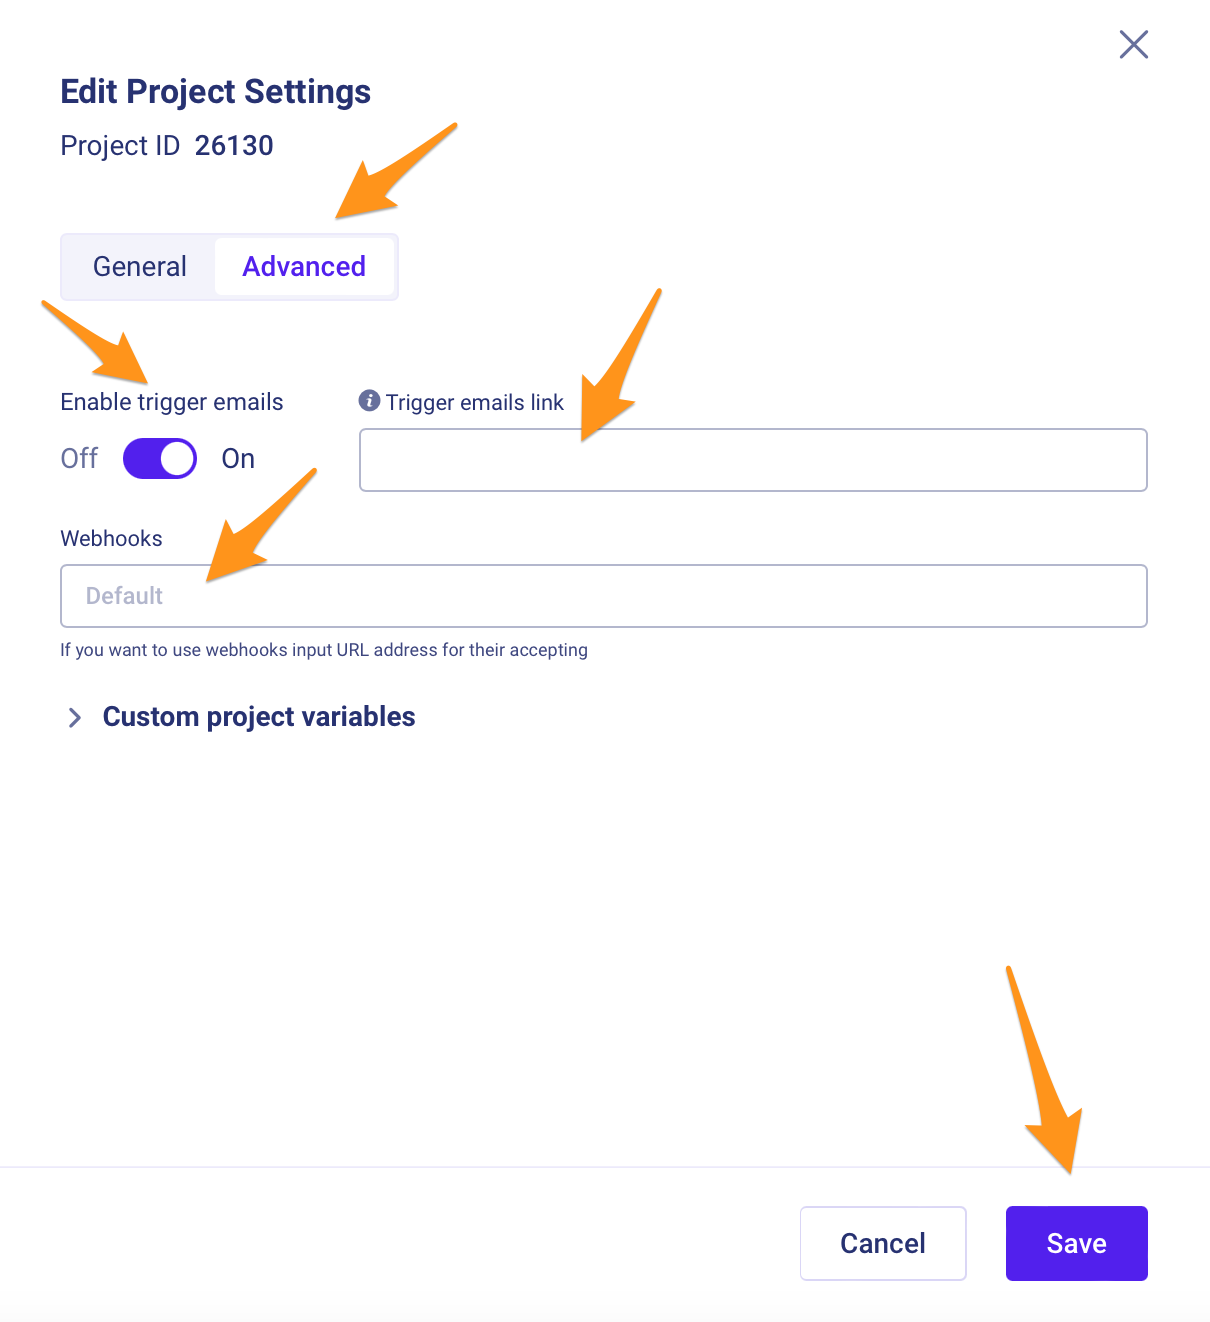
Enabling trigger emails
When utilizing our recommendation system, you can configure the sending of requests for the specific Project on this page. By Enabling trigger emails, you can customize the process and set up different URL addresses to receive them on your end.
To learn more about the Recommendation System, we suggest referring to the dedicated article Recommendation System.
If you have any questions, please get in touch with your Customer Success Manager
Webhooks
You can also configure receiving webhooks on this page by specifying the desired address in the Webhooks field. This ensures that the webhooks are sent to the designated location.
For more information on configuring webhooks, please refer to the Webhooks documentation.
Remember to save your changes by clicking the Save button.
Custom project variables
The Custom project variables section allows you to configure personalized variables specific to a particular Project. These variables can be used to include legal addresses, logos, and other customized elements in the template.
To create a new personalized variable, simply click on Create variable. In the subsequent modal window, provide the required information:

- Variable category – "Project" is selected by default and cannot be changed;
- Variable type – select the appropriate variable type from Text, Number, Date, Link, and Image;
- Key – enter the key, which represents the value used in the template to add this variable;
The key should be written without spaces if it consists of multiple words.
- Value for preview – provide a preview value that will be displayed in the template's preview;
- Description (optional) – add a description for the variable.
Once you have entered all the required information, click Create.
Having created a variable, proceed to add the necessary value:
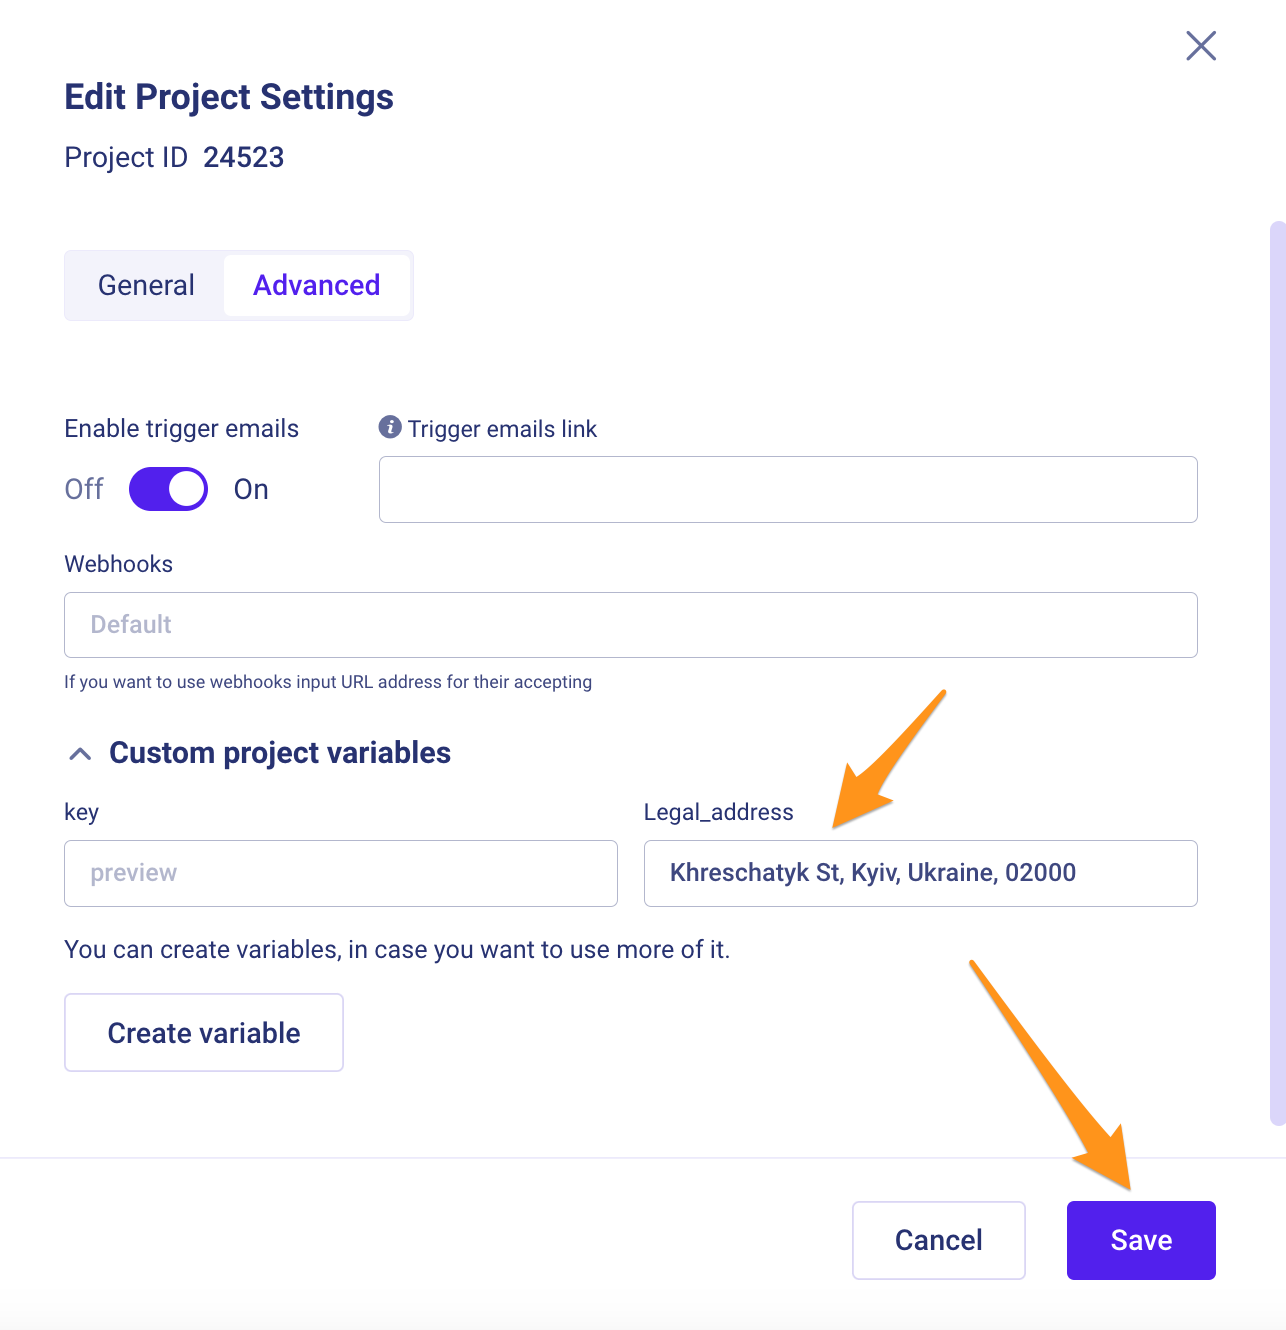
Remember to save your changes by clicking the Save button.
Updated over 2 years ago