How to create a segment?
What is a segment and segmentation?
Audience segmentation is the process of dividing your user base into separate groups based on specific factors.
The goal of segmentation is to personalize messages and offers for each group of users. Instead of sending the same texts to all recipients, you can create them differently for different segments based on their unique needs and interests. This makes communication more relevant and attractive to the audience, increasing the chances of successful interactions and conversions.
A segment is a group of users who share a common set of characteristics or criteria. These can include parameters such as age, gender, interests, location, purchase history, and more.
Segmentation steps
- Select segmentation criteria – begin by defining the characteristics or parameters by which you want to divide your audience. These can be factors like age, gender, location, interests, site activity, purchases, etc.;
- Collect and analyze data – gather the necessary data about your users. This can include information from your database, purchase history, email interactions, and any other data that helps you better understand your audience's needs and interests;
- Create segments – based on the collected data, divide your audience into separate segments that match the chosen criteria;
- Personalize messages – after creating segments, choose appropriate messages and content for each segment. Pay attention to the interests, needs, and past interactions of the audience to make the message as relevant as possible for each group;
- Testing and analysis – after sending messages, conduct testing and analyze the results. Determine the effectiveness of each segment and make adjustments if needed.
Creating a new segment
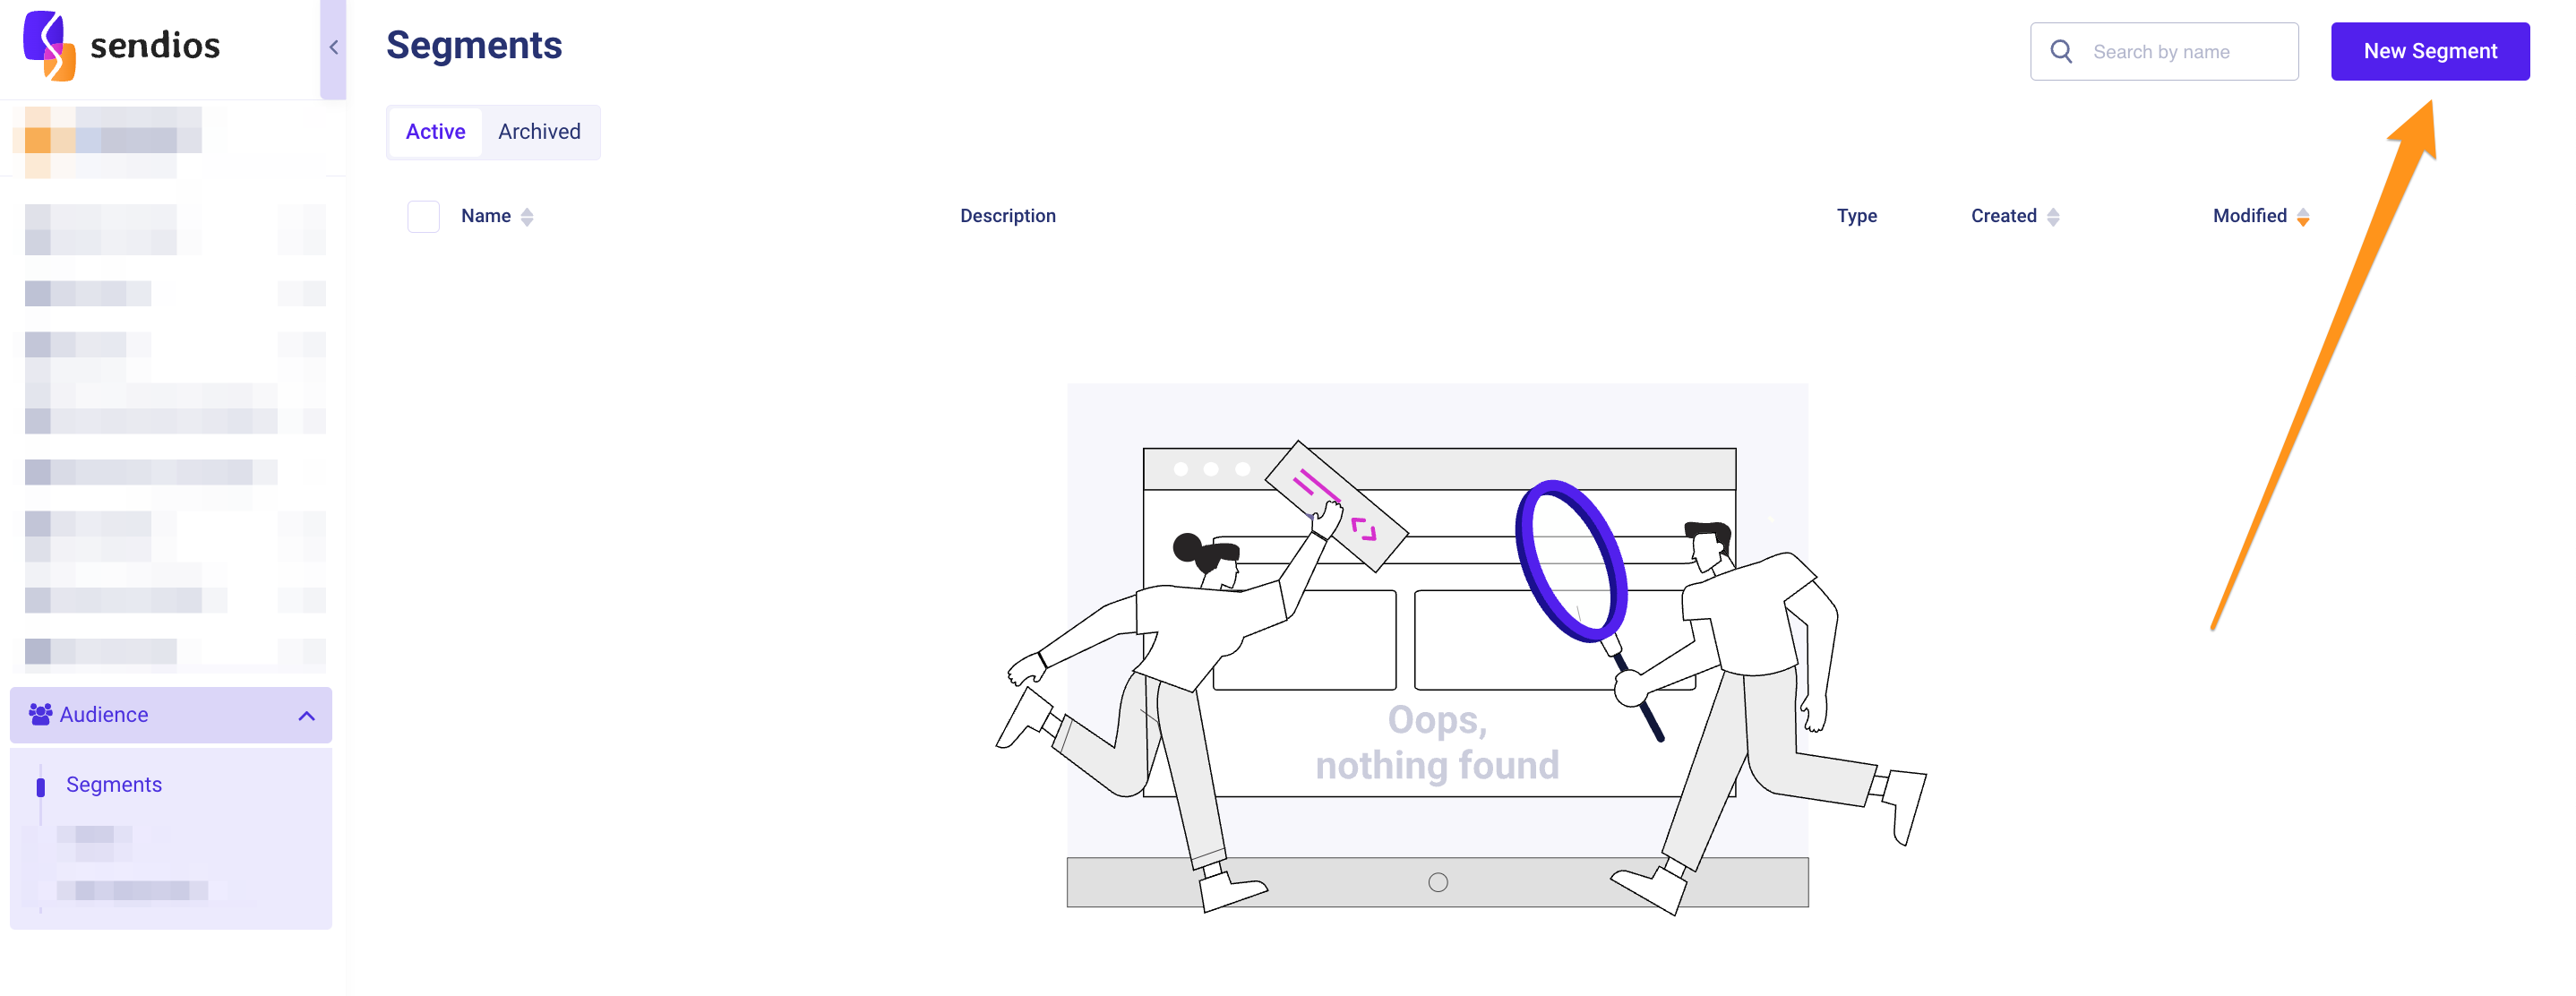
Navigate to the Audience → Segments page and click on the New Segment button.
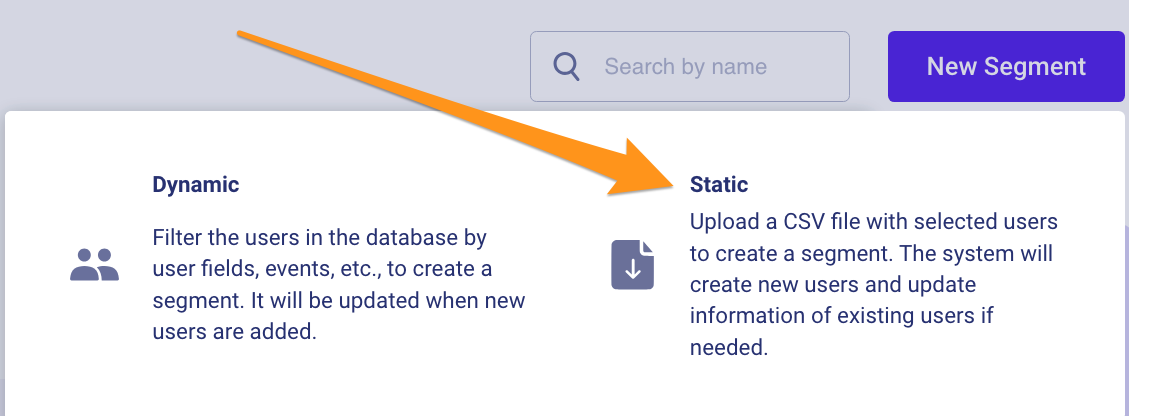
1. Creating a static segment
Click on Static in the pop-up window to create a static segment.
A static segment is a segment in which the composition of users remains unchanged and is not updated automatically over time.
These can be segments based on static parameters, such as demographic data (age, gender, location), or other permanent characteristics.
1.1 Filling in data and uploading a CSV file

- In the Name field, enter the name of the segment;
- Optionally, add a description of the segment in the Description field;
- Upload a CSV file with the users you want to add to this segment.
Please make sure that your CSV file contains the following column headers and information for each user: Project ID ('projectid'), user identifier on your side ('ClientUserId') and at least one communication channel:
- User's email address ('email' – for the Email channel);
- User's phone number ('phonenumber' – for the SMS channel);
- App push token of user's device ('apppushtoken' – for the App push channel, respectively).
The length of the Client User ID parameter must not exceed 36 characters.
For more details on the CSV file format and requirements, please refer to the Uploading a CSV File article.
You can fill information on several communication channels for one user if necessary, but the providing of at least one parameter (email address, phone number or app push token of the user's device) is mandatory.
All other user data you specify in the CSV file will be stored in User Fields, and you can use them as variables when creating and sending transactional emails and marketing campaigns using the syntax
{{ user.camp_VariableName }}.
- Enter your email address in the Email field so that we can notify you when the CSV file is uploaded and processed;
- Click Create Segment.
1.2 Notification of CSV file processing results
After clicking Create Segment, you can attend to other things, as the processing of the CSV file happens in the background. We will notify you when the CSV file has been uploaded and processed and send the results to the email address you provided in the Email field when entering data in the previous step.
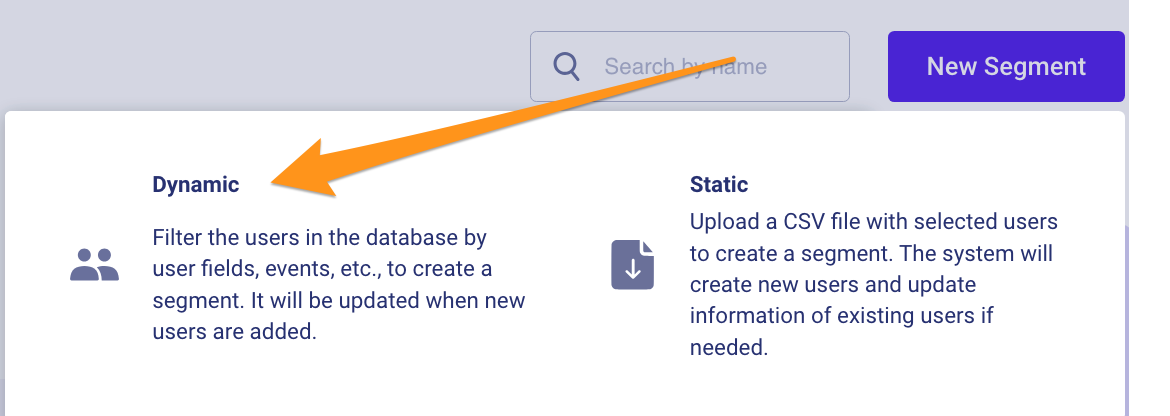
2. Creating a dynamic segment
Click on Dynamic in the pop-up window to create a dynamic segment.
A dynamic segment is one that is automatically updated based on specified conditions.
For example, you can create a dynamic segment for users who have taken a specific action on your website.
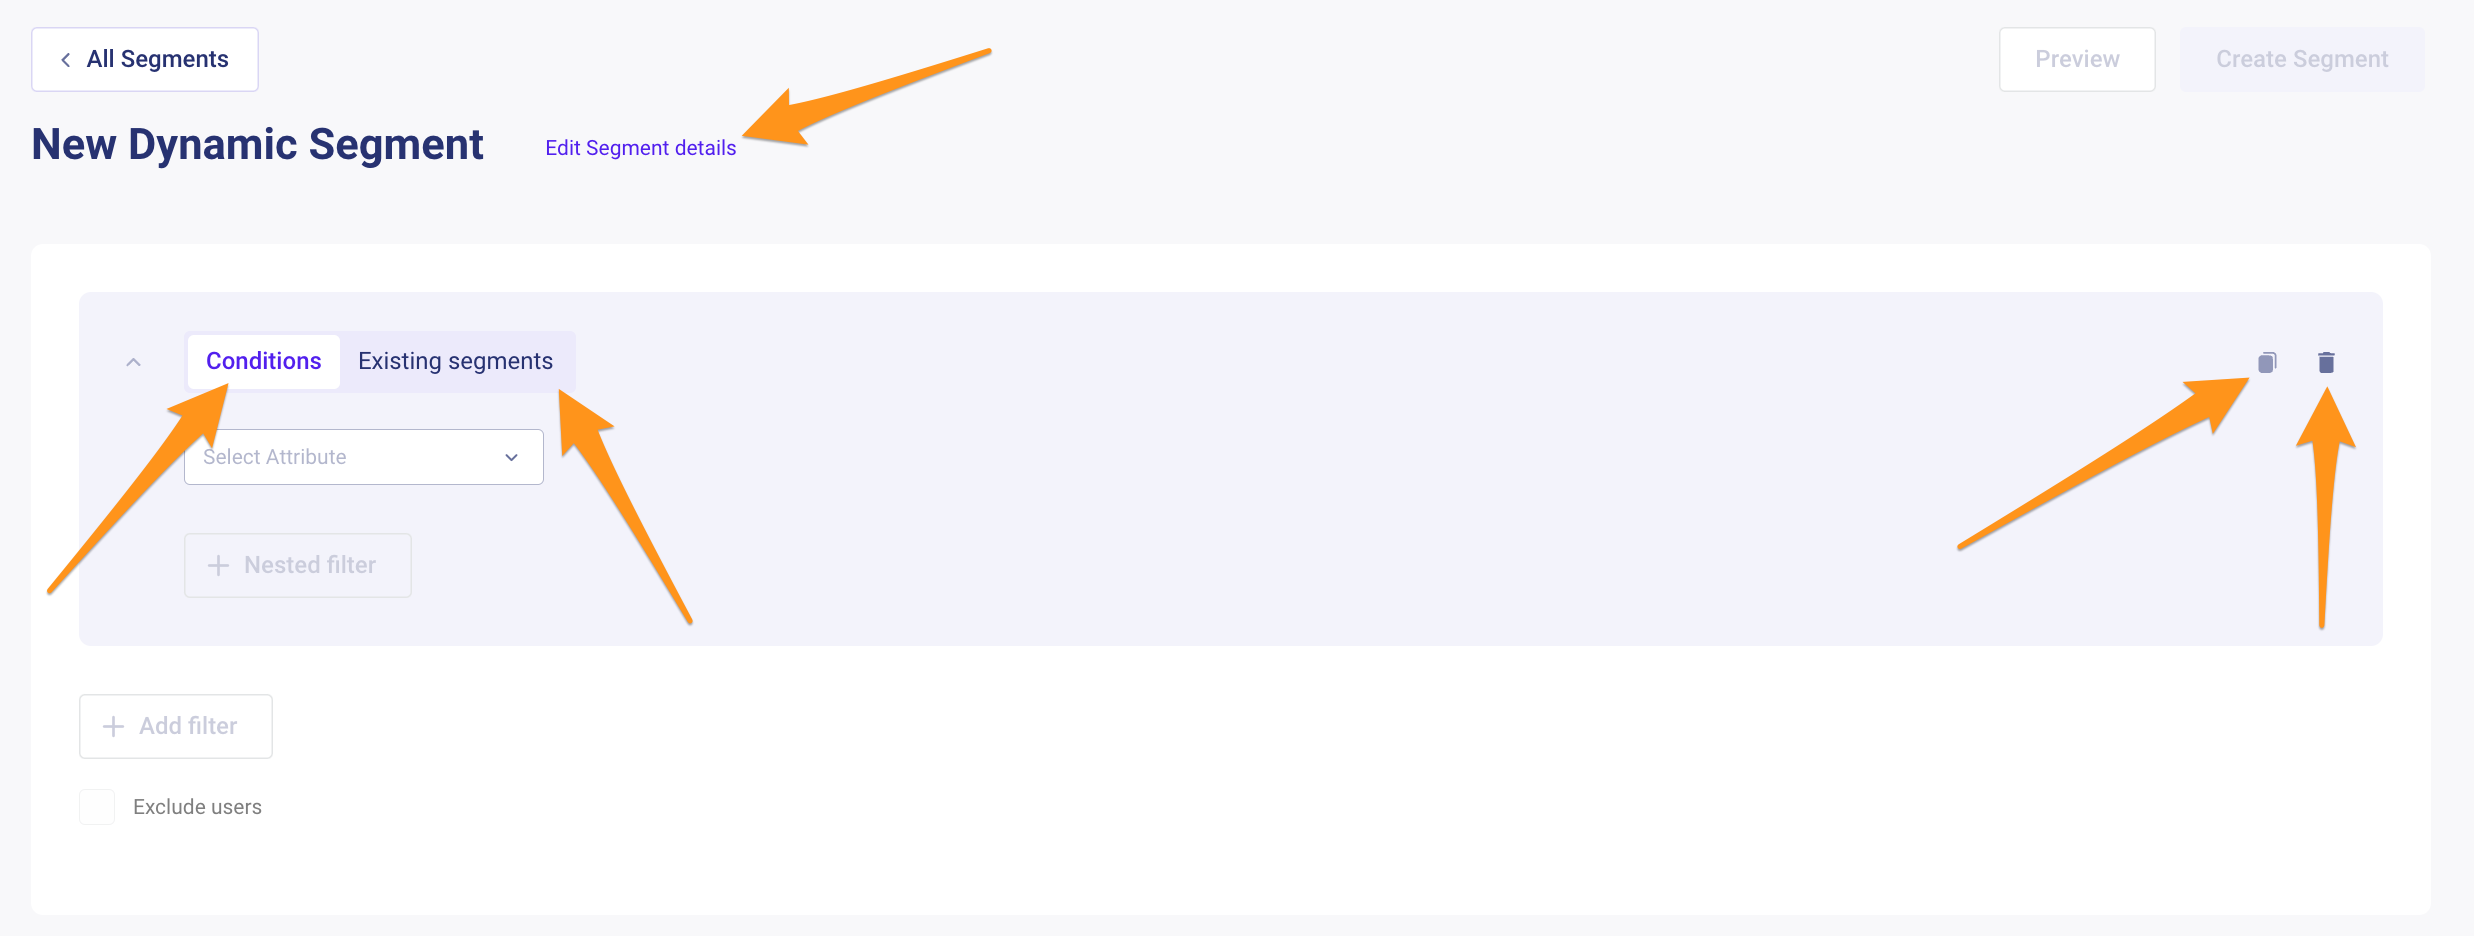
2.1 Setting segmentation conditions
On this page, you need to add conditions (Conditions) by which users will be added to your segment, or choose existing segments (Existing segments) as the basis for creating a new dynamic segment.
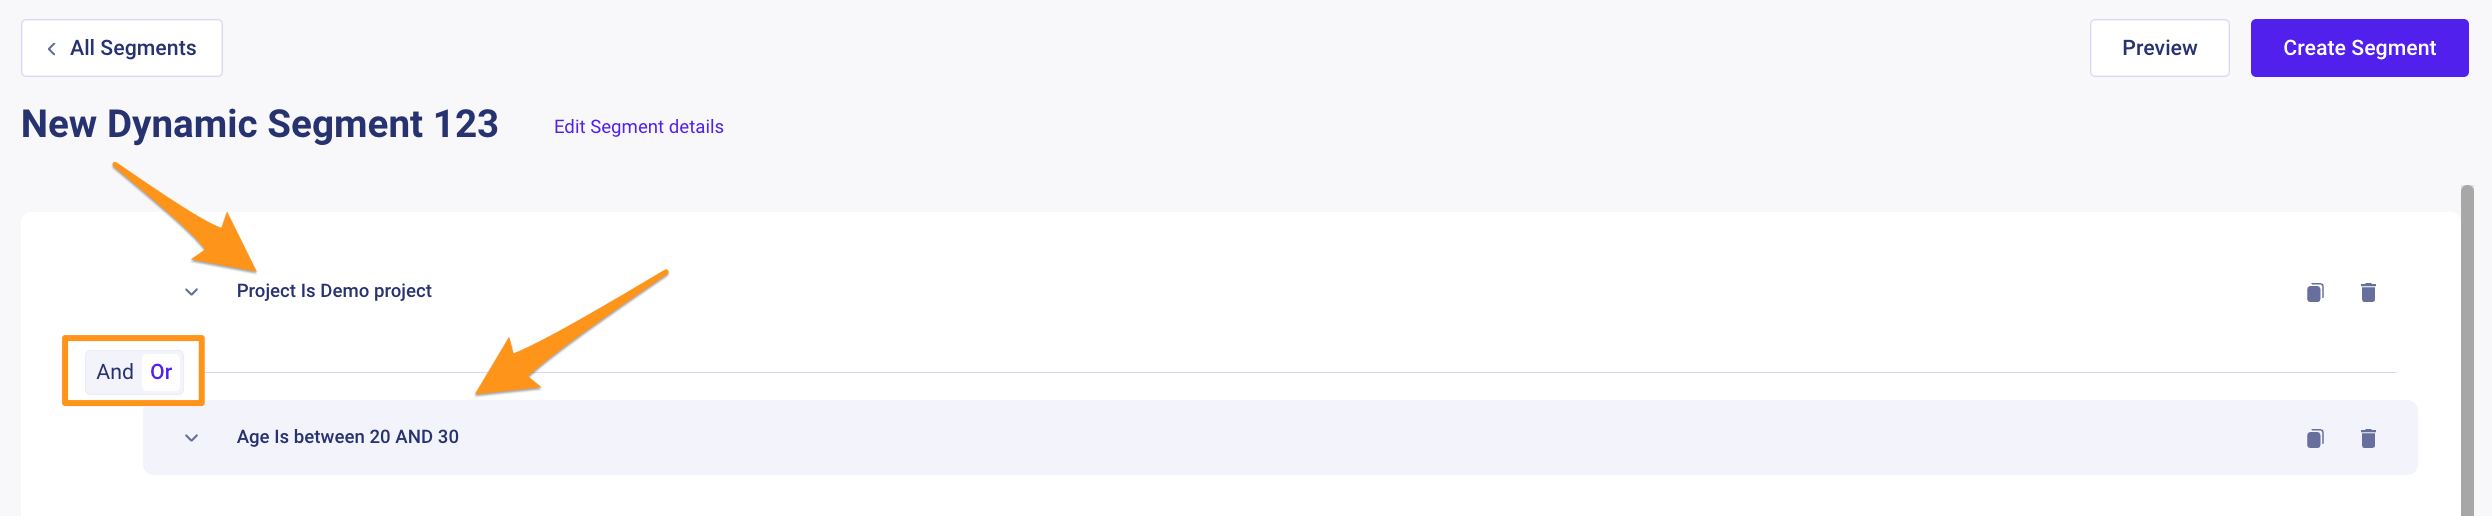
Among the conditions (Conditions), you can select various criteria and choose their number, as well as combine them with these connectors:
- And – the user must satisfy both conditions;
- Or – it's enough to satisfy just one of several conditions.
Within one condition, you can add a nested filter using the Nested filter option.
When adding multiple nested filters, you can use only one type of connector: either And or Or.
You can create a dynamic segment based on an existing segment. To do so, use the Existing segments option.
You can combine Conditions and Existing segments when creating a dynamic segment.
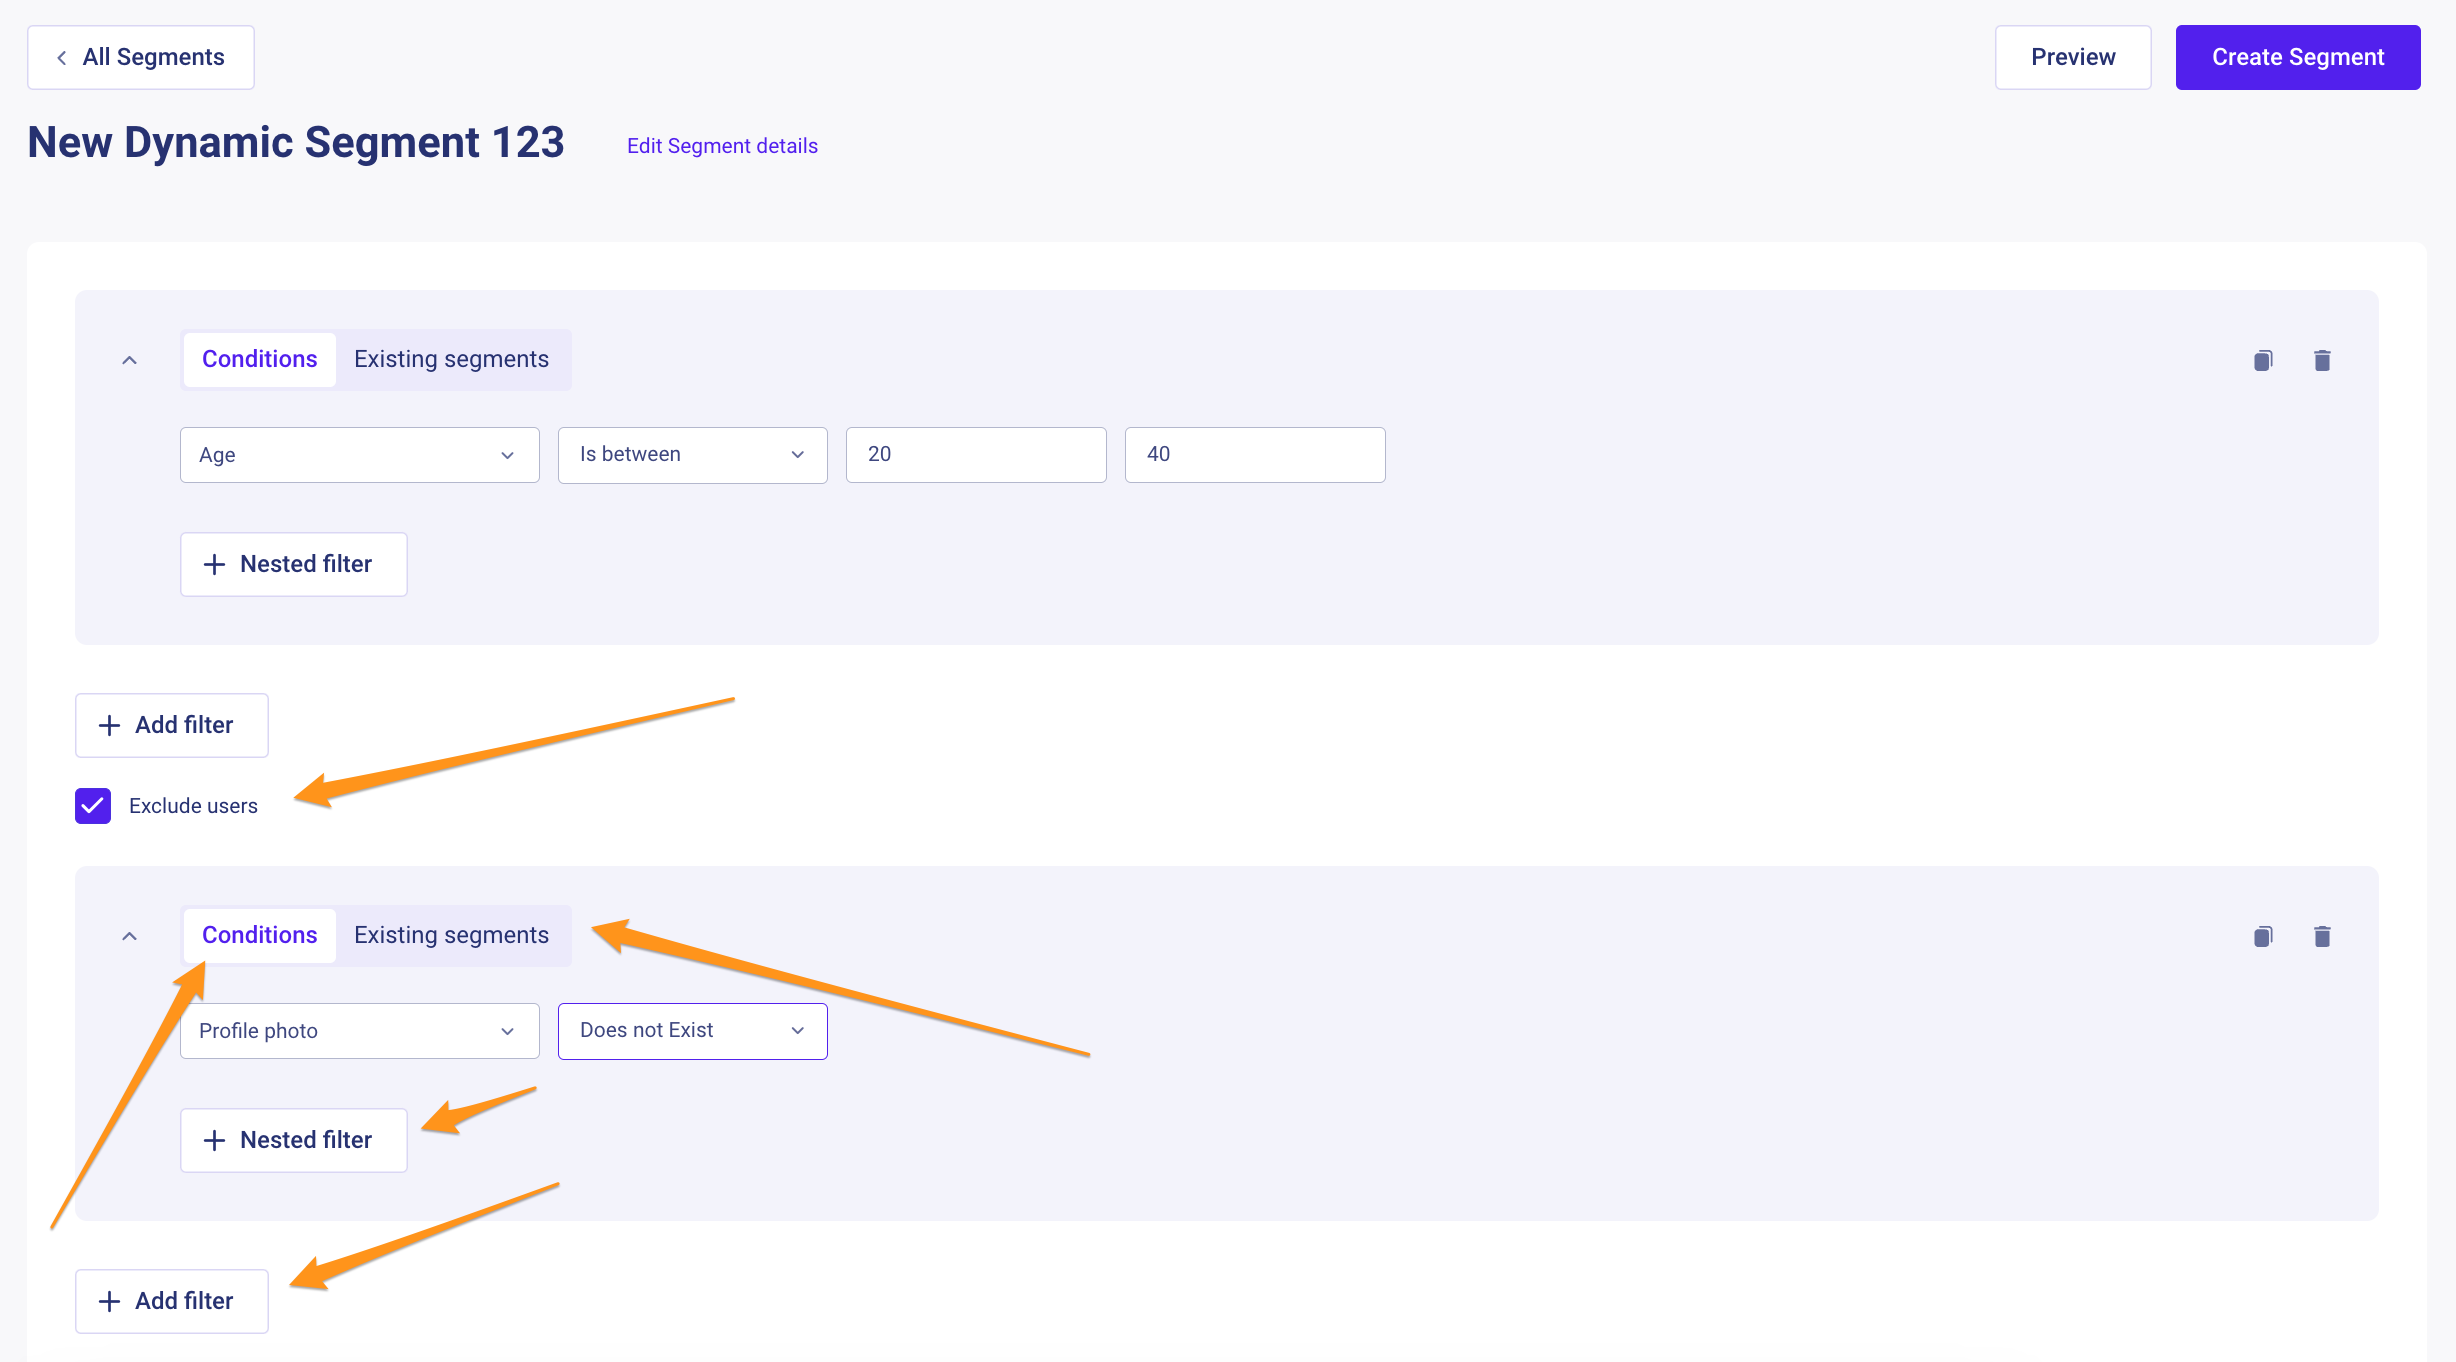
You have the option to duplicate a configured condition using the Duplicate button or delete it using the Delete button.
You can exclude users from the segment if they meet a certain criterion using the Exclude users option. Similar to adding users to a dynamic segment, you can configure the exclusion of users from the selection based on specific Conditions or anExisting segments. Add a nested filter using the Nested filter option or multiple different conditions by clicking the +Add filter button.
2.2 Changing the name of the dynamic segment
By default, a segment is created with the name "New dynamic segment n," where n is an increment.
In the pop-up window that appears, you can change the name of the segment by clicking on Edit Segment details:
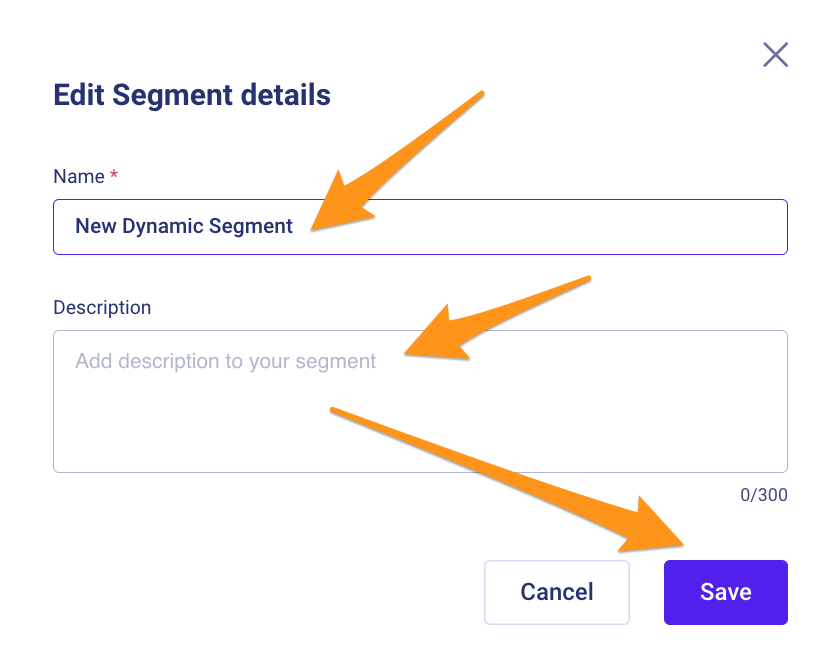
- In the Name field, enter the new name for the segment;
- Optionally, add a segment description in the Description field.
Remember to save your changes by clicking the Save button.
2.3 Previewing the segment
By clicking on Preview, you can review the details of the configured dynamic segment filters in the Detailed Segment description section and get a preliminary count of users (Users in Segment), that satisfy the conditions, divided by communication channels.
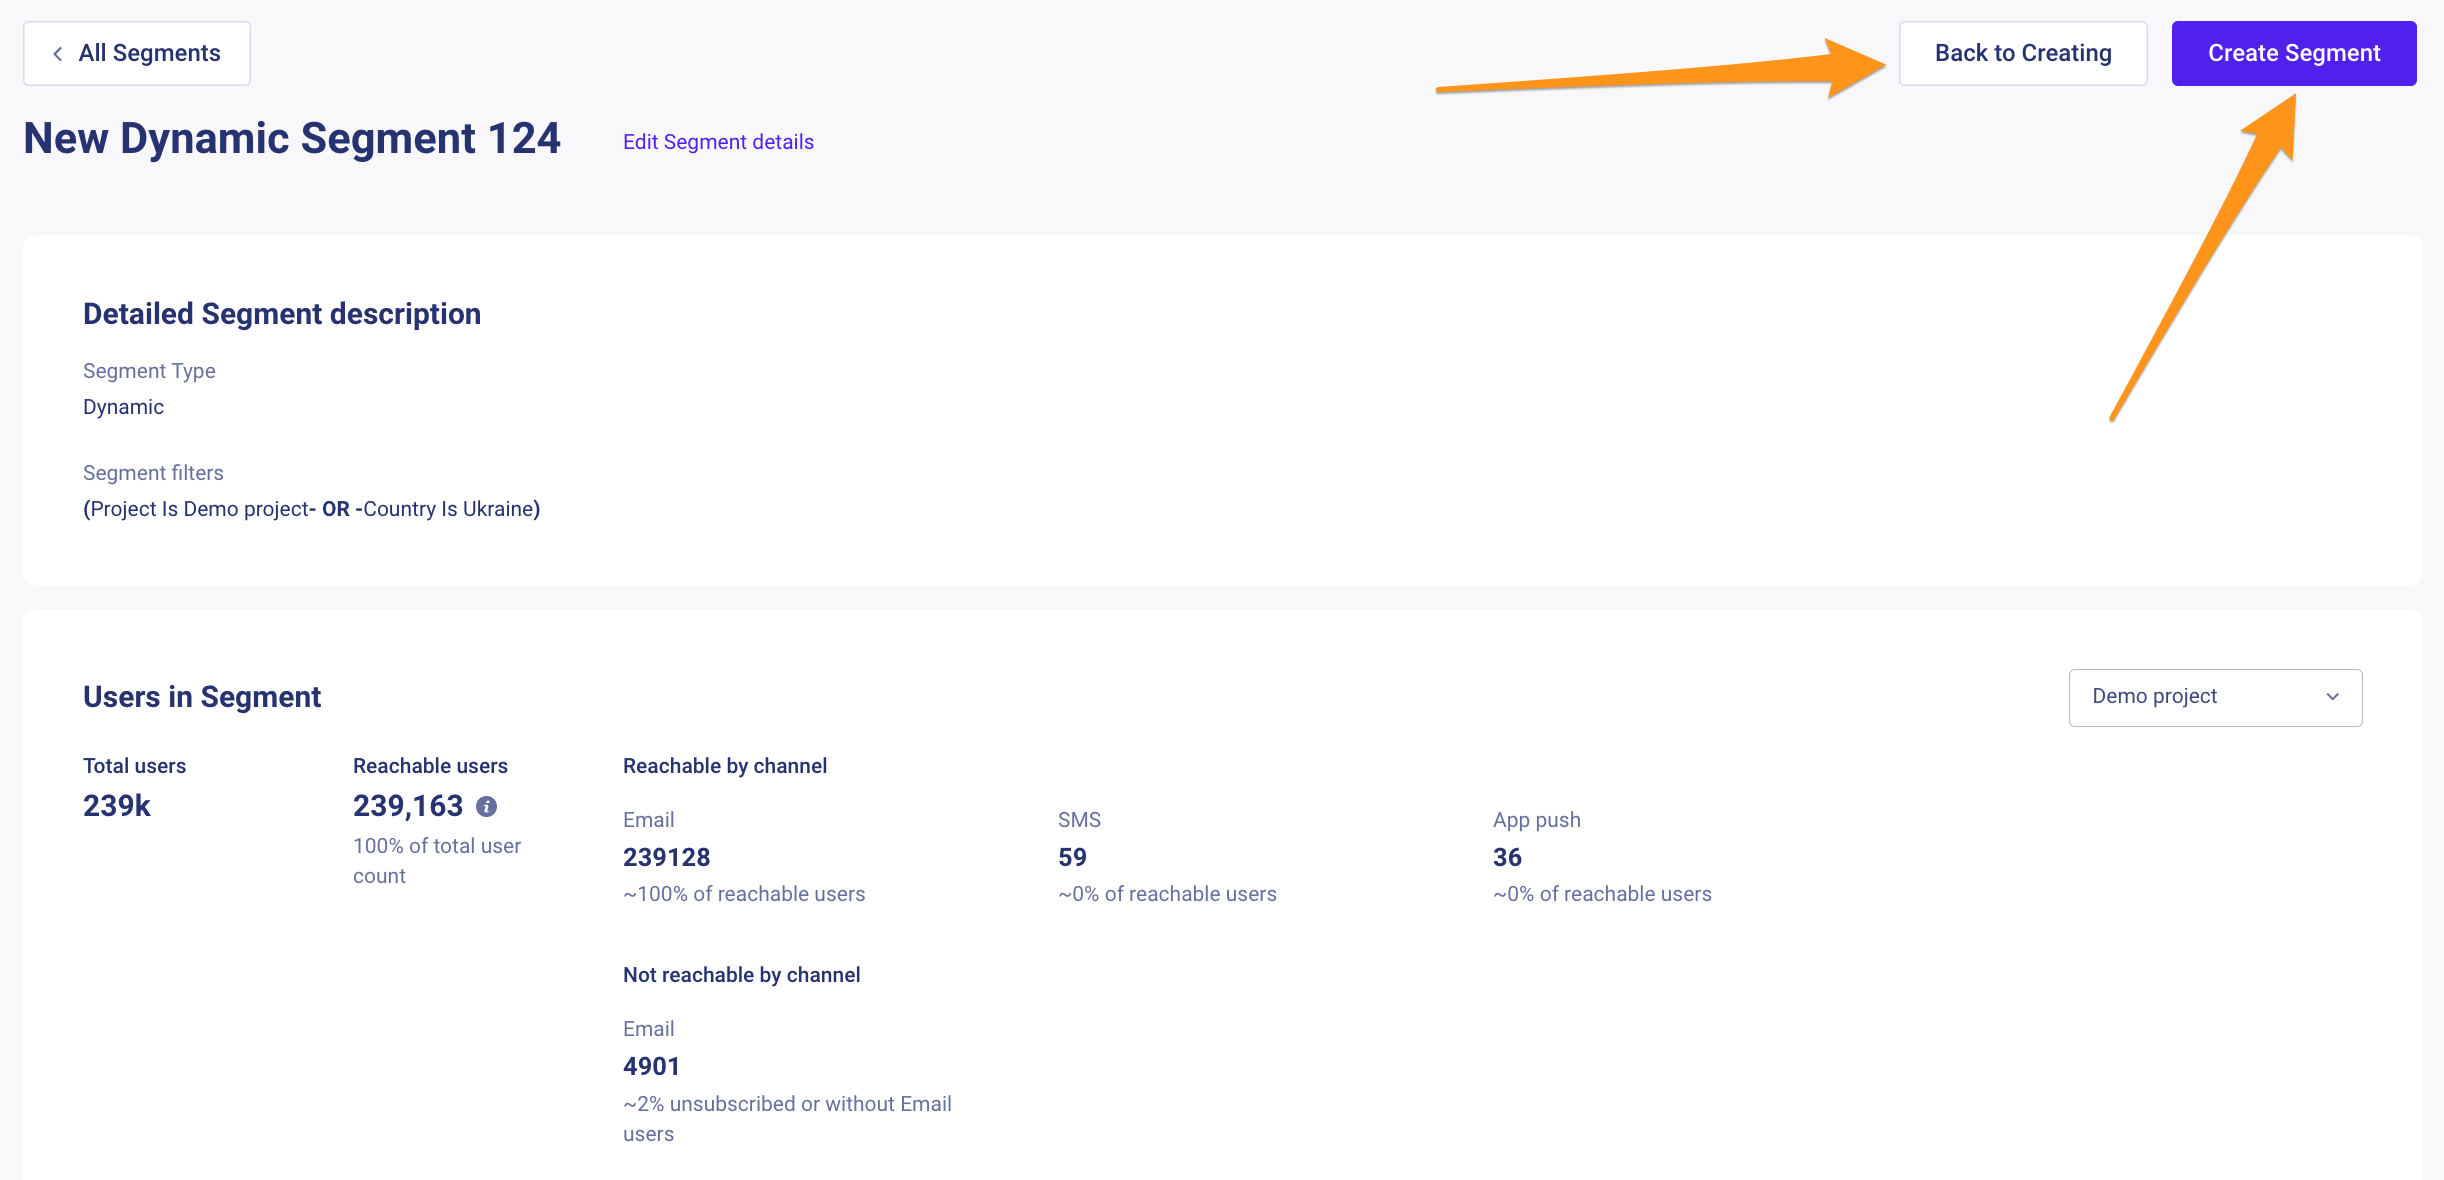
If you need to change the segment before saving it, you can return to the previous step by clicking Back to Creating.
2.4 Saving
Once you have finished configuring the segment, click on Create Segment.
Updated over 2 years ago