How to create a campaign?
A marketing campaign is a series of messages sent to a specific group of recipients. A campaign is a personalized messaging system that reflects and considers the preferences, needs, and previous actions of users.
1. Creating a new campaign
- Go to the Marketing Campaigns page and click on the New campaign button.

- Choose the communication channel among Email, SMS, or App push that will be used in your marketing campaign.
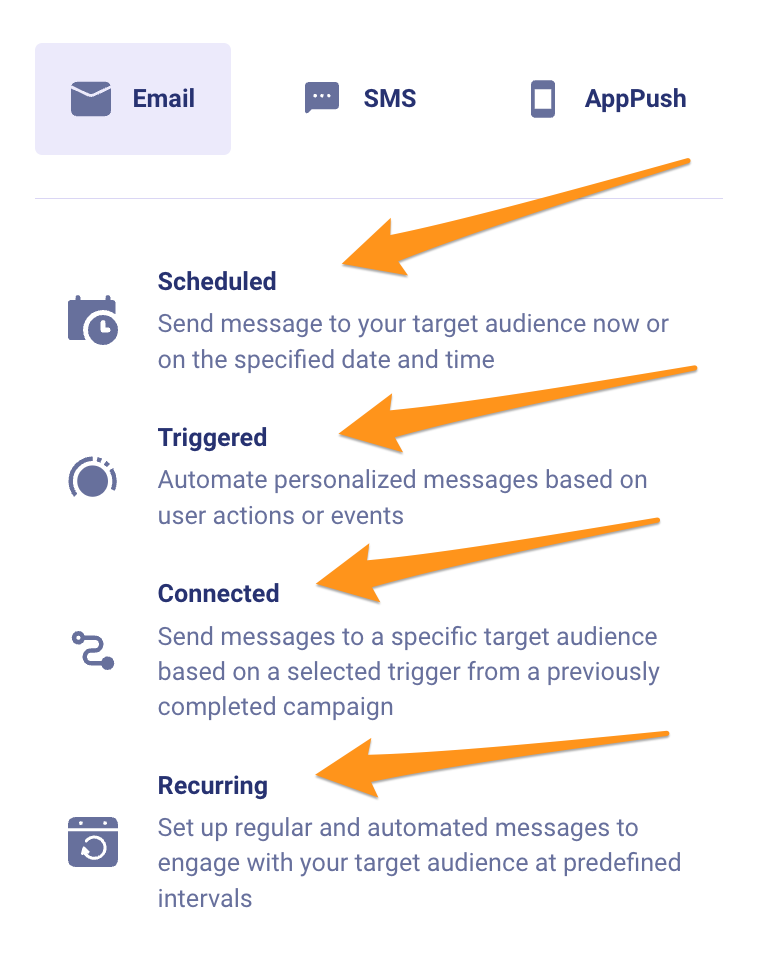
- Select the delivery method:
- Scheduled– scheduled or immediate sending. The campaign will start sending immediately after creation or on the day and time you specify;
- Triggered– sending based on an event or trigger, such as registration, payment, user network status, and more;
- Connected– sending messages, notifications, and emails to a target audience based on a selected trigger from previous or existing campaigns;
- Recurring – cyclical sending. This campaign will send emails and messages with a configured time interval (daily, weekly, etc.). Cyclical sends can also be Scheduled or Triggered.
2. Filling in basic information
The marketing campaign creation window, regardless of the chosen channel, has several pages to fill out. You will start with the Campaign details section, where you need to fill in the following fields:
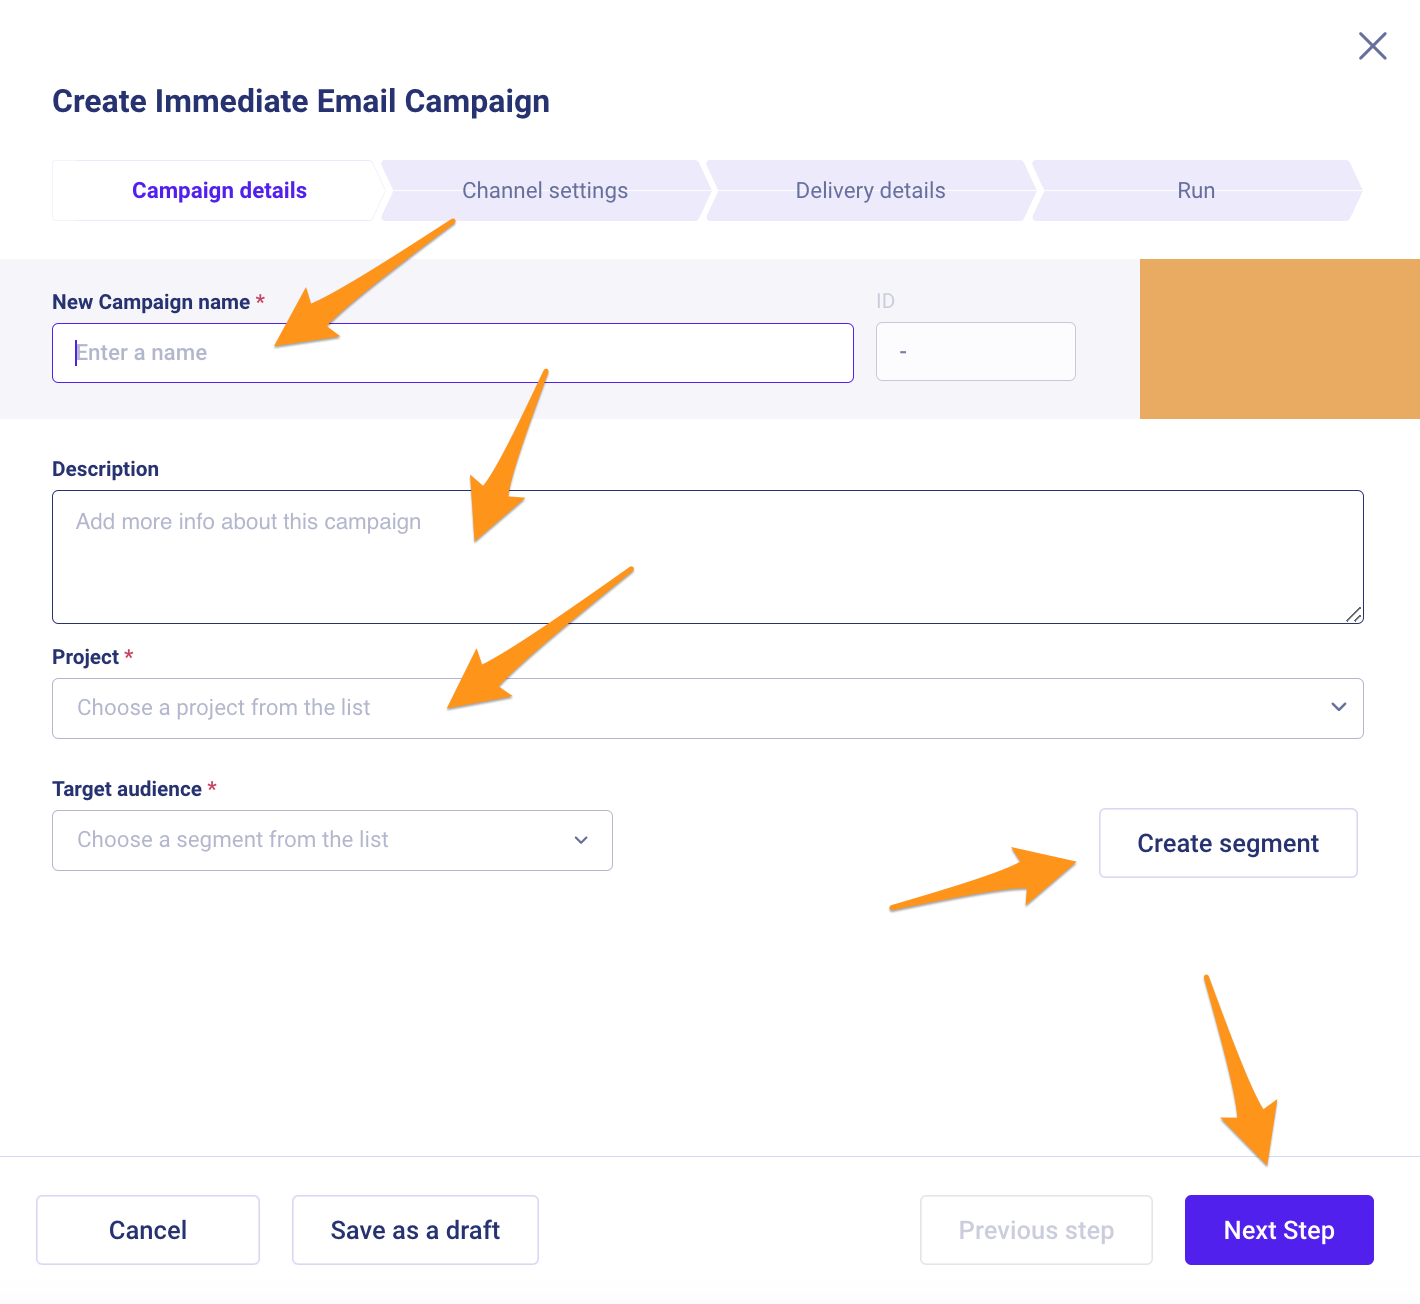
- Campaign name – enter the campaign's name;
- Description – add description for a marketing campaign;
- Project – select one or more projects among which users falling under the segment will be highlighted;
- Target audience – specify the segment you created earlier or click the Create segment button to create a new one.
The number of users in the segment is approximate and may change after the marketing campaign launch.
You do not need to fill in the ID field, as this identifier is automatically assigned after saving the marketing campaign.
Once you fill in all the necessary information, click Next Step.
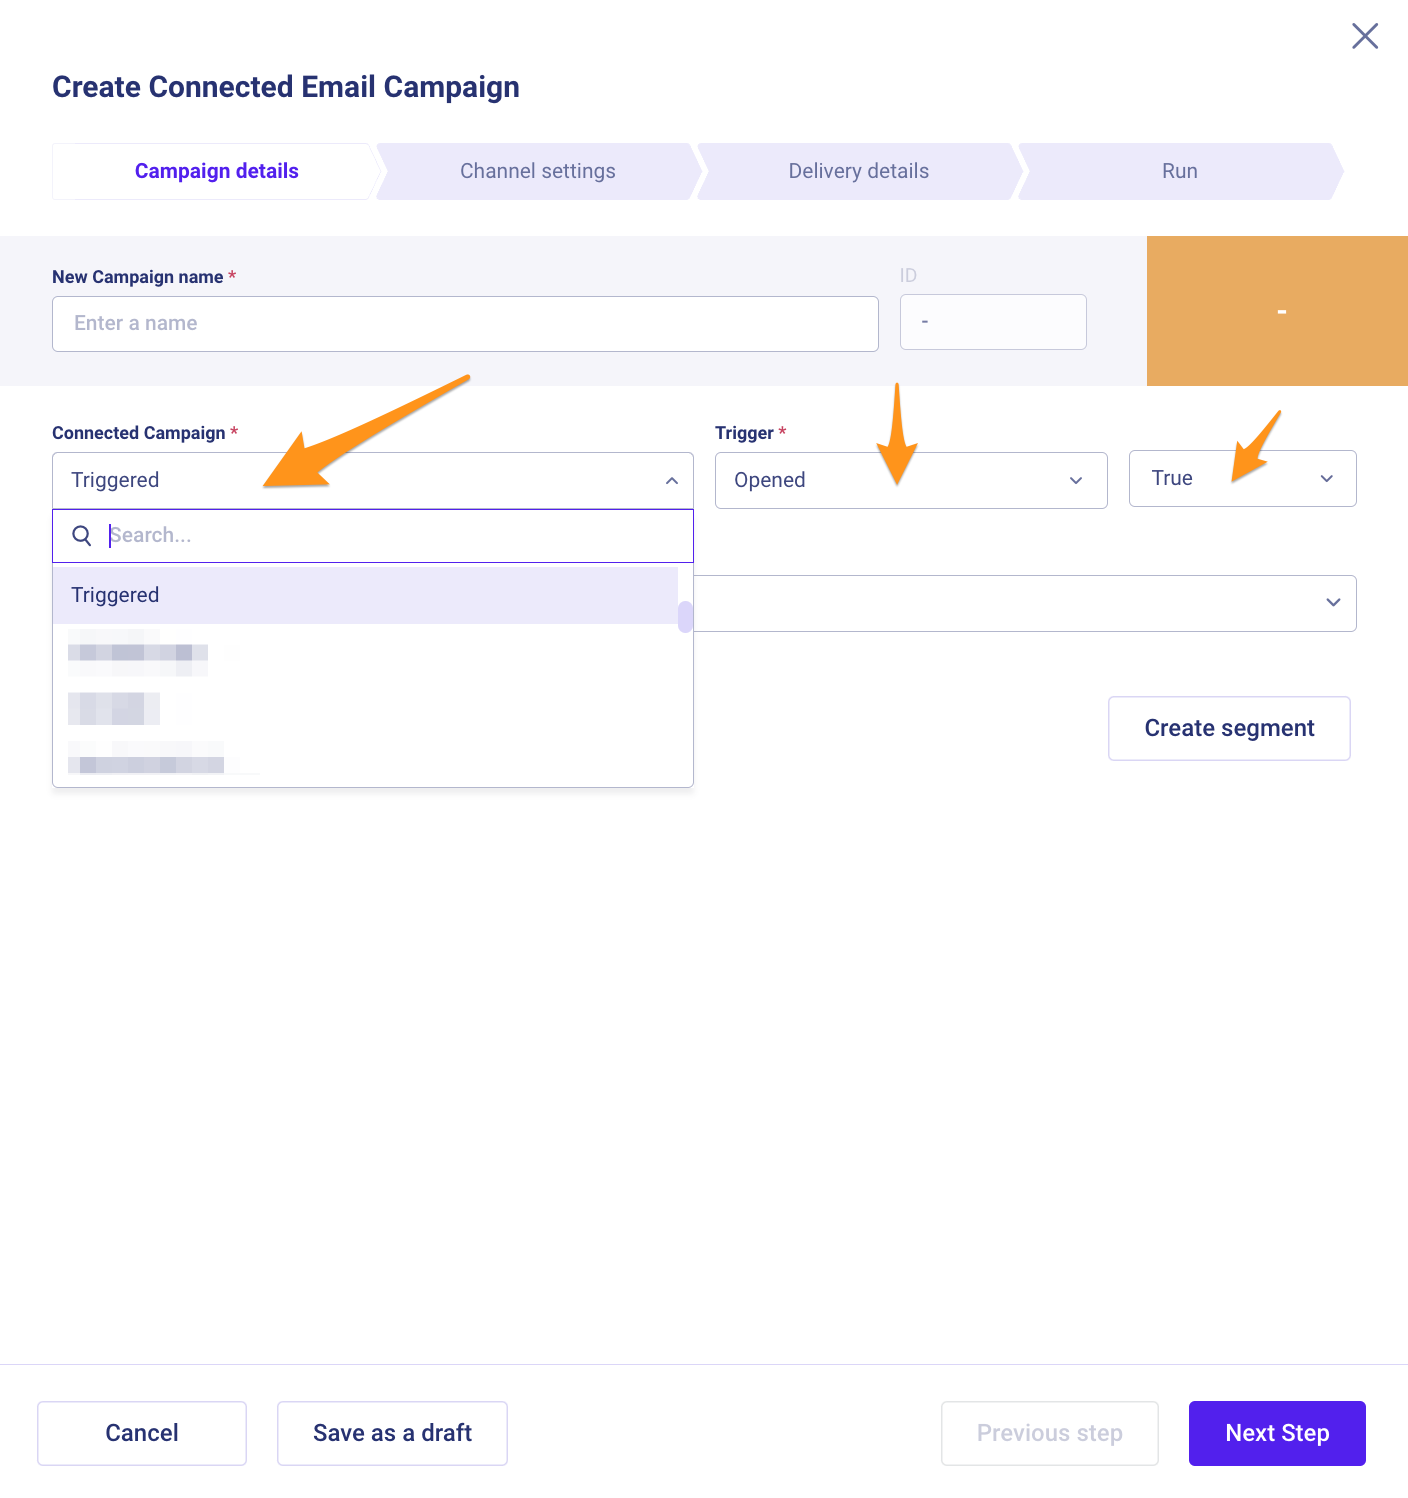
If you are creating a Connected campaign, you will also need to choose an existing campaign from the list in the Connected Campaign field, specify a trigger (Trigger), and its value ("True" / "False").
3. Channel configuration
Email
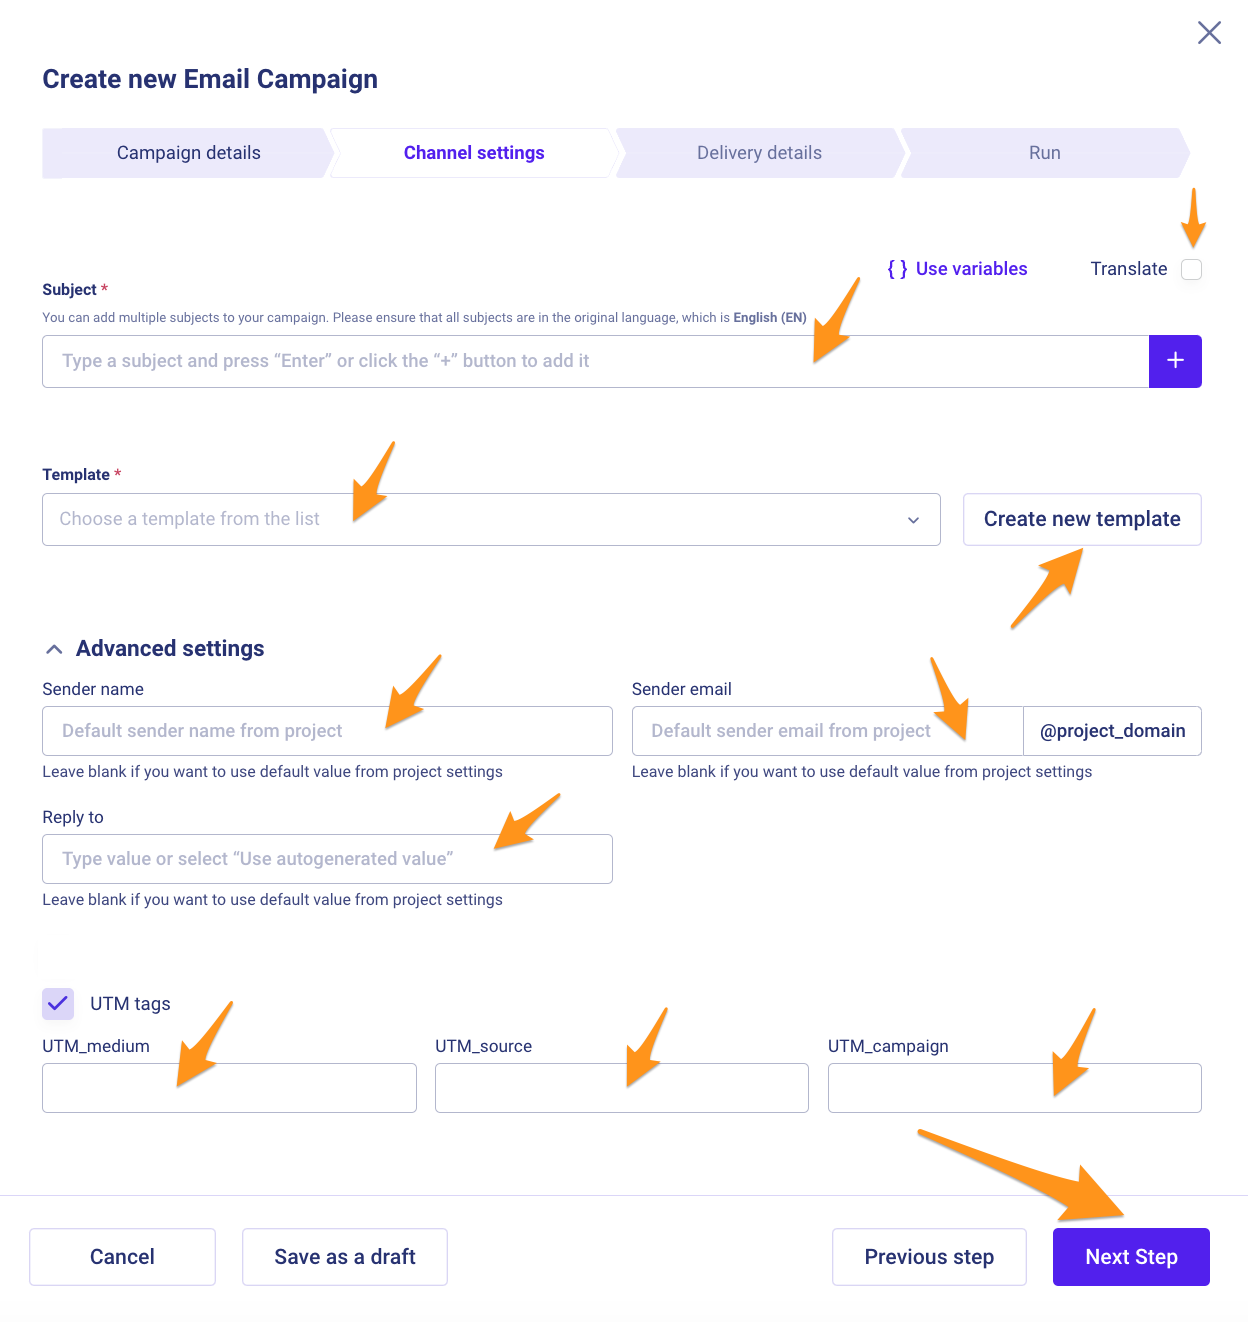
On the Channel settings page, you will find the following fields to fill in:
- Subject – enter the email's subject:
- You can add one or several subjects. The client will receive one of the suggested options with the probability indicated next to each;
- You can also use project variables and variables of the user's default and user field types in the email's subject;
- If you want to add translations to your subjects, contact your CSM. After that, the Translate checkbox will become active.
- Templates – add one or more email templates to this field. You can also create a new template by clicking on Create new template.
For more details on creating an email template, read the article How to Create a Template?.
When adding two subjects and two email templates to one email, you will get four email variations. Each one may be sent to users with a 25% probability.
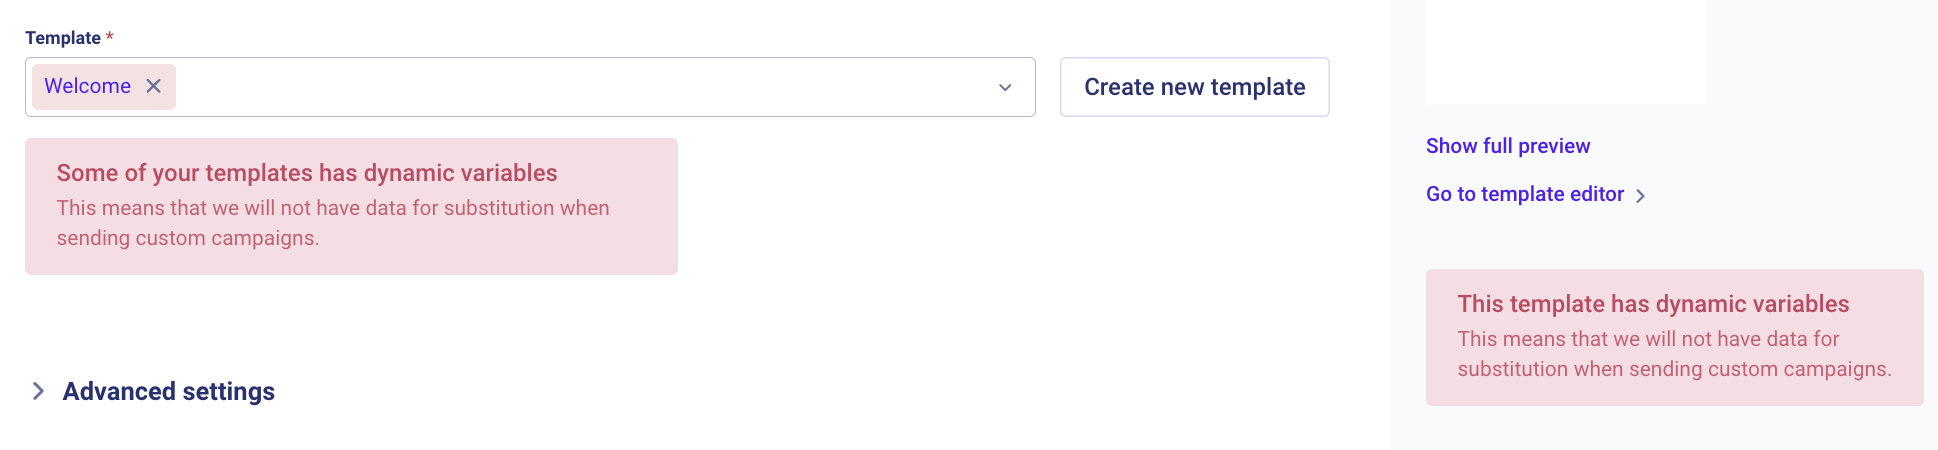
Templates that use dynamic variables are not suitable for campaigns. They are marked as "Dynamic" on the template creation and editing page. If you add such a template to a marketing campaign, you will receive a corresponding warning.
Advanced settings
In this section, you can additionally replace default values for the following fields:
- Sender name – the name that recipients will see as the sender of the email;
- Sender email – the email address from which the email is sent;
- Reply to – the email address to which replies to your email will be directed. It may or may not be the same as the sender's email.
If you leave the fields blank, default values will be used for each Project.
You can also add UTM tags to your emails on this page. These tags are used to gather information about each traffic source.
After filling in the information, click Next step.
SMS
To send an SMS message, you need to add the following:
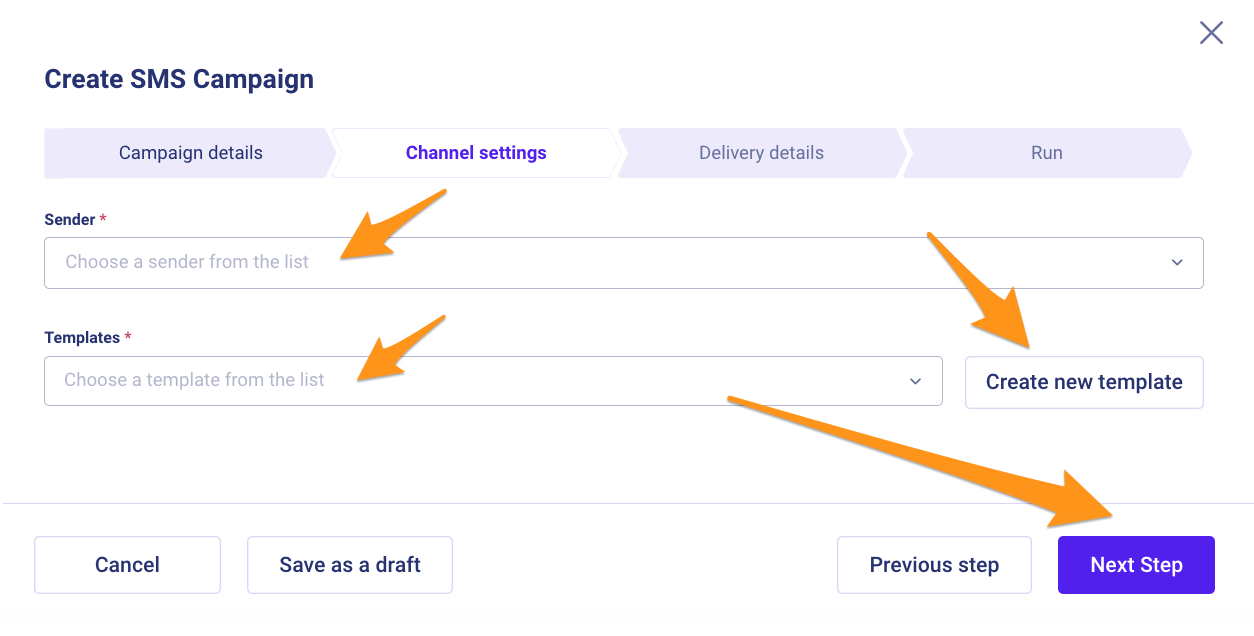
- Sender (SMS Sender) – an identifier or number that determines from which source SMS messages are sent. Please contact the Customer Success Manager to set up a sender.
For more details about the SMS Sender, refer to the "Omnichannel Integration" article.
- Templates – the SMS message template. You can also create a new template by clicking on Create new template.
After filling in the information, click Next step.
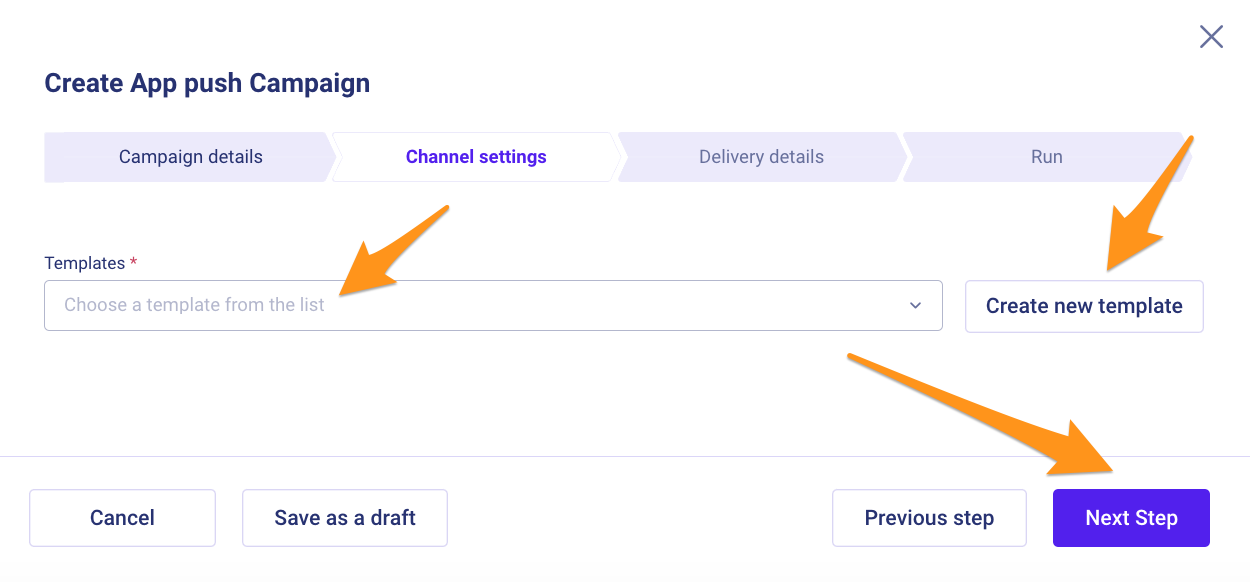
App Push
You only need to add an app push message template in the Templates field to send an app push. A new template can be created by clicking on Create new template.
When sending SMS messages and app push notifications, you can add multiple templates to one marketing campaign, and each will be delivered to the user with the same probability.
4. Configuring for sending methods
Scheduled
On the Delivery details page, you need to configure:
- Send portions – this is the portion of emails, SMS messages, or app push notifications that will be sent within 5 minutes (default is 100);
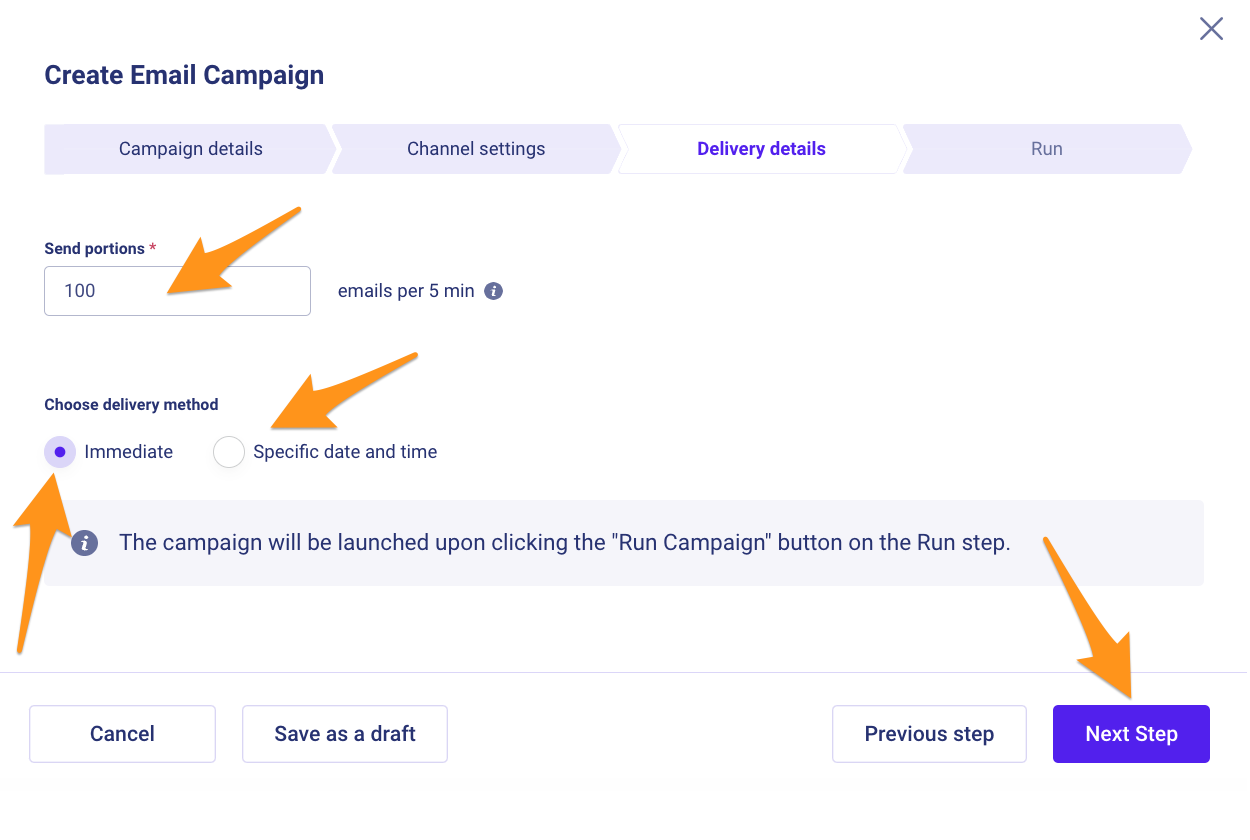
- Delivery method – this is the method of sending the marketing campaign:
- Immediate – one-time and immediate sending. The campaign will be launched immediately after clicking Run Campaign on the final page of campaign creation;
- Specific date and time – delayed sending on a selected date and time.
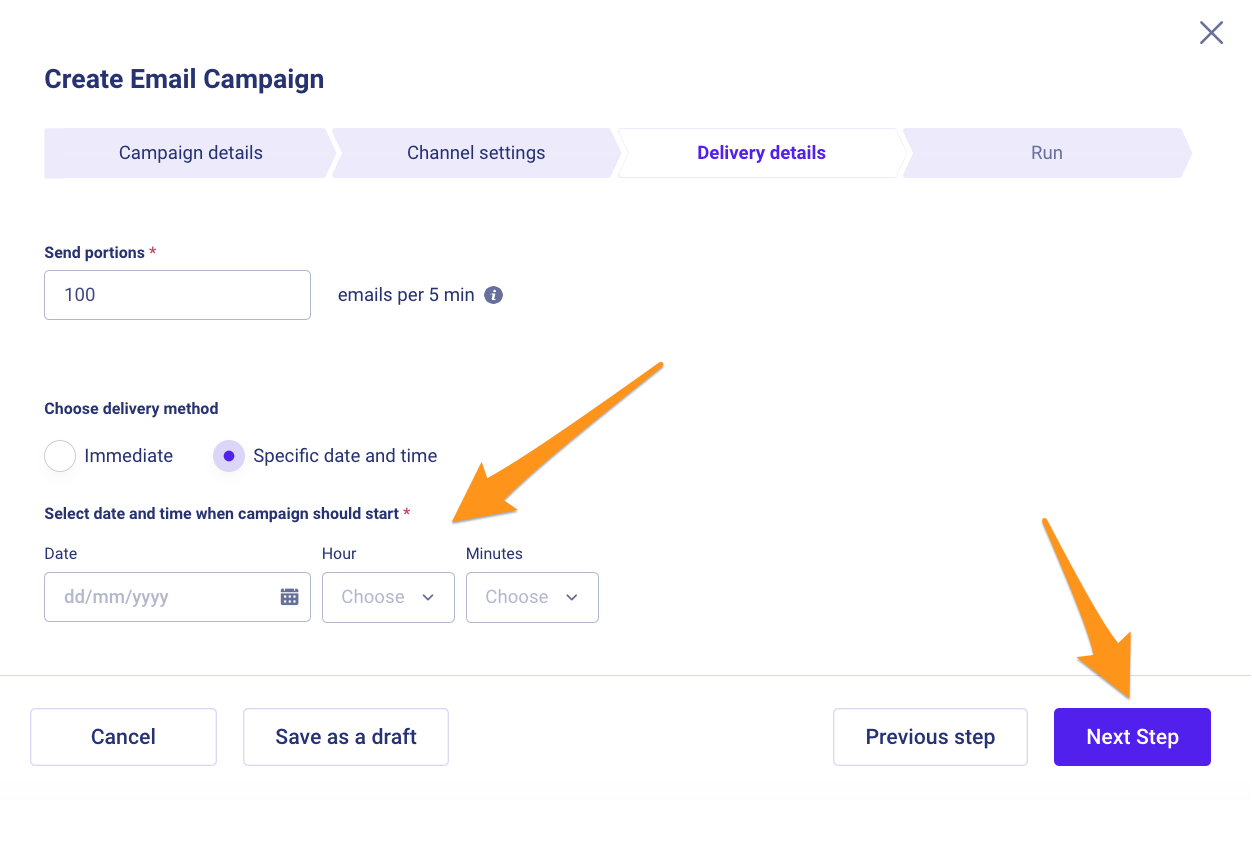
After filling in the information, click Next step.
Triggered
For triggered campaigns, you need to choose a trigger (Trigger) that will launch the marketing campaign and set the time interval between the trigger and the start of sending.

The triggers available for selection may vary depending on the chosen sending channel (Email, SMS, or App push).
After filling in the information, click Next step.
Connected
For Connected campaigns, the choice of the trigger that will launch the campaign is made on the first step of campaign creation.
At this stage, you need to configure the portion of emails, SMS messages, or app push notifications (Send portions) that will be sent within 5 minutes (default is 100) and the time interval between the trigger and the start of sending.
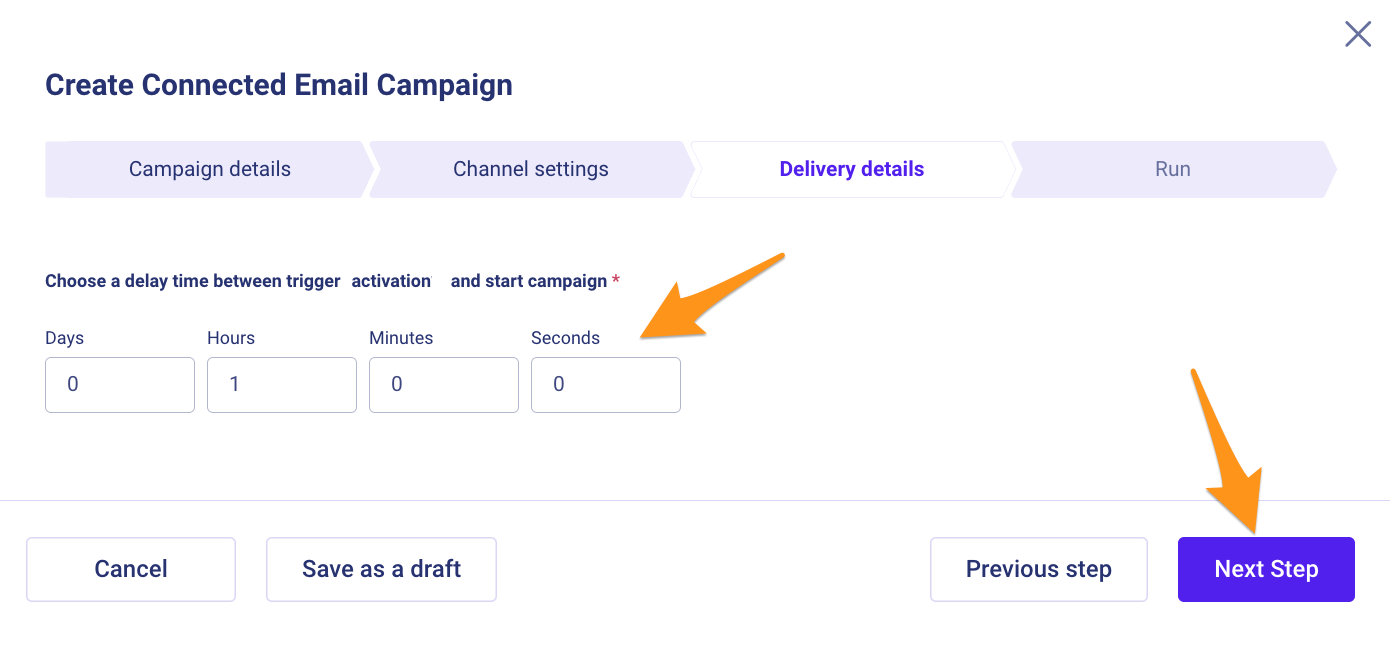
After filling in the information, click Next step.
Recurring
You can configure a recurring campaign based on sending time (Specific date and time) or a trigger (Triggered).
Sending based on time
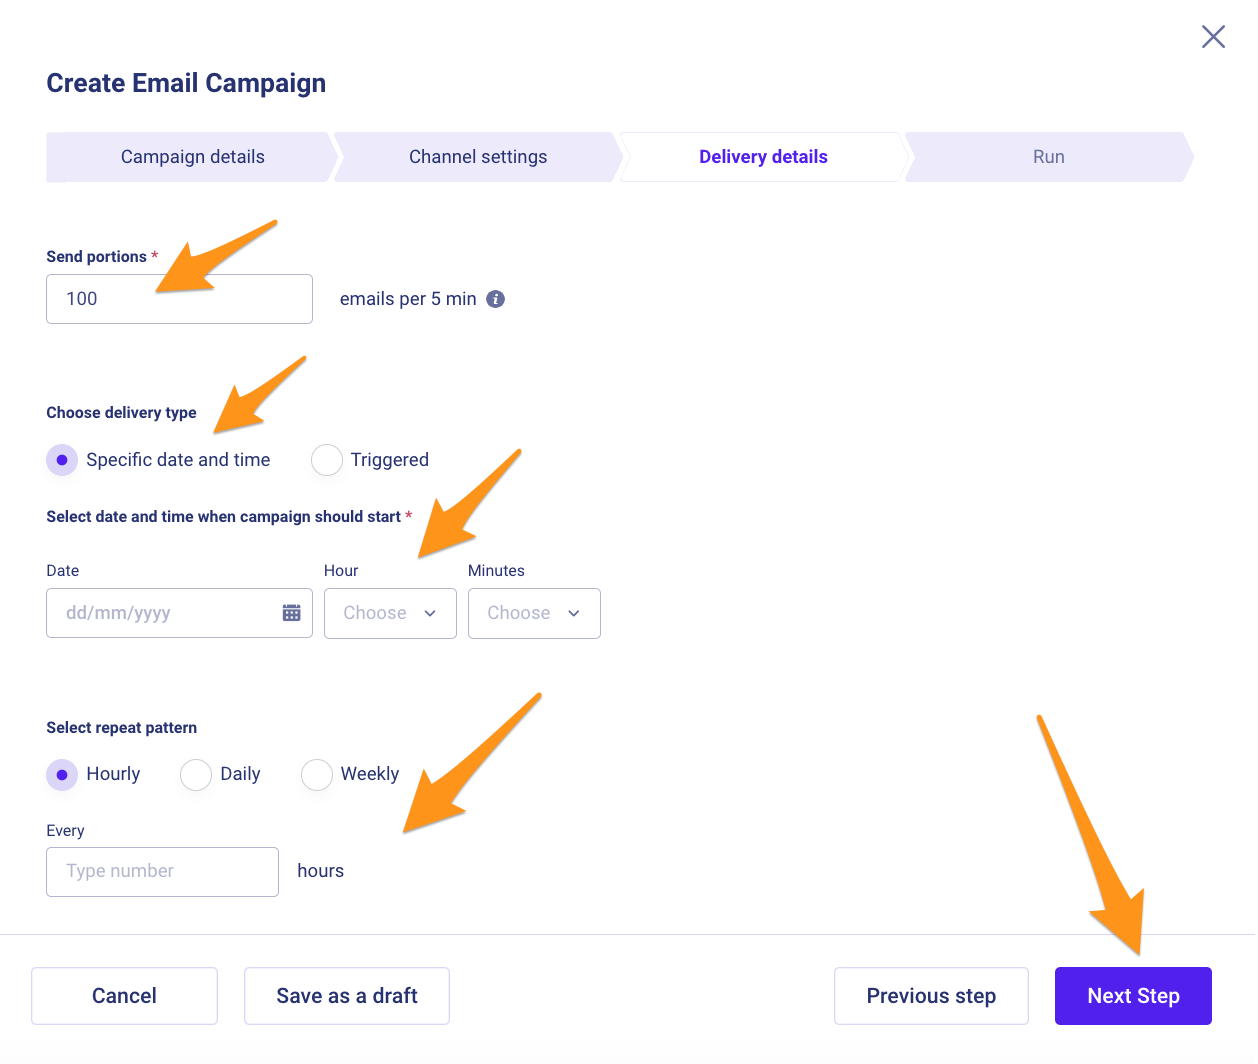
For Specific date and time sending, you need to select:
- Send portions– the portion of emails, SMS messages, or app push notifications that will be sent within 5 minutes (default is 100);
- Select date and time when the campaign should start– the date and time when the campaign should begin sending;
- Select repeat pattern– the recurrence pattern (by hours, days, or weeks).
Sending based on a trigger
For recurring triggered campaigns, you need to:
- Choose a trigger (Trigger) that will launch the marketing campaign;
- Set the time interval between the trigger and the start of sending;
- Configure the recurrence (Repeat pattern).
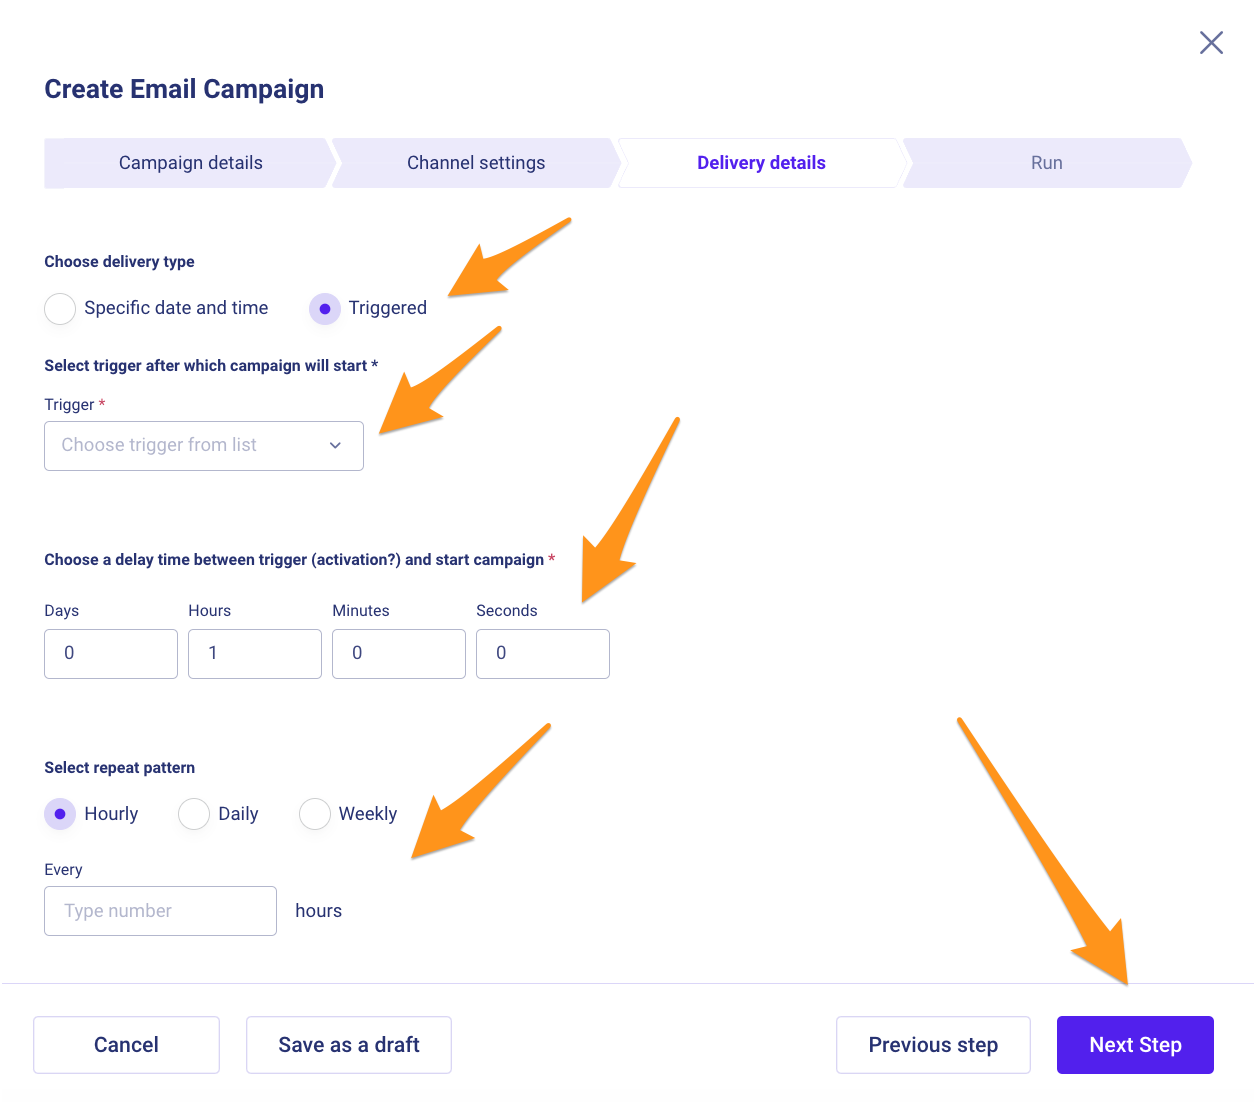
After filling in the information, click Next step.
5. Campaign overview
On the final page, you can review all the settings you have made during the previous steps. This allows you to check and make changes before saving or launching the marketing campaign.
If necessary, you can go back and make the desired adjustments by clicking on the respective header (Campaign details, Channel settings, Delivery details).
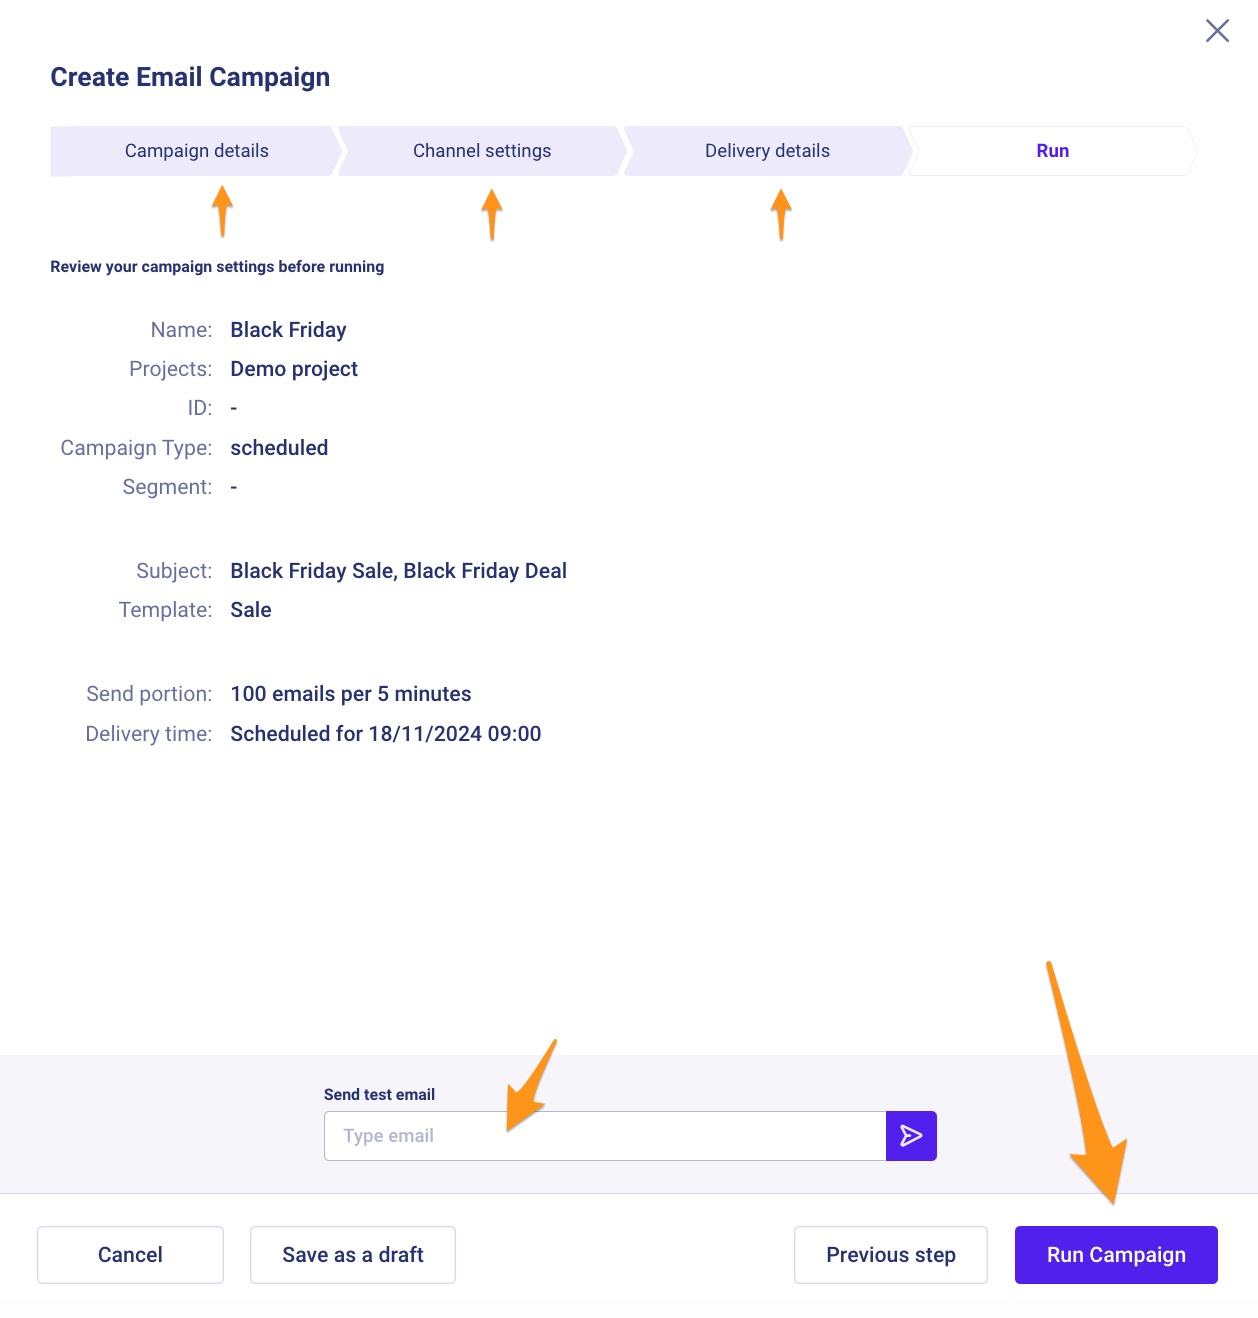
Additionally, you have the option to send a test email (Send test email) to the email address you have selected. Please note that this feature is currently available only for the "Email" channel.
Clicking on Save as draft will save the campaign with a "Draft" status. Clicking on Save and run will change its status to "Published".
For more information, refer to the article on Campaign Statuses.
After reviewing all the marketing campaign details, click Run Campaign.
Updated over 2 years ago