How to create a campaign?
Marketing campaign is a series of emails sent to a specific group of recipients. This personalized mailing system reflects users' preferences or needs and is sent based on their previous actions.
1. Creating a new campaign
Go to the Marketing campaigns → Recent campaigns page and click on +.

2. Main settings
The marketing campaign creation form consists of several pages. In the Main settings section, provide the following details:
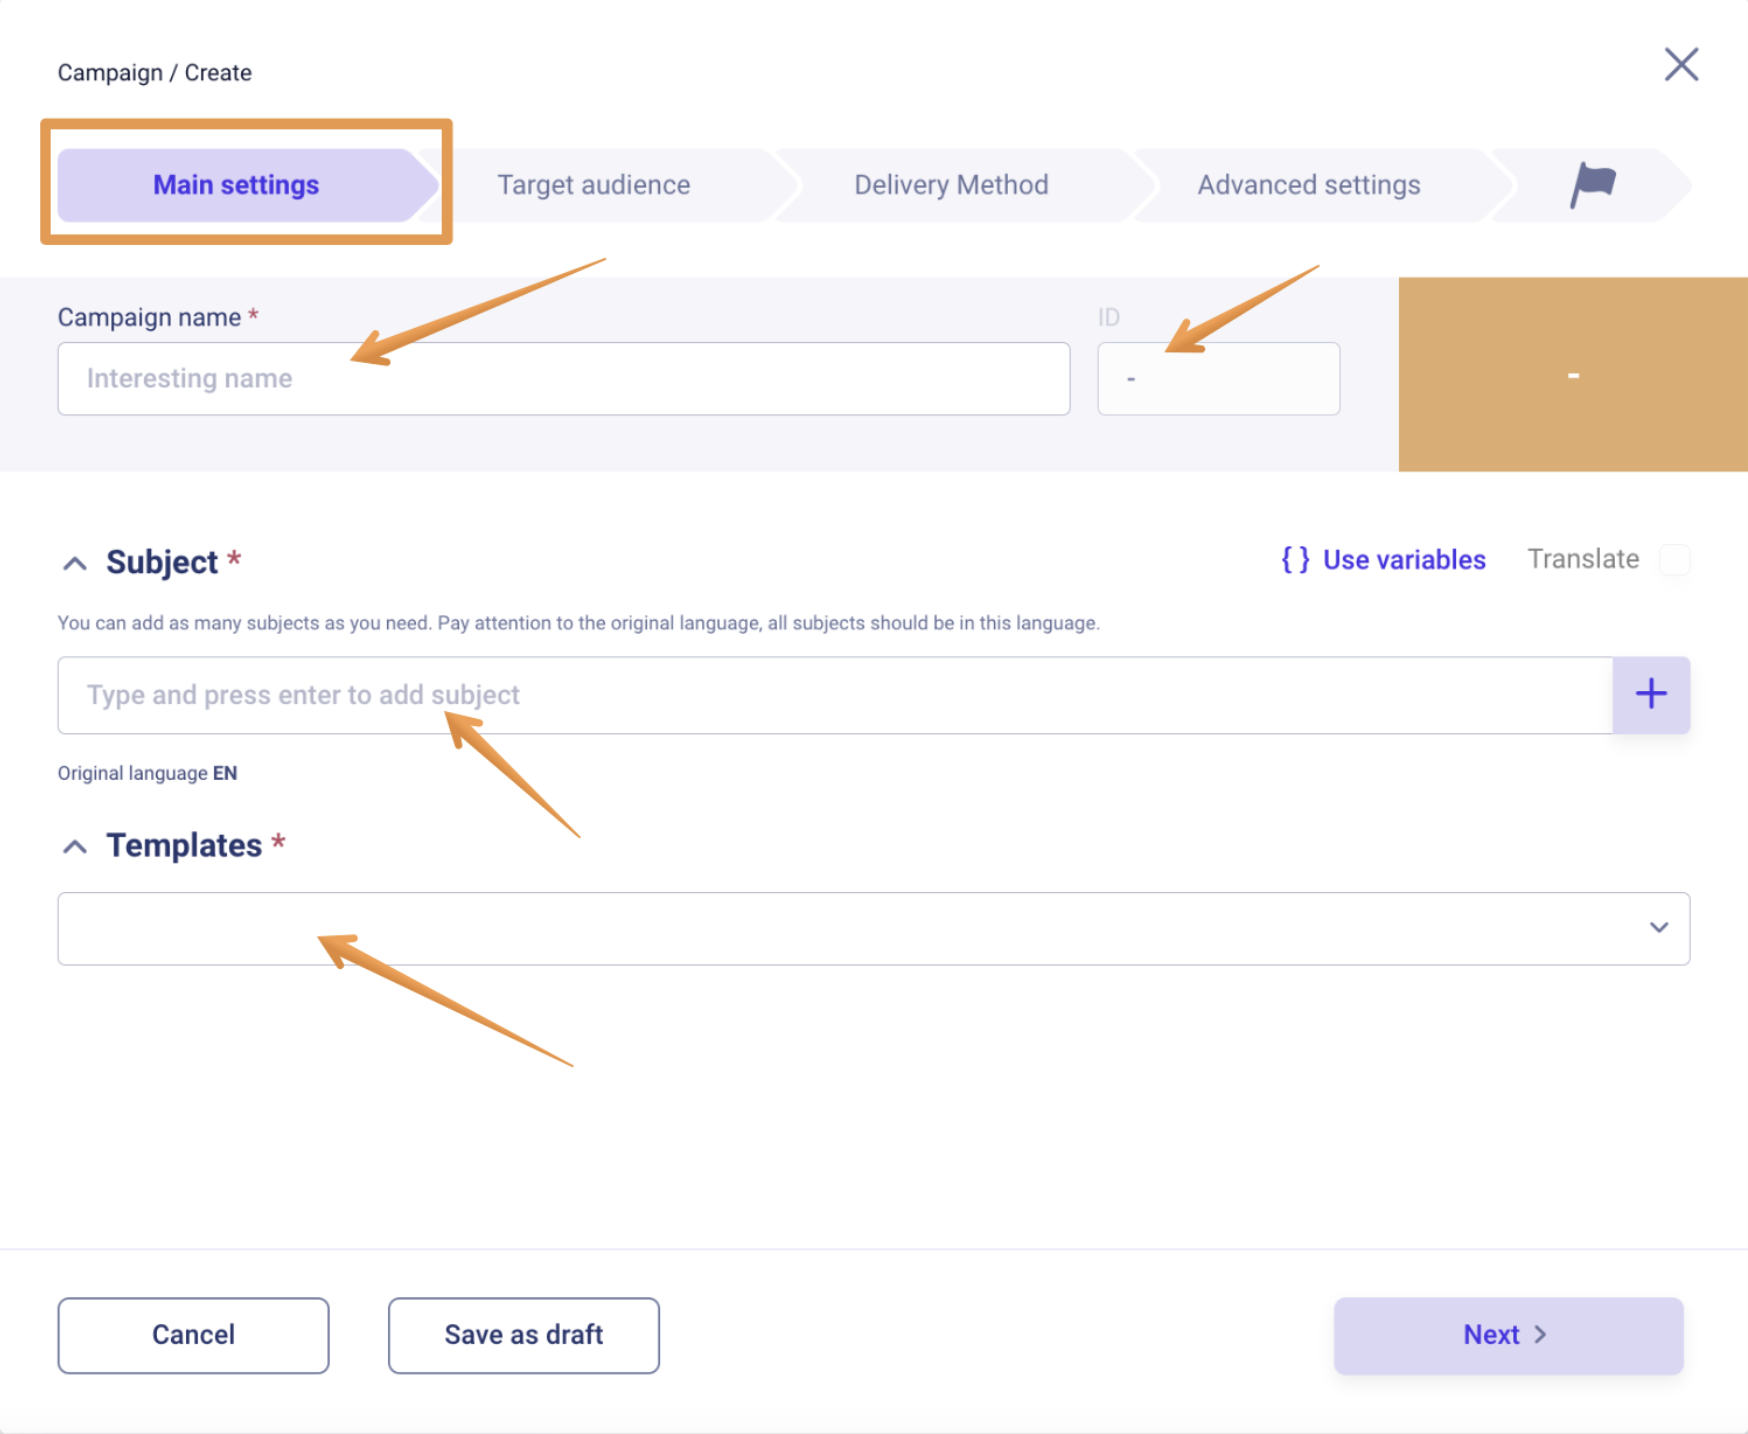
- Campaign name – enter the name of the campaign;
- ID – this field is automatically inserted after saving the campaign and does not need to be filled in;
- Subject – type one or more email subjects. Users will receive one of the subject options based on the indicated probability;
- You can also include project variables, user default, and user fields in the email subject;
- If you want to use translations for your subject, please contact your CSM to activate that option. Then, it will be possible to enable the Translate checkbox;
- Templates – add a template for this campaign. Similar to email subjects, you can add several templates for one marketing campaign.
Please refer to the article How to create a template? for more information.
With two email subjects created and two templates added, you have four options for your email. Each of them may be sent to the user with a probability of 25%.
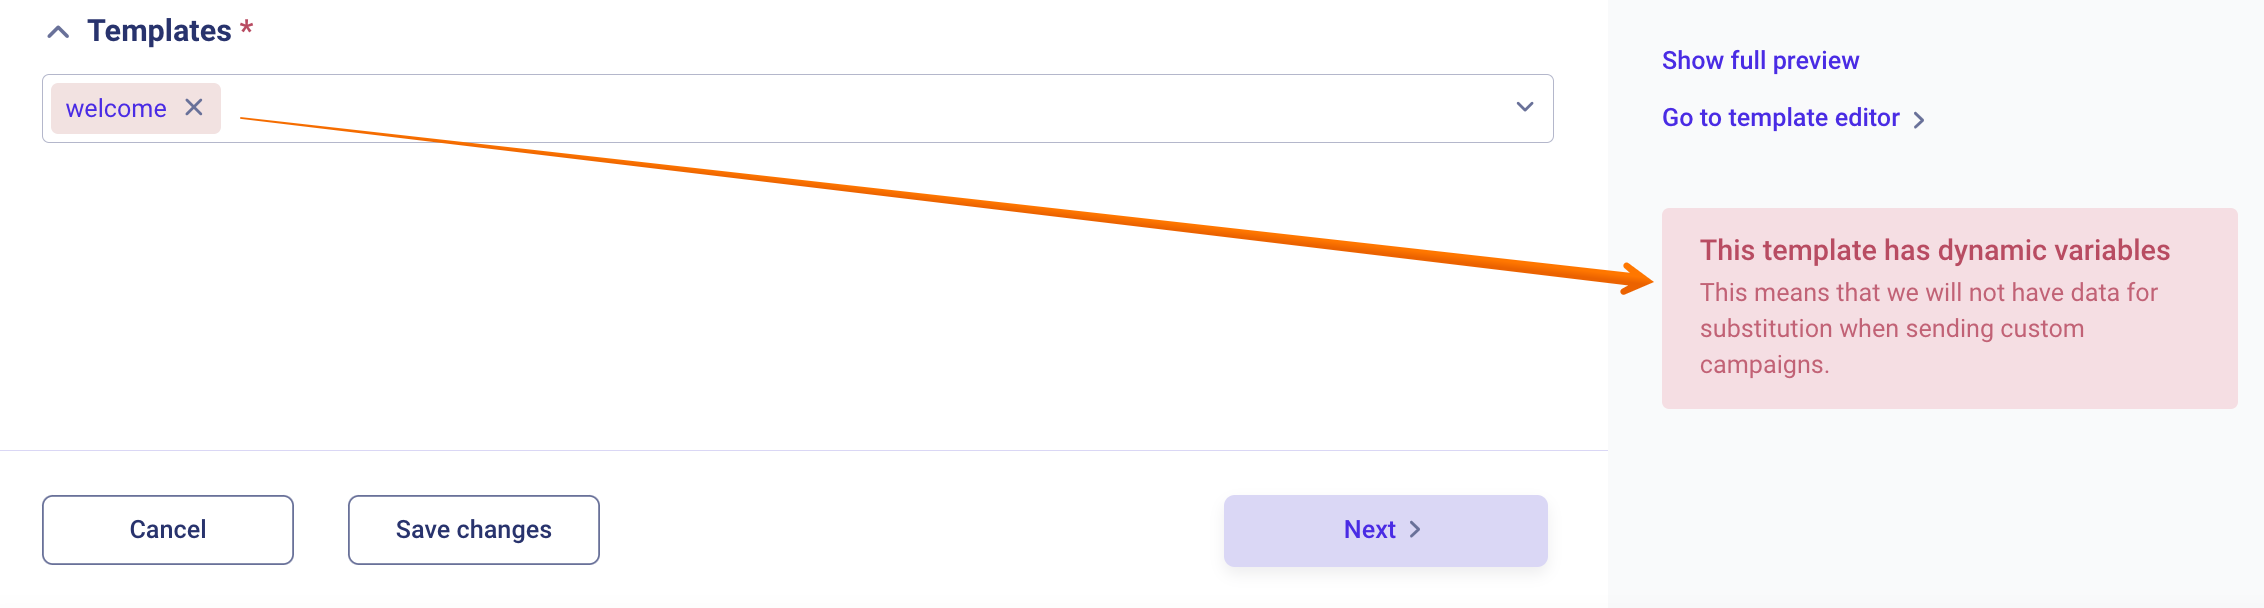
Templates with dynamic variables are not suitable for campaigns.
They are marked as "Dynamic" on the Template creation and editing page.
When adding such a template to the campaign, it will be highlighted in red and display a warning message, when clicking on it.
Click the Next button after filling in the required information.
3. Target audience
On the second page, Target audience, choose the Project(s) and segment for your marketing campaign:

- Project – pick one or several projects, among which users who fall under the segment will be selected.
- Target audience – choose a segment that was created earlier, or click on the Create segment button to create a new one.
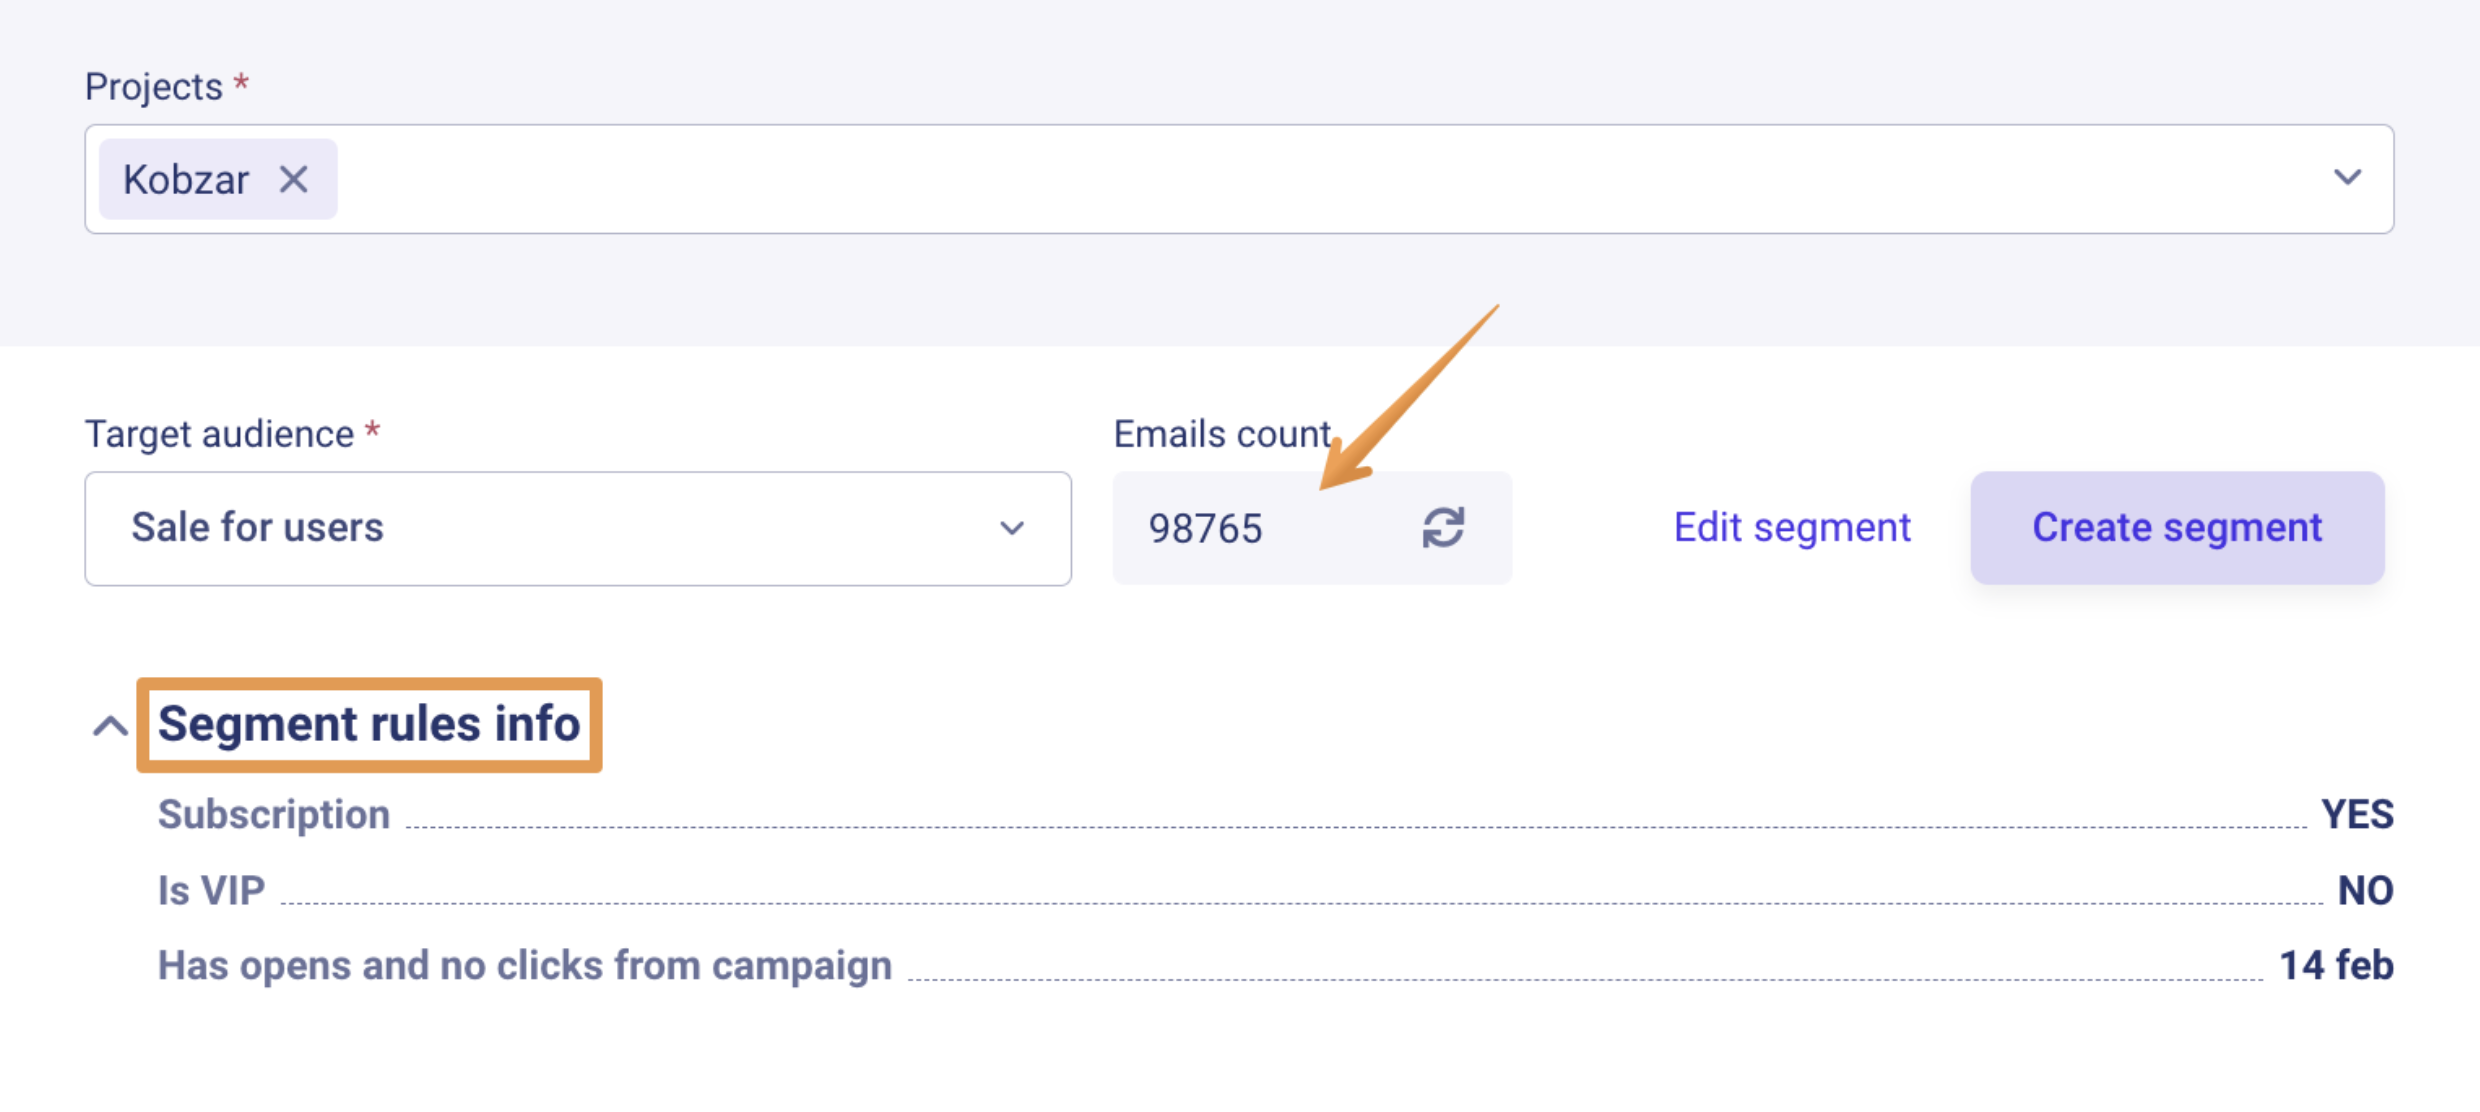
After adding a segment, you will see the rules by which users will be added to the segment and the number of users from the selected Project that fall under each rule.
Click Next to proceed.
4. Delivery method
On the third page, Delivery method, configure the delivery settings for your marketing campaign.
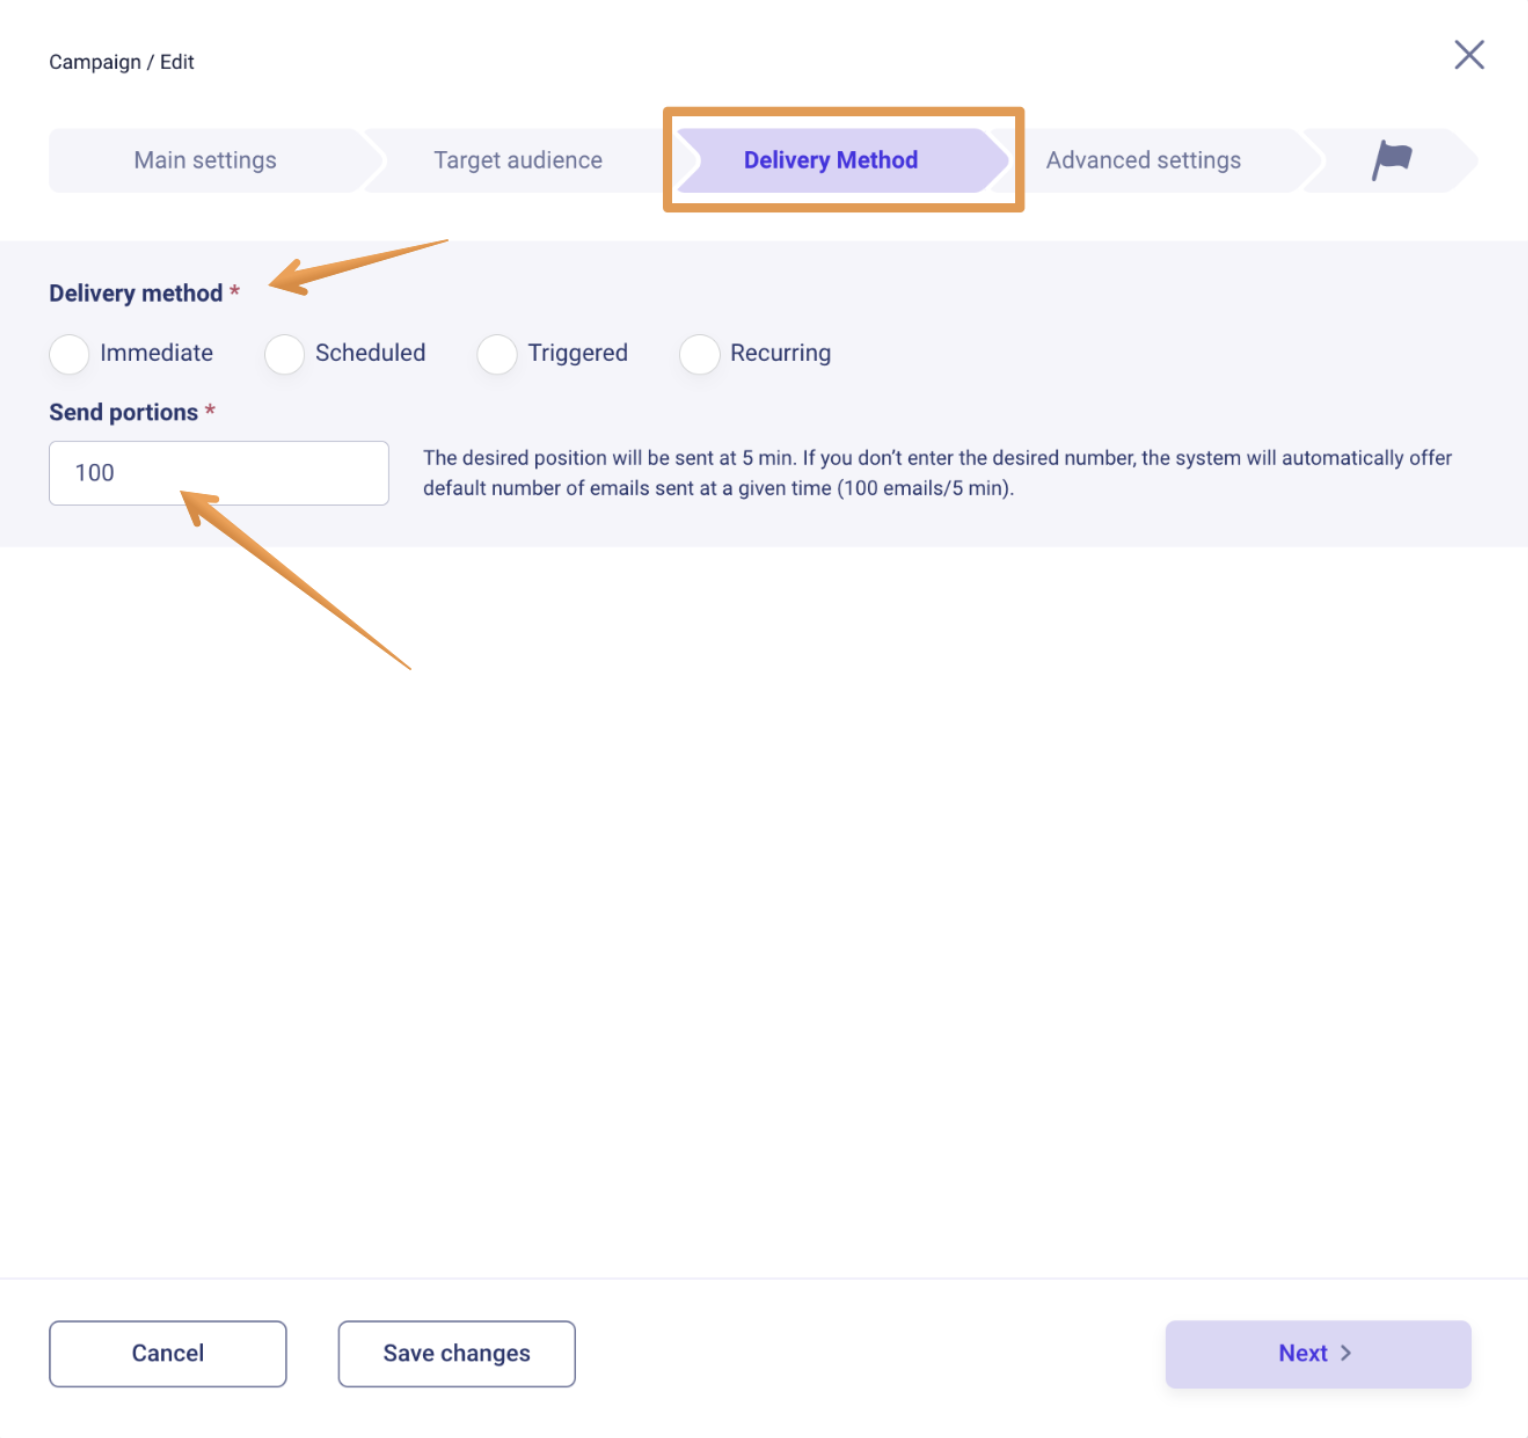
- Delivery method is the type of marketing campaign or rather, the method of sending it. It has four different options:
- Immediate – one-time sending. The campaign will start sending as soon as you click Save and Run on the last page of the campaign creation;
- Scheduled – delayed sending. The campaign will start on the day and time you set;
- Triggered – sending by triggers, such as registration, payment, online status of the user, and so on.
- Recurring – a cyclic ongoing sending method. This campaign will send such emails daily, weekly, etc. Recurring sending can also be Scheduled or Triggered.
- Send portions is a portion of emails that will be sent in 5 minutes (by default, 100).
Be careful when entering a portion of emails, as sending too many may poorly affect the mail servers' reputation.
Click Next.
5. Advanced settings
In the Advanced settings section, you can customize:
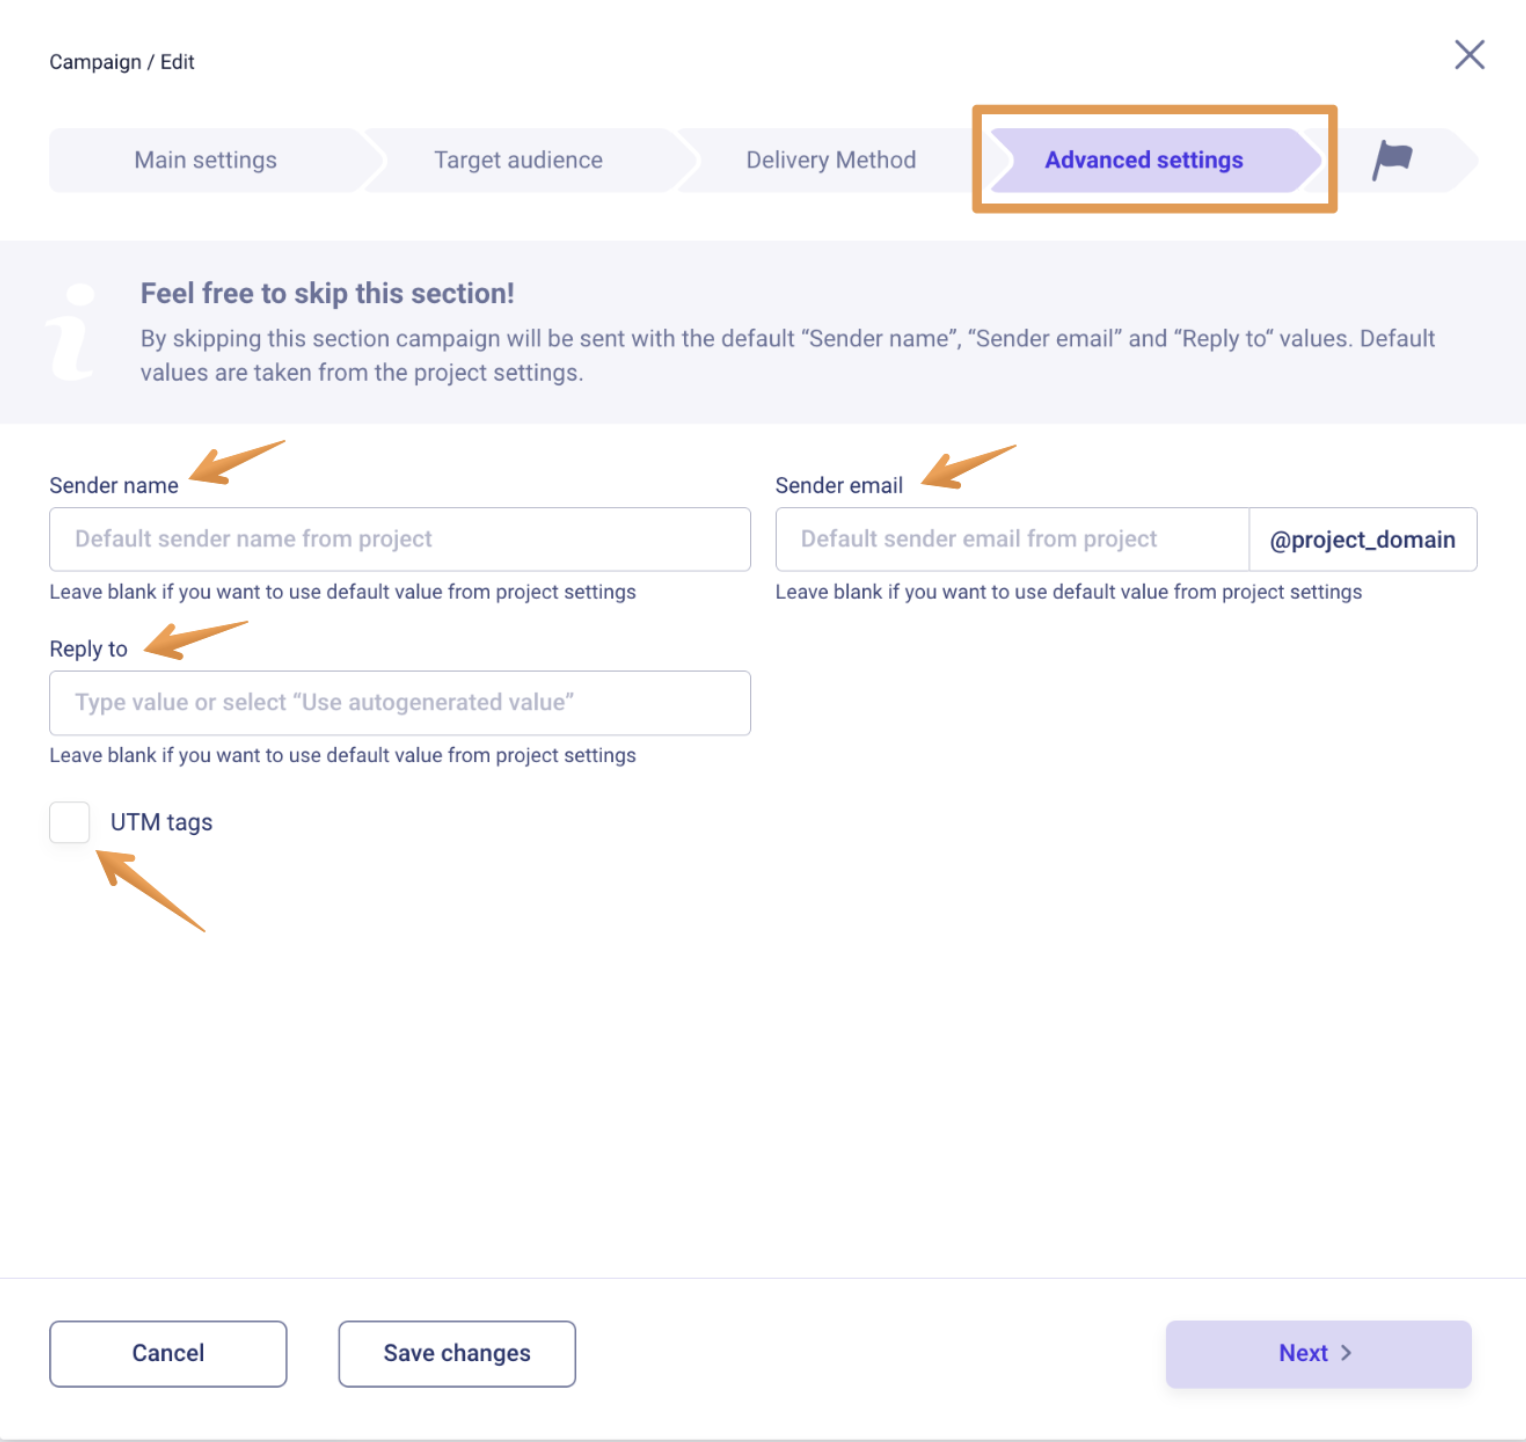
- Sender name – the name that recipients will see as the sender of the email;
- Sender email – the email address from which the email is sent;
- Reply to – the email address to which replies to your email will be directed. It may or may not be the same as the sender's email.
If you leave these fields blank, the default values for each Project will be used.
You can also add UTM tags to your emails here.
Click Next to proceed.
6. Viewing your campaign
On the final page, review the fields you filled in and send a test email to the specified email address to preview the marketing campaign.
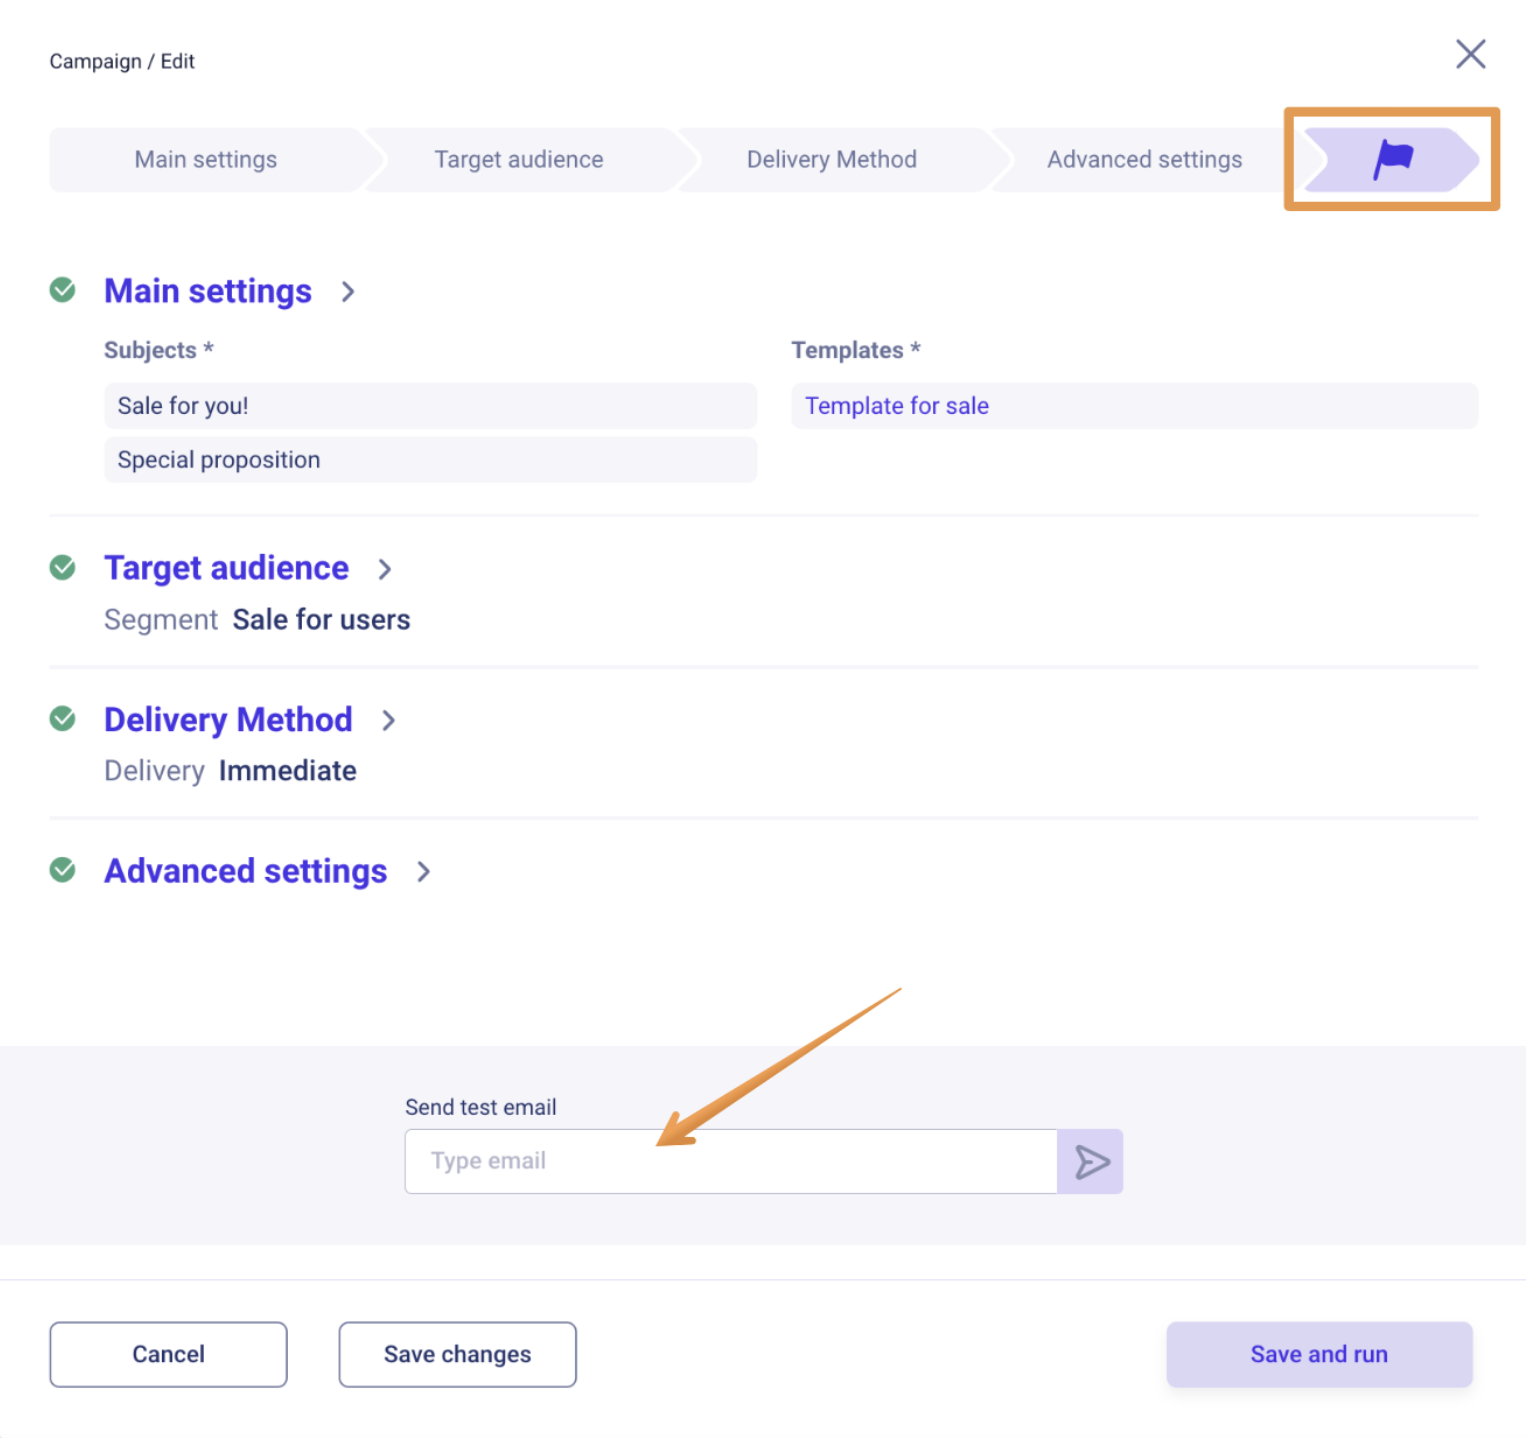
7. Saving and running your campaign
- Click Save changes to save the marketing campaign in the "Draft" status.
- Click Save and run to publish the campaign.
Updated over 2 years ago